Sessions are one of the primary methods by which you can convey useful content to your event attendees. There are multiple different types of sessions you can add to your event, including live or on demand, workshops, keynotes, and breakout sessions.
Topics in this article include:
Navigating the Sessions Landing Page
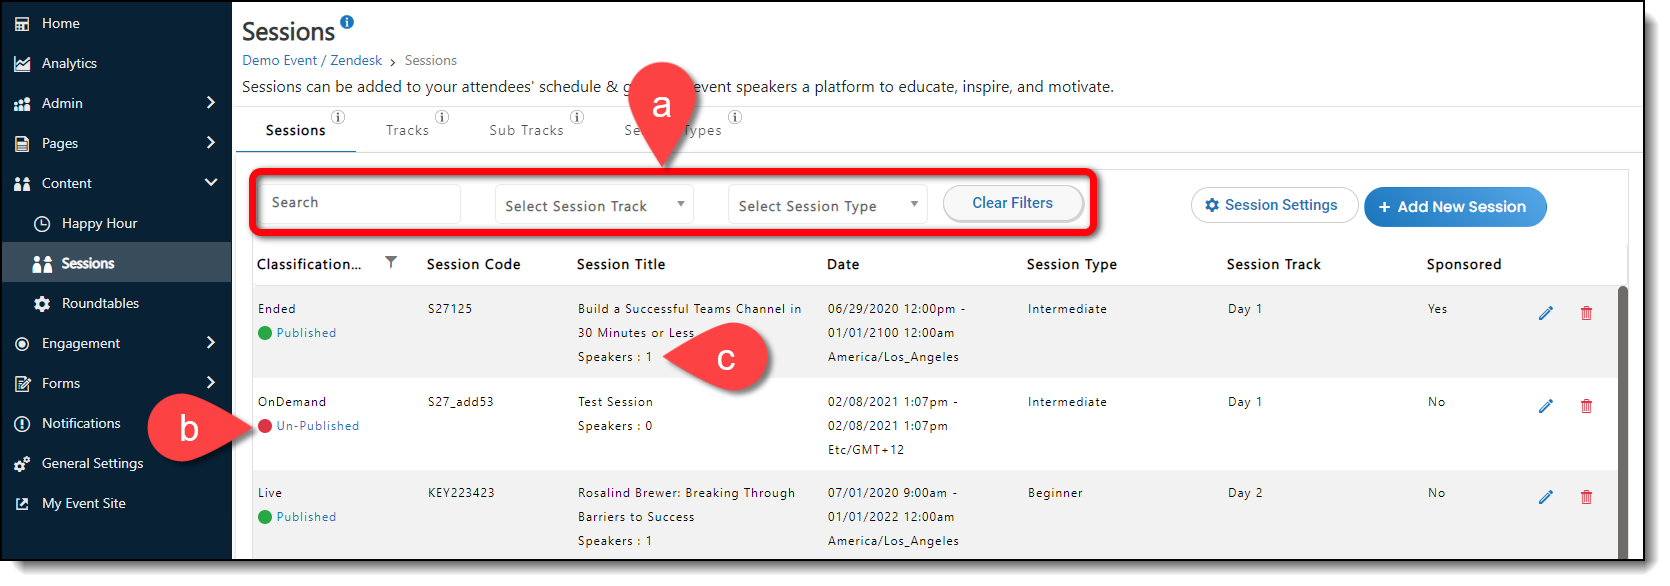
To access the Sessions landing page, log in to the Events Builder and select Content > Sessions from the left navigation menu. This page gives you an at-a-glance view of all your event sessions. On this page, you can:
a. Search and filter the session list
b. View and change session publication status
c. See how many speakers have been assigned to the session
Creating a Session
To add a session to your event, click Add New Session at the top of the page.

Completing Session Information
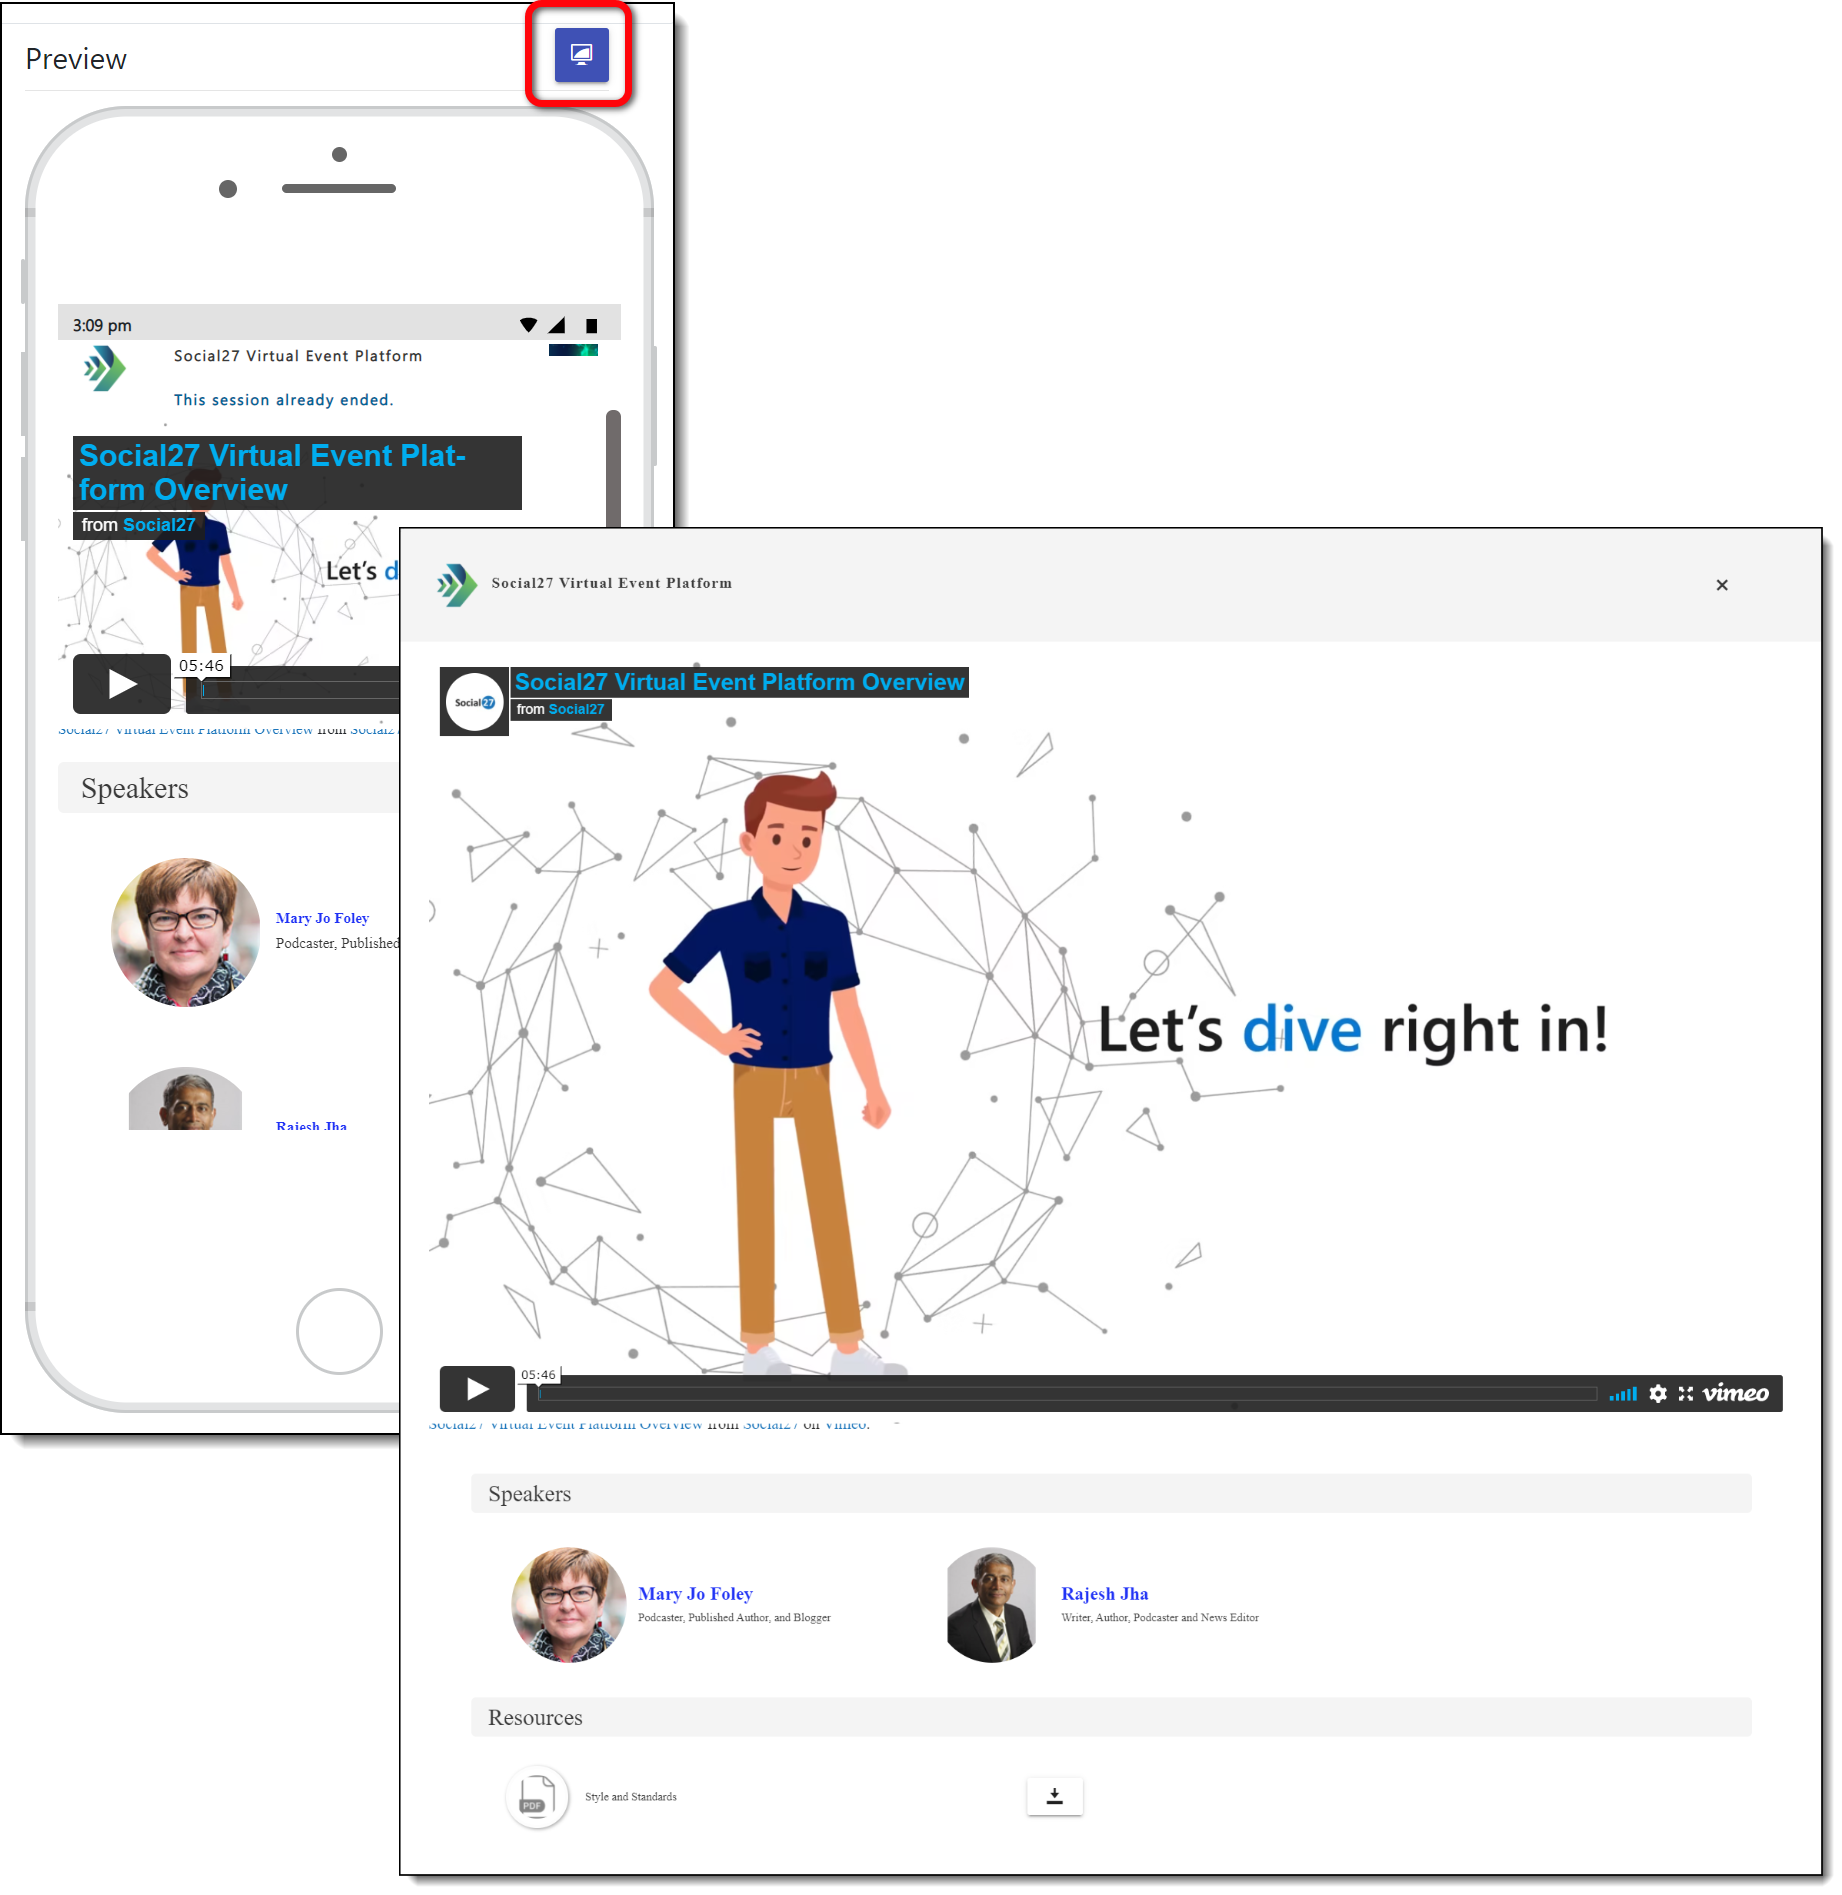
The Preview pane on the right side of the screen will update as you add session information, giving you a real-time view of how your session will appear to attendees. The default view is mobile, but clicking the desktop icon will reveal a pop out window that shows what the session will look like on a larger screen size.
Complete all necessary information on each of the six tabs to create your session.

|
|
The settings and features available on each session creation tab are as follows:
Details
- Session Thumbnail: This will be shown on the Sessions page if you have enabled the Sessions thumbnails feature.
- Session Title: Session titles can have a maximum of 500 characters.
-
Session Code: A session code is auto-generated but can be updated to any unique string of characters. We recommend the following standard format:
- Breakout sessions: BK001, BK002, etc.
- Keynote sessions: KEY001, KEY002, etc.
- Live sessions: SES001, SES002, etc.
- Recorded sessions: RSES001, RSES002, etc.
-
Classification: Sessions can be live, on demand (pre-recorded), or breakout.
- If you select Breakout as your session type, you will see a new Breakout Type field from which you can select session, sponsor, or external link.
- Session Time Zone: It’s recommended to use the same time zone as your event time zone (which can be set in General Settings).
- Session Start/End Date and Time: Attendees cannot join a session until its scheduled time/date
- Session Track: Use session tracks to organize your sessions and how they appear on the event site’s Sessions
- Session Sub Track: This field will only appear if the selected session track has sub tracks associated with it.
- Session Type: These are topic areas into which sessions can be categorized (e.g., Talent Strategy & Management, Career Development, etc.).
- Overview: A description of the session
- Area of Interest: Including these will help like-minded attendees find the session.
- Restrict Session: This setting allows you to restrict the session’s visibility to certain user types.
After you have added all session details, click Save. This will allow you to access the remaining five tabs.
Media
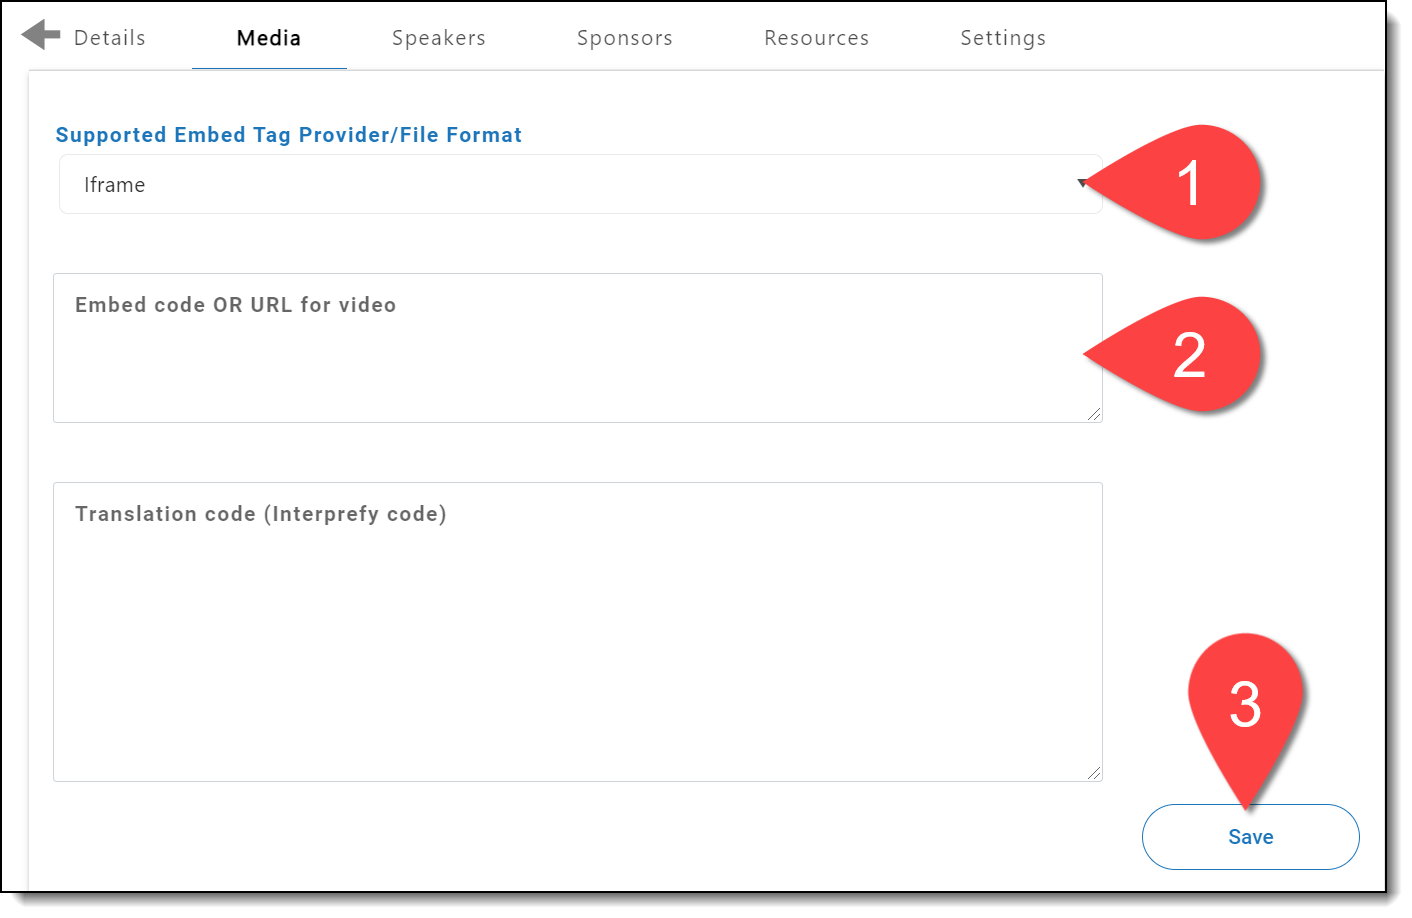
Use the Media tab to enter your session content. First select the media type from the dropdown then enter the file/code as appropriate. The media types available to you include:
- Azure Media Player
- External Link
- Document
- Internal Link
- Image
- Iframe
- Social27
- TheoPlayer
- Teams
- YouTube
- Zoom
Don’t forget to click Save after you add your session media.
Speakers
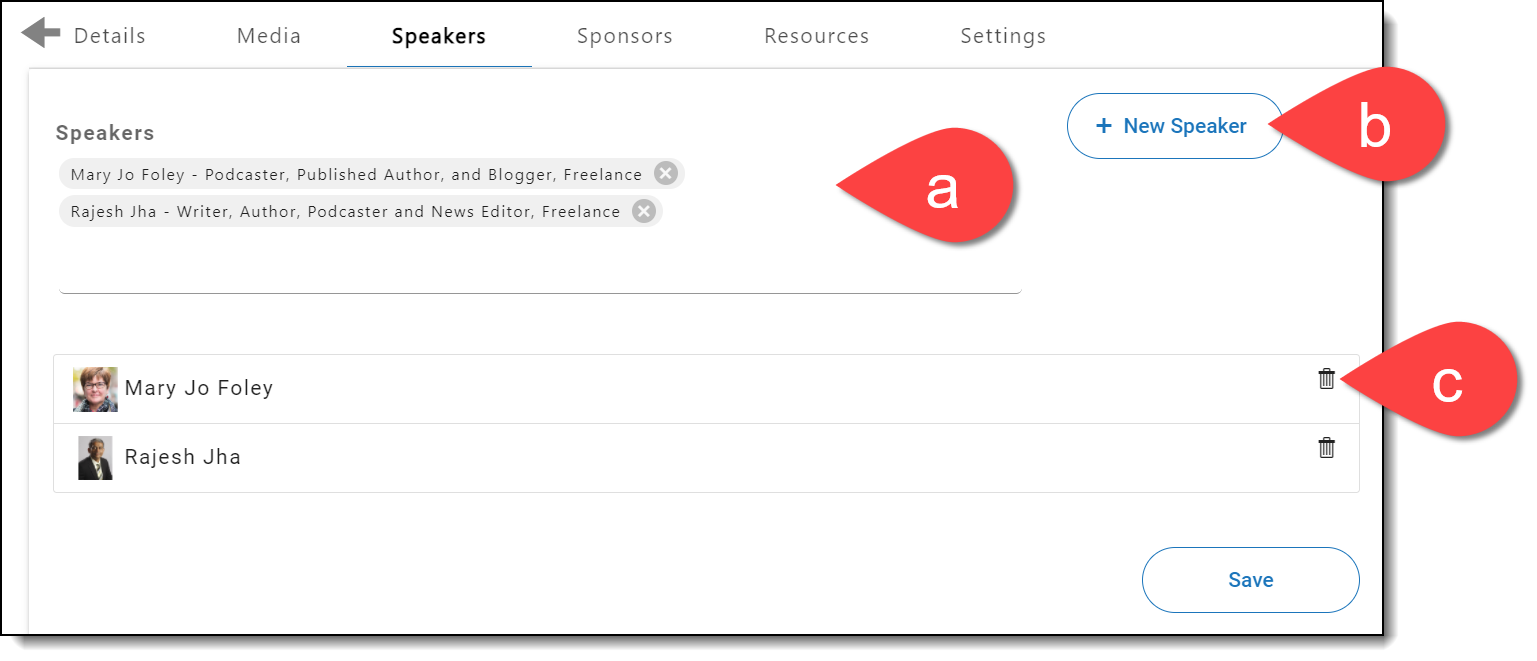
On the Speakers tab, click the Speakers field to reveal a list of your speakers (a). If your speaker doesn’t appear in the list, click New Speaker to create a new user (b). Click the trash icon to remove any speakers from the session (c). (This will not delete the user, just remove them from the session.)
Don’t forget to click Save after you add your speaker(s).
|
|
Sponsors
Use this tab to set whether or not the session is sponsored. If it is sponsored, you can select a sponsor from the dropdown list and add their banner. The banner will appear on the session theater page below the session player. When users click on the banner, they will be taken to that sponsor’s microsite.

Resources
Add resources (downloadable materials) to a session, by clicking Add New Resource button on the Resources tab. You can add a resource to an existing category or create a new one. Insert a link to the file or upload the file itself, add a description, and click Save.
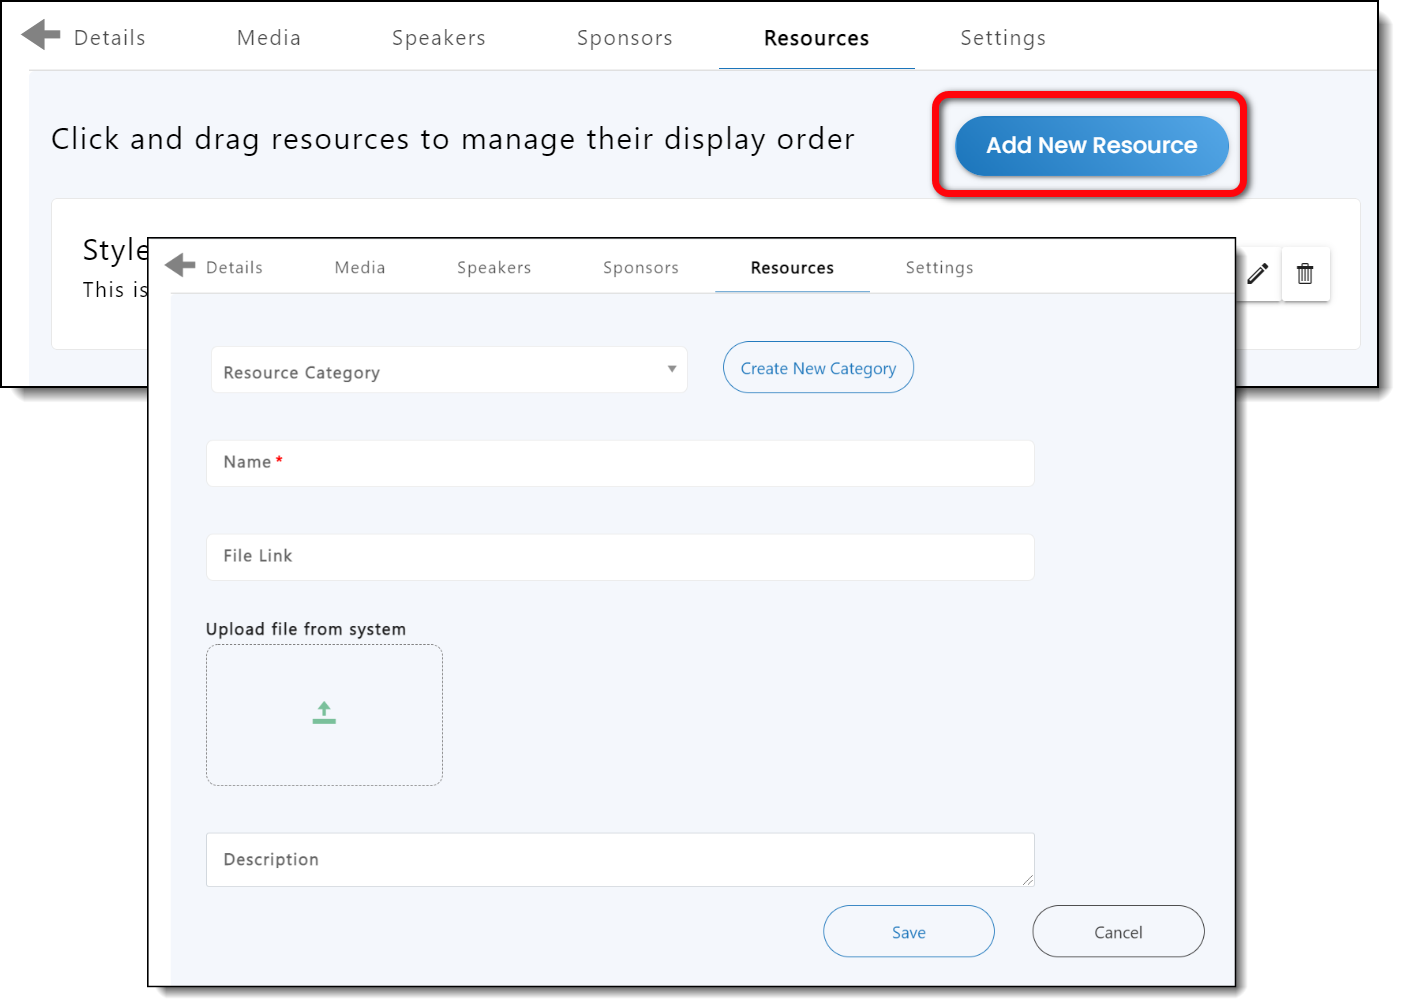
Use the edit and trash can icons to remove resources from the session.

Settings
Use the toggles on this tab to determine settings for your session.
The CEU Credits field determines whether CEU credits are awarded to users for attending the session, as well as their amount.
General Settings allow you to publish (add the session to the event’s Agenda page) or feature sessions (add the session to the event’s Home page). You can also use the Enable Chat / Moderated Q&A toggles to determine what appears on the session’s theater page.
The Session Meeting Settings toggles allow you to set if Roundtables and Boardrooms can be added to the session. If you enable these settings, a Roundtables section will appear the bottom of the session’s theater page. Session speakers will be able to add Roundtables and Boardrooms to the session if they want to continue the conversation about the session’s topic with a smaller group of attendees.
Use the Select Meeting Providers toggles to set which meeting providers can be used.
The Polls and Quiz section will show which polls and quizzes have been added to your session. Click the gear icon to create polls and quizzes for your session. Check out this article for a walkthrough of how to use these features.
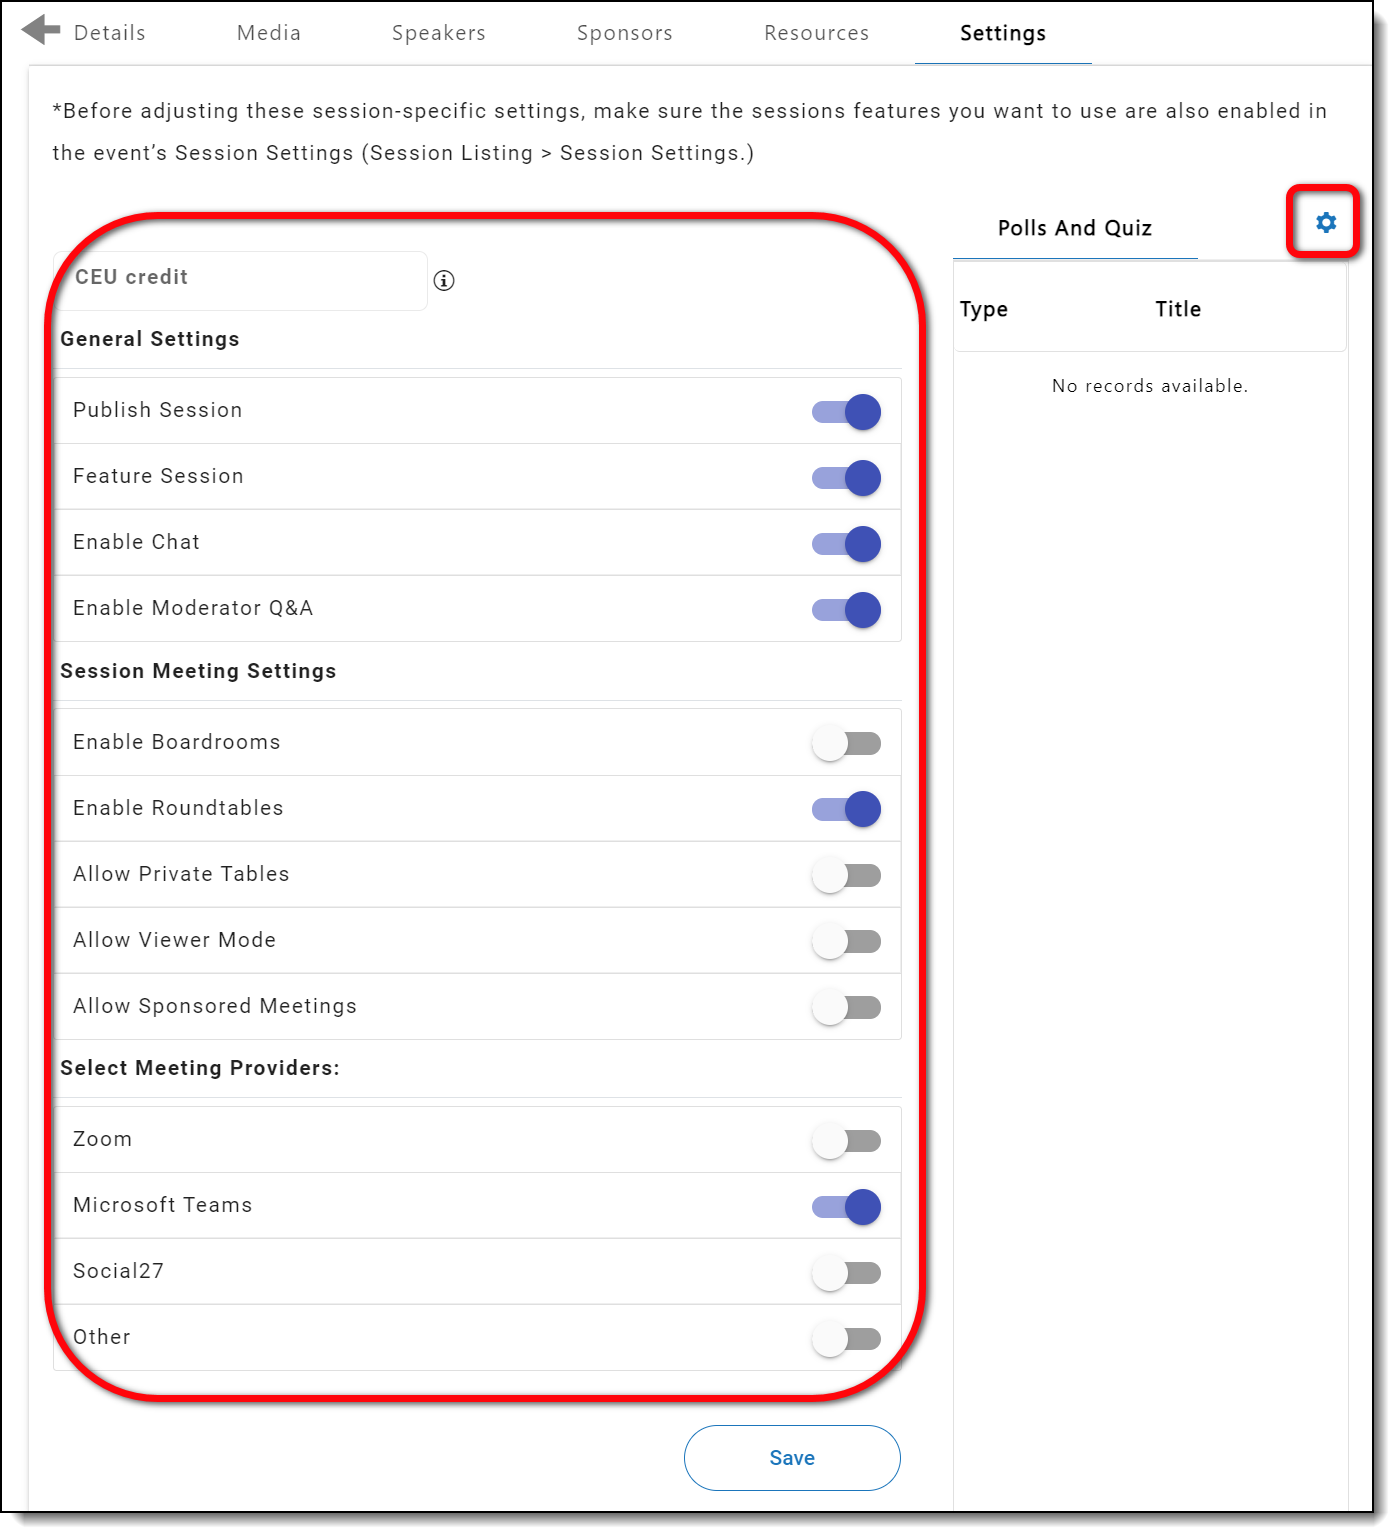
After you’ve adjusted all your session settings, click Save.
|
|
![]() Further Reading:
Further Reading:
Comments
1 comment
This article has been updated to reflect the new and improved functionality of our session creation feature.
Please sign in to leave a comment.