In the Social27 platform, you can restrict sessions and determine which user types will be able to see a session on the Sessions page. This feature can be helpful if you want to create a session that, for example, only speakers can attend, or if you are creating a session but don't want it to appear to attendees until the session is finalized. (This feature is different from the Lock Session feature.)
You can edit session restrictions with two different methods:
Single Session Restriction Edit
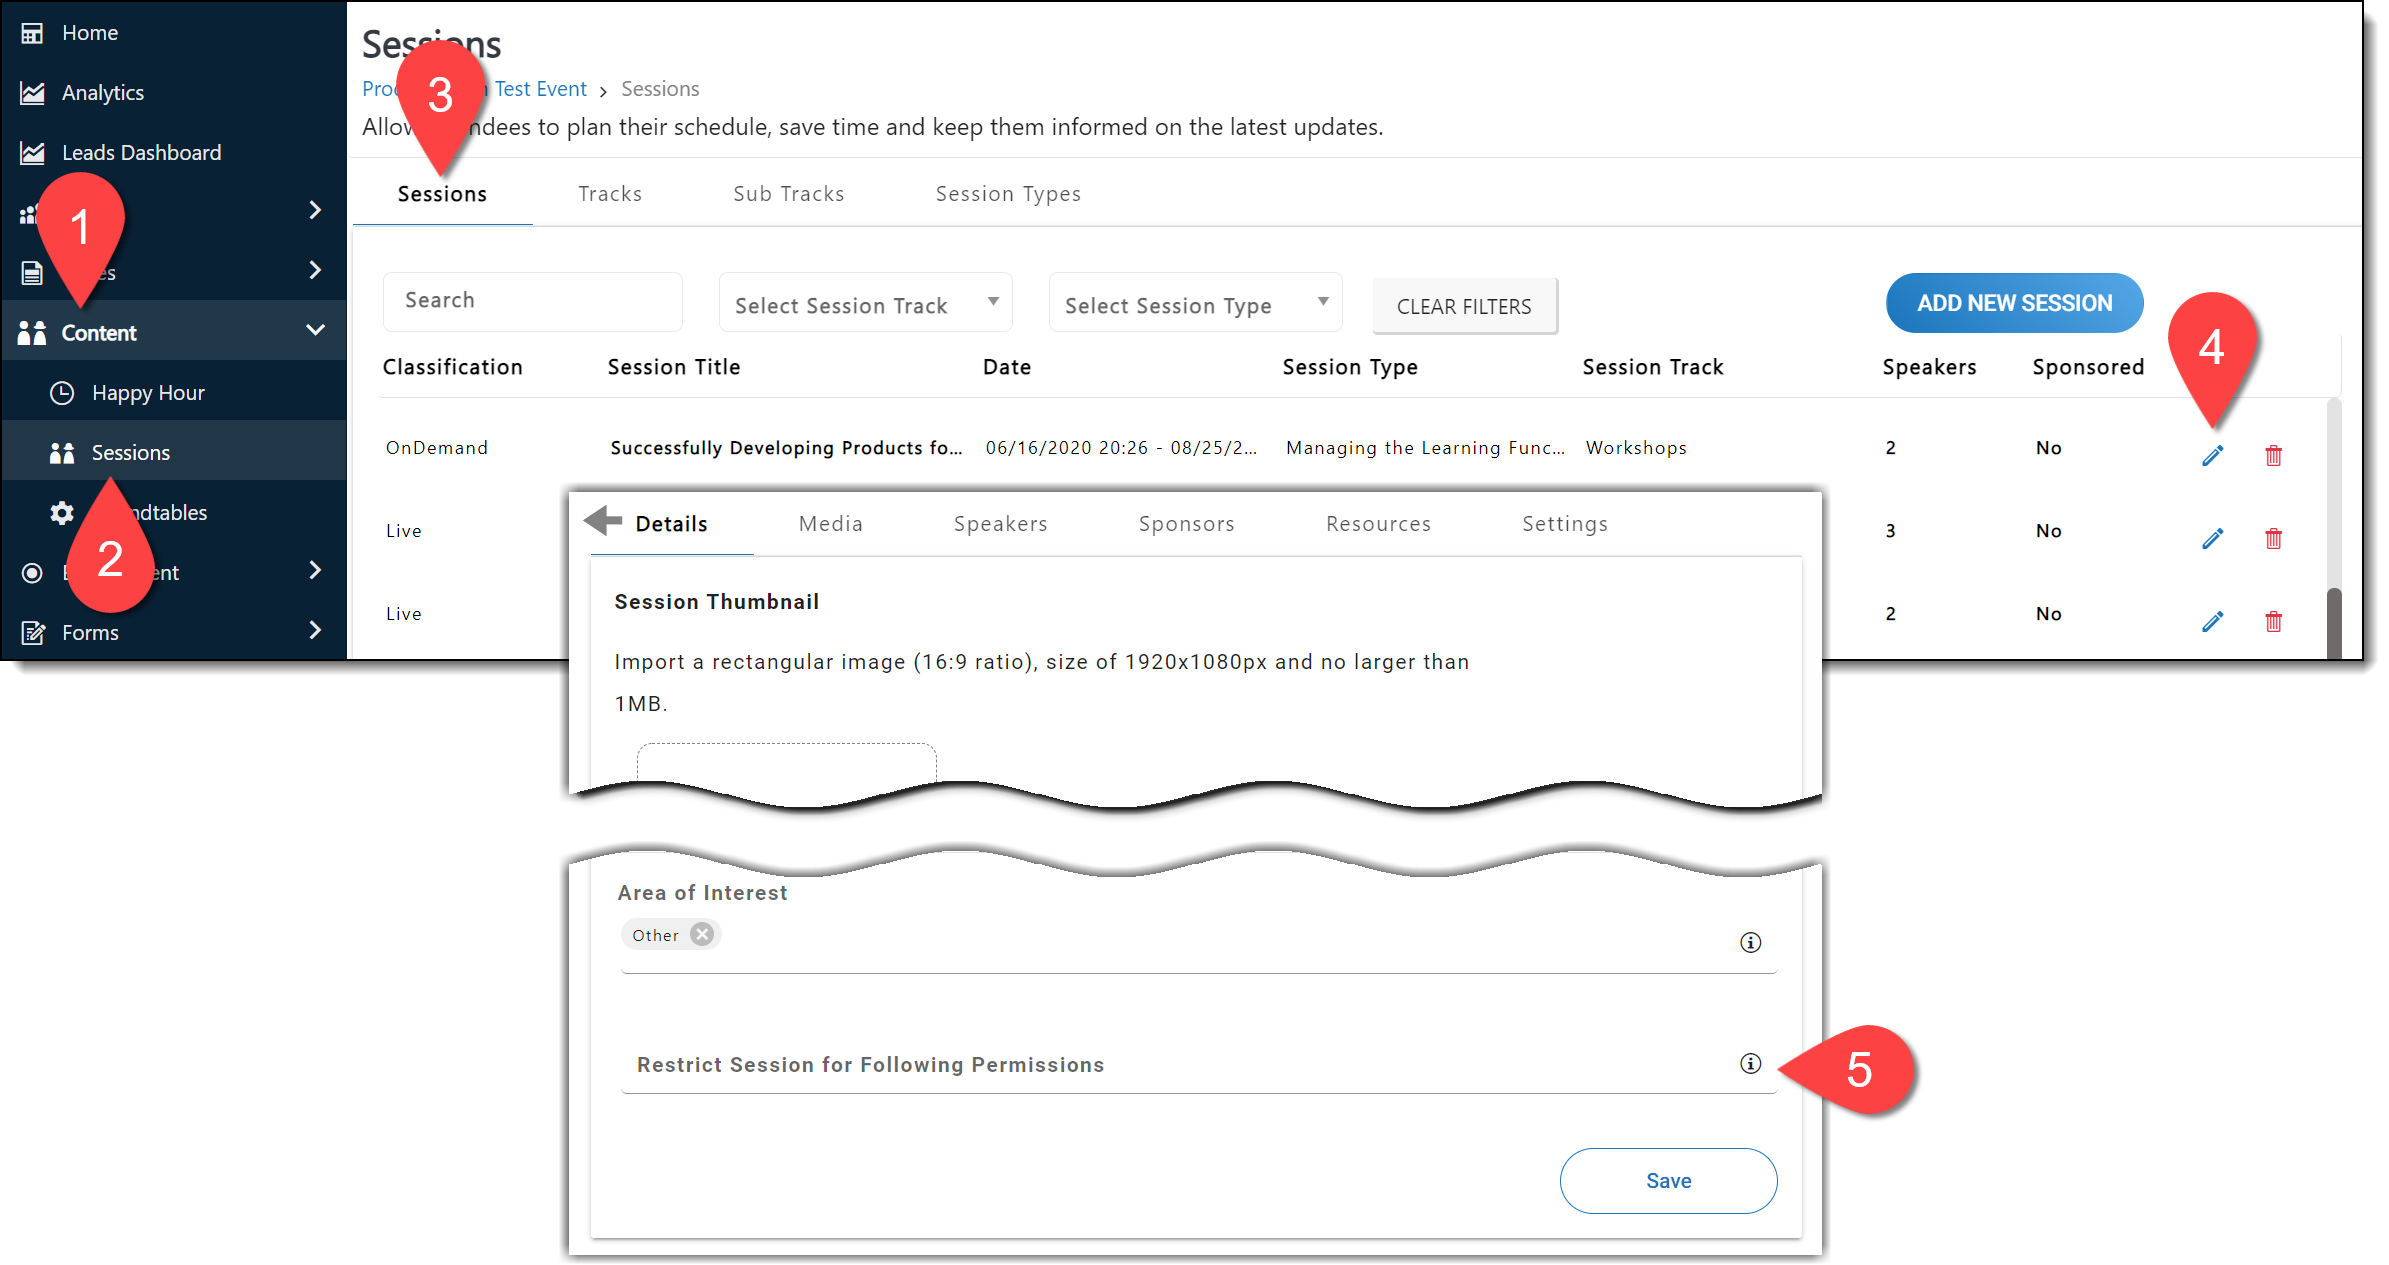
To set restrictions for a singe session, log in to the Events Builder and select Content > Sessions from the left navigation menu. On the Sessions tab, click the pencil icon on the session you wish to restrict. At the bottom of the Details tab, click the Restrict Session dropdown and use the menu options to set which user permission types will be able to view the session. (You can select multiple user types.)
If you don't select any user types from the dropdown, the session will be visible to all users by default.

After you’ve adjusted the session's restrictions, don’t forget to click the Save button at the bottom of the screen.

Bulk Upload Session Restrictions
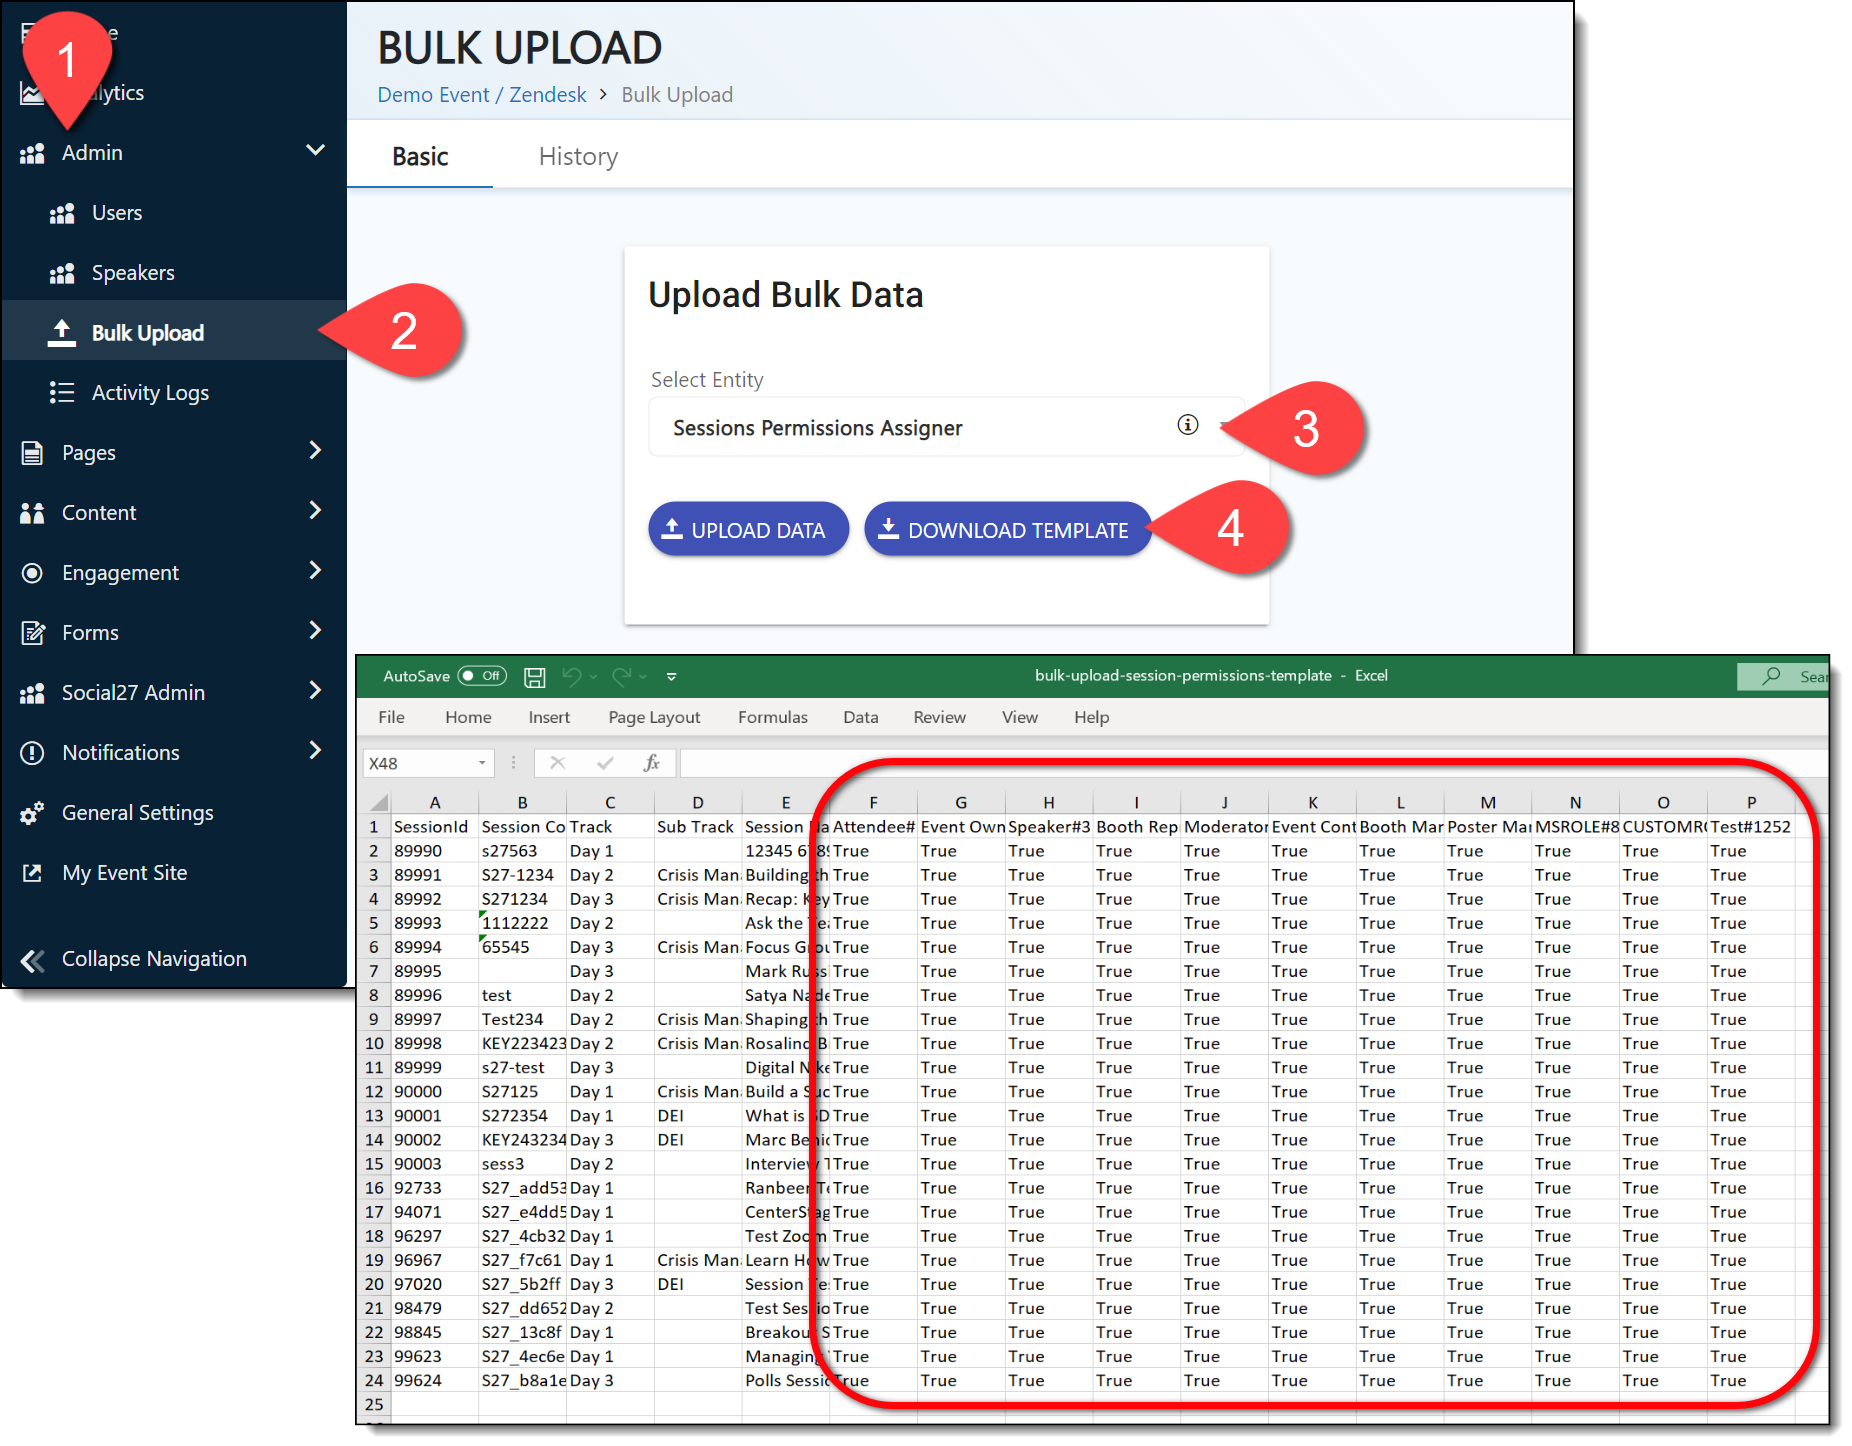
To set restrictions for multiple sessions, log in to the Events Builder and select Admin > Bulk Upload from the left navigation panel. Select Sessions Permissions Assigner from the dropdown menu and click Download Template. Once the Excel template file downloads to your computer, click the Sessions sheet. For each session row, enter either "TRUE" or "FALSE" in each user permission column starting with column F.

After you have edited the spreadsheet, save it to your computer, then click the Upload Data button to upload it to the Events Builder.
|
|
![]() Further Reading:
Further Reading:
Comments
0 comments
Please sign in to leave a comment.