You can make your event sessions even more useful to attendees by including downable resources that support session content. Session resources appear in the Resources section at the bottom of the session theater page.
 _
_
This article explains how to:
Add New Resources
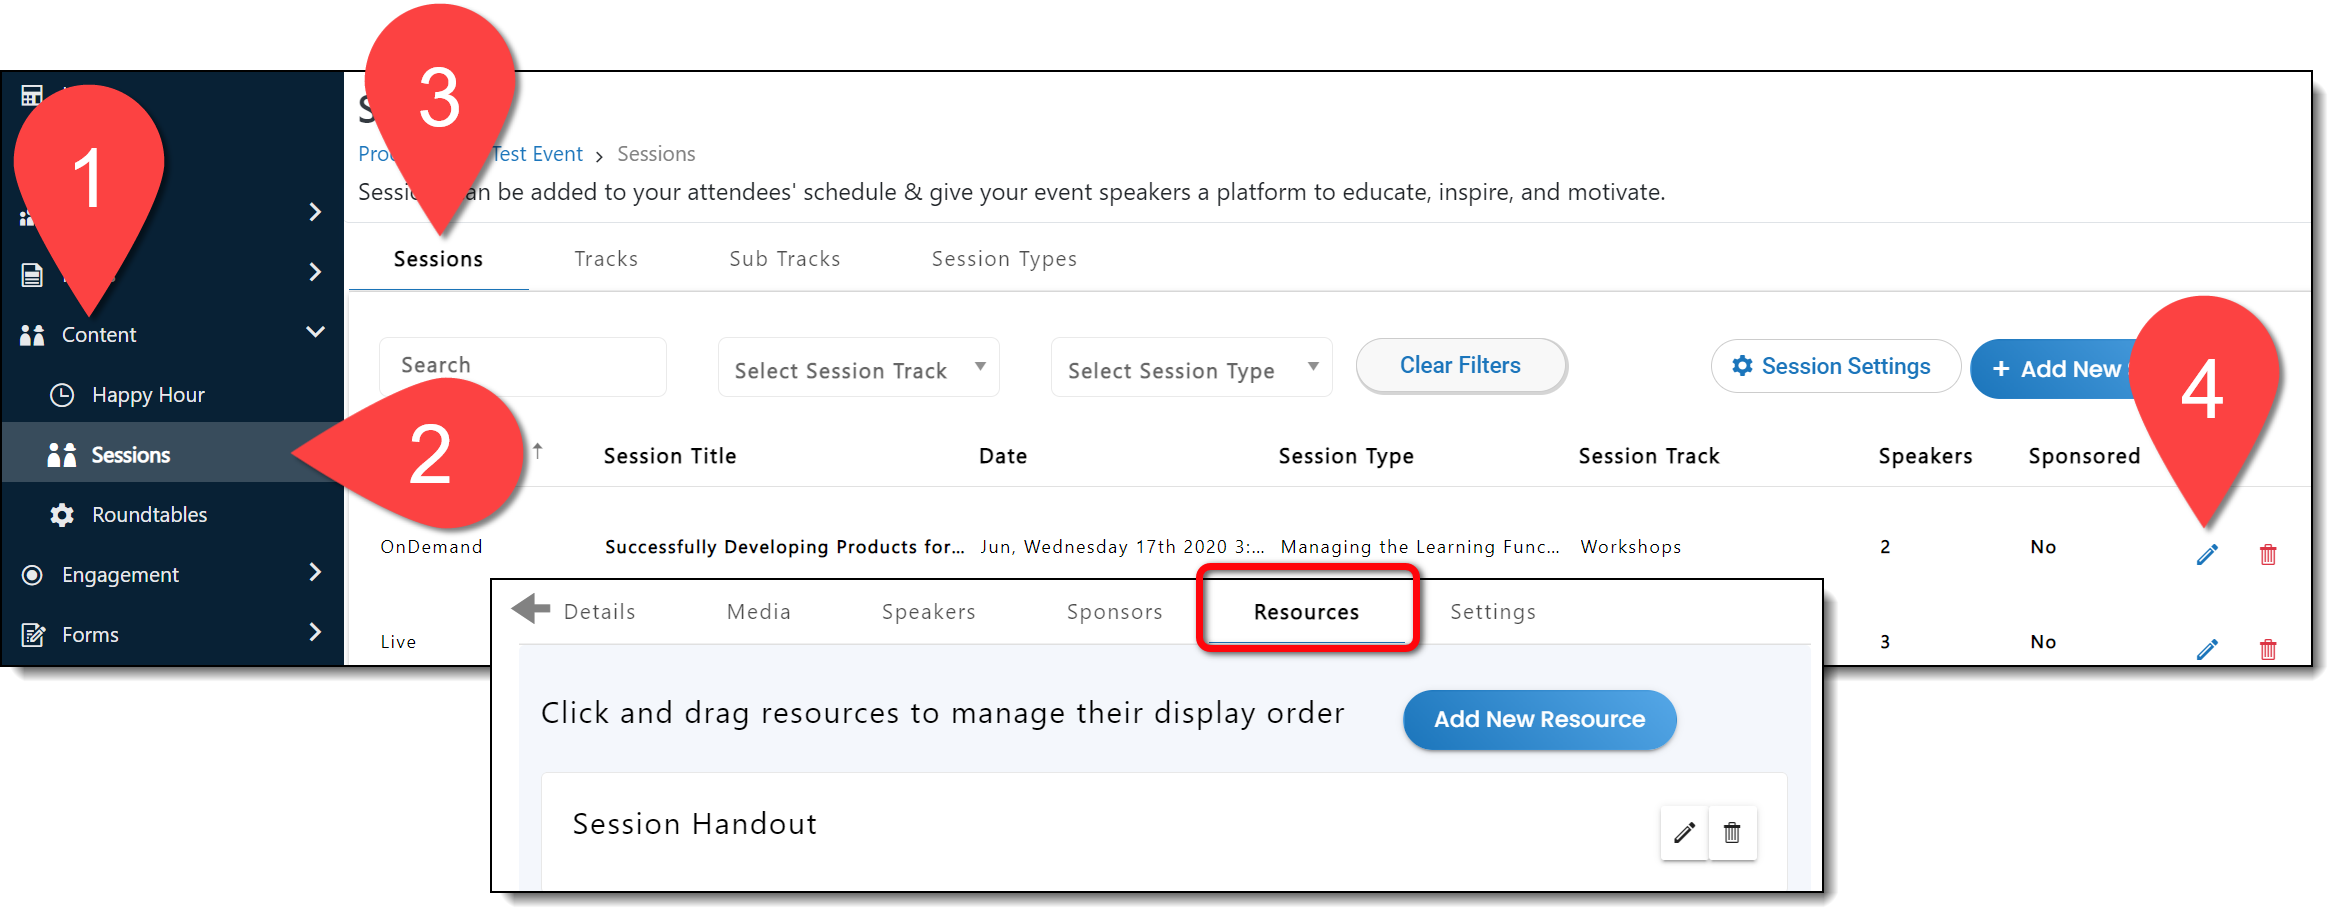
To add resources to a session, log in to the Events Builder and select Content > Sessions from the left navigation menu. In the Sessions tab, click the pencil icon on the session you wish to update and navigate to the Resources tab.

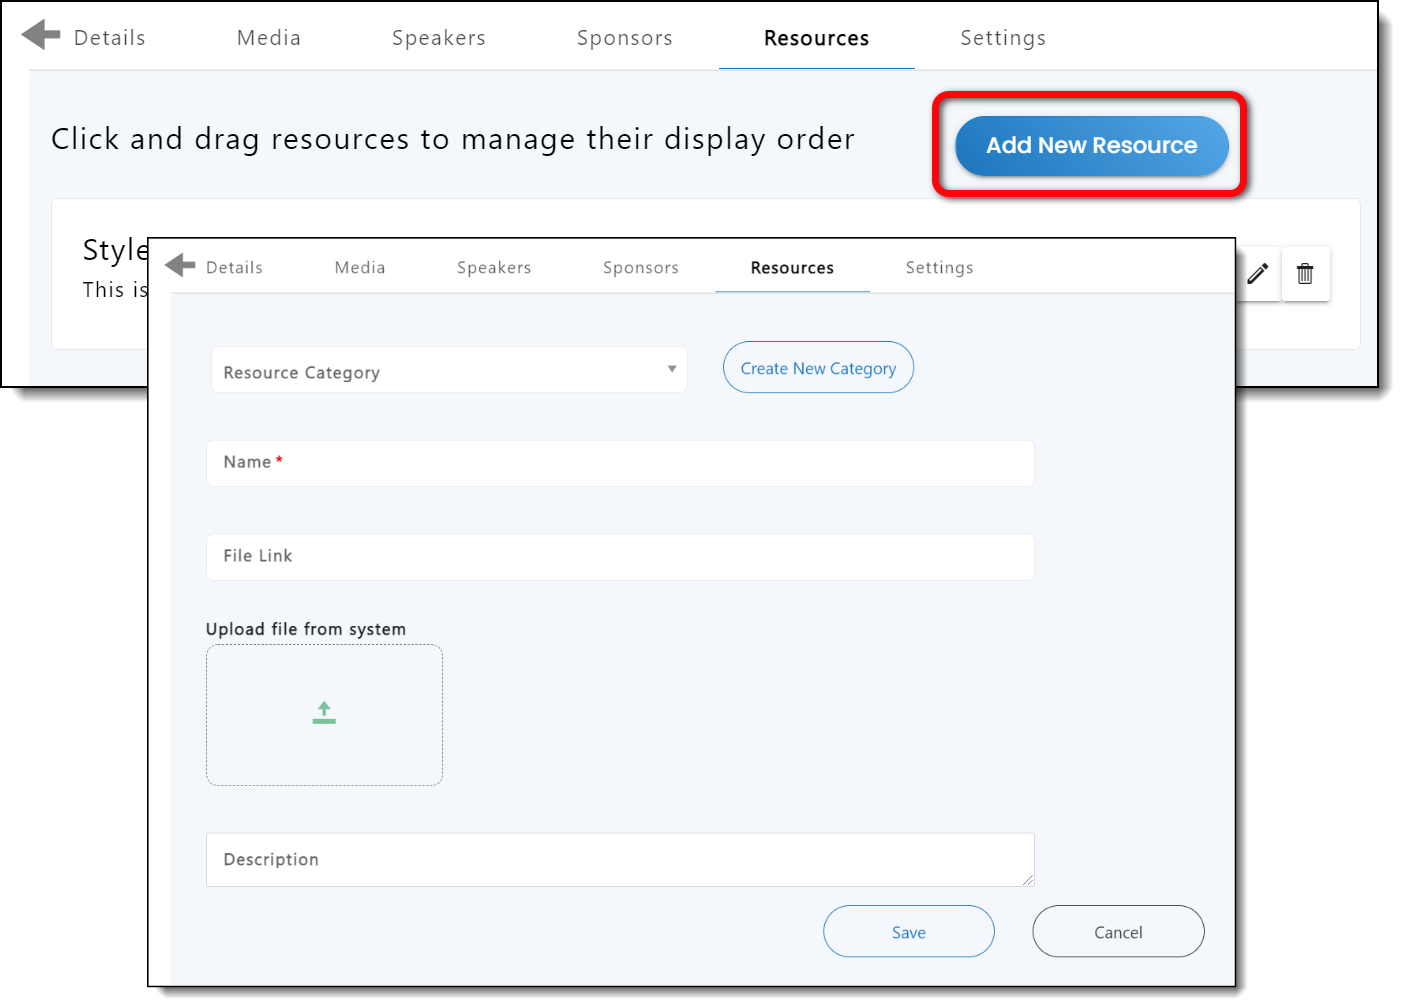
Click Add New Resource and fill out the resource information, including category (select an existing category or create a new one) and resource name. Insert a link to the file or upload a file from your computer. Complete the process by adding a resource description and clicking Save at the bottom of the screen.

|
|
Edit Resources
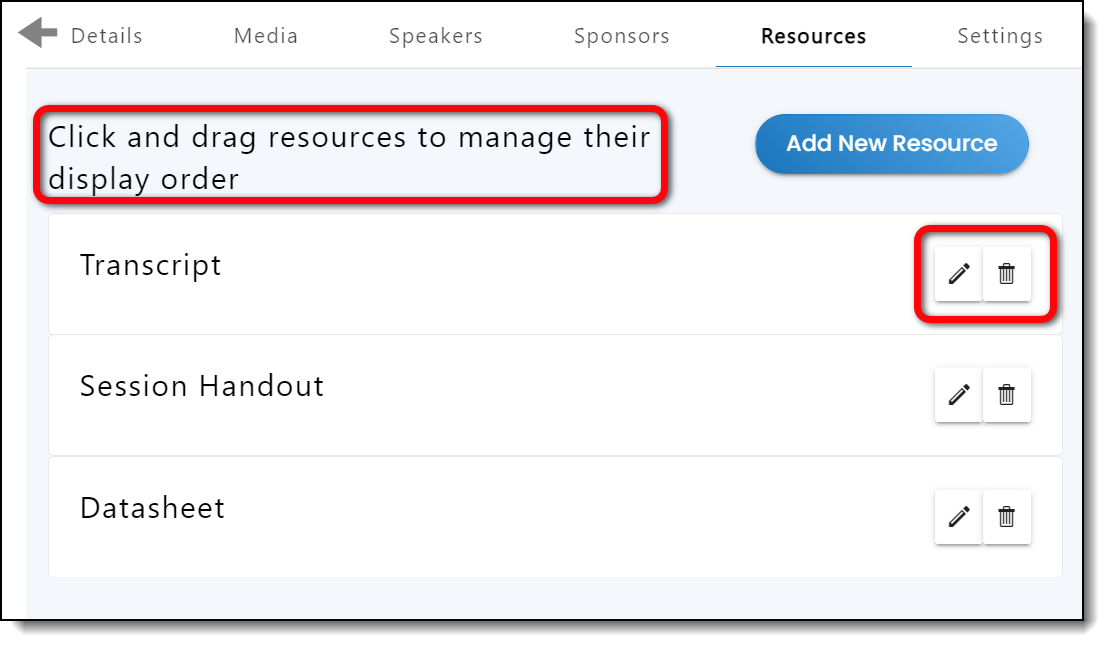
Click and drag resources up and down the list to determine the order in which they appear on the session theater page.
Click the pencil icon on a resource to reveal the resource details and make changes.
Click the trash can icon to delete a resource.

![]() Further Reading:
Further Reading:
Comments
1 comment
This article has been updated to reflect the new and improved functionality of our session creation feature.
Please sign in to leave a comment.