Sessions are one of the primary methods by which you can convey useful content to your event attendees. There are multiple different types of sessions you can add to your event, including live or on demand, workshops, keynotes, and breakout sessions.
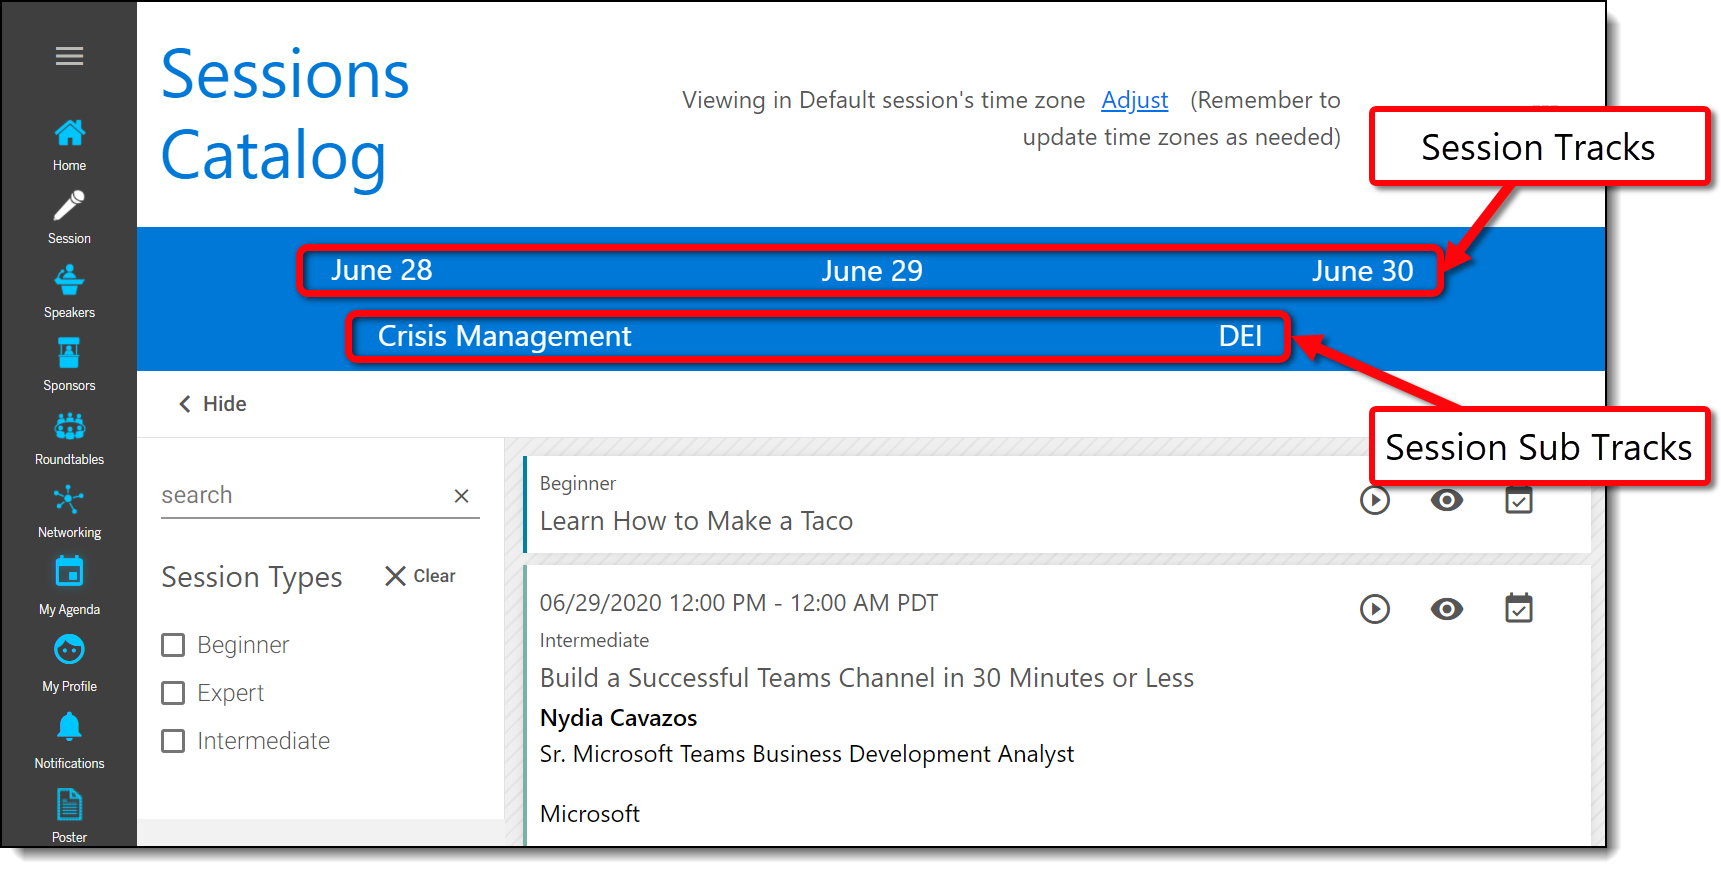
To organize your sessions, you can add sessions to tracks and sub tracks, which will appear as tabs on the Sessions page.

This article explains how to create sessions into tracks and sub tracks. Topics include:
Creating Tracks
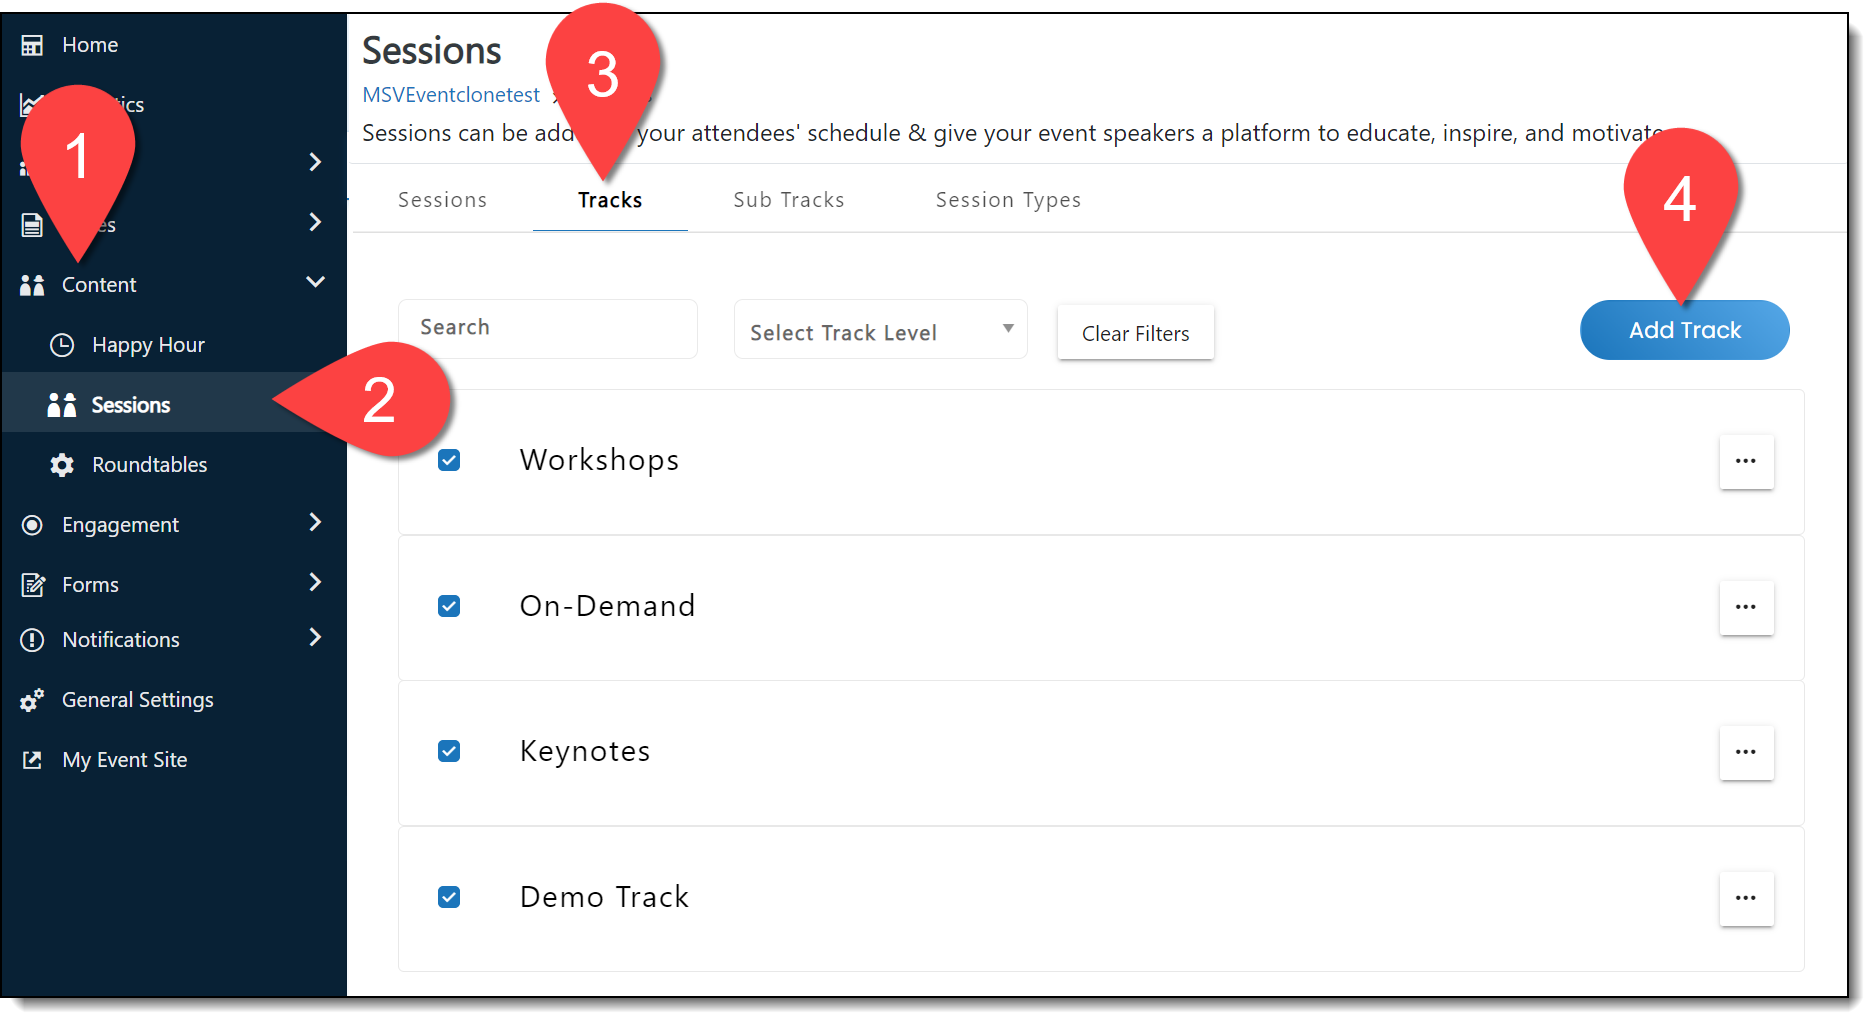
To create a session track, log in to the Events Builder, select Content > Sessions from the left navigation menu. Click the Tracks tab then Add Track.

On the Create Session Track screen, create a track name and description. Tracks are meant to organize sessions, so chose names that will best fit your event. Examples of session tracks include:
- Session Dates: June 28, June 29, etc.
- Topics: Data Discussions, Product Ideation, etc.
- Session types: Keynotes, Workshops, Breakouts, Live, On Demand, etc.
- Regions: Americas, Europe, etc. (often used for events with global attendees)

Set the Track Category to "Live," and use the Track Level dropdown to set the level of the track.

Lastly, select a Track Format (Online Track or OnDemand Webinar), publish the track so it appears on the Sessions page, and click Save.

Creating Sub Tracks
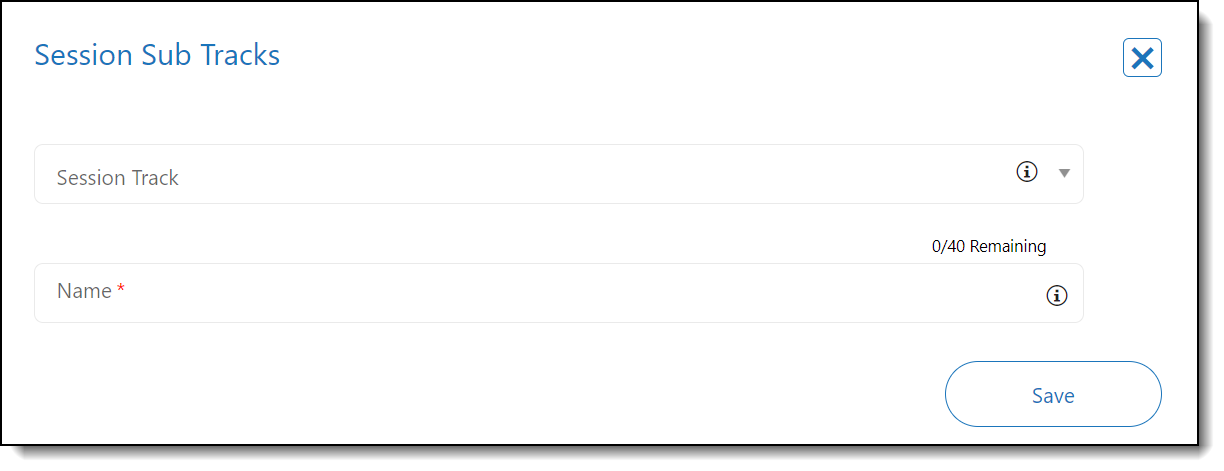
Once you have created session tracks, you can create an additional tier of "session sorting" by creating sub tracks. To do this, select Content > Sessions from the left navigation menu, select the Sub Tracks tab, and click Add Session Sub Tracks.

The Session Sub Tracks page will load where you can name the sub track and associate it to a pre-existing session track. Once you've filled out all sub track details, click Save at the bottom of the screen.

![]() Further Reading:
Further Reading:
Comments
0 comments
Please sign in to leave a comment.