Incorporating polls into your event sessions helps engage your attendees and can give you insights into what they think or feel about a topic. Polls can be pushed out to attendees as soon as they are created or scheduled to appear to attendees at a specific date/time.
This article explains how to create a poll using the Events Builder. Check out this article for an explanation of how to create polls from a session chat sidebar within the event site.
Topics in this article include:
Creating a Poll
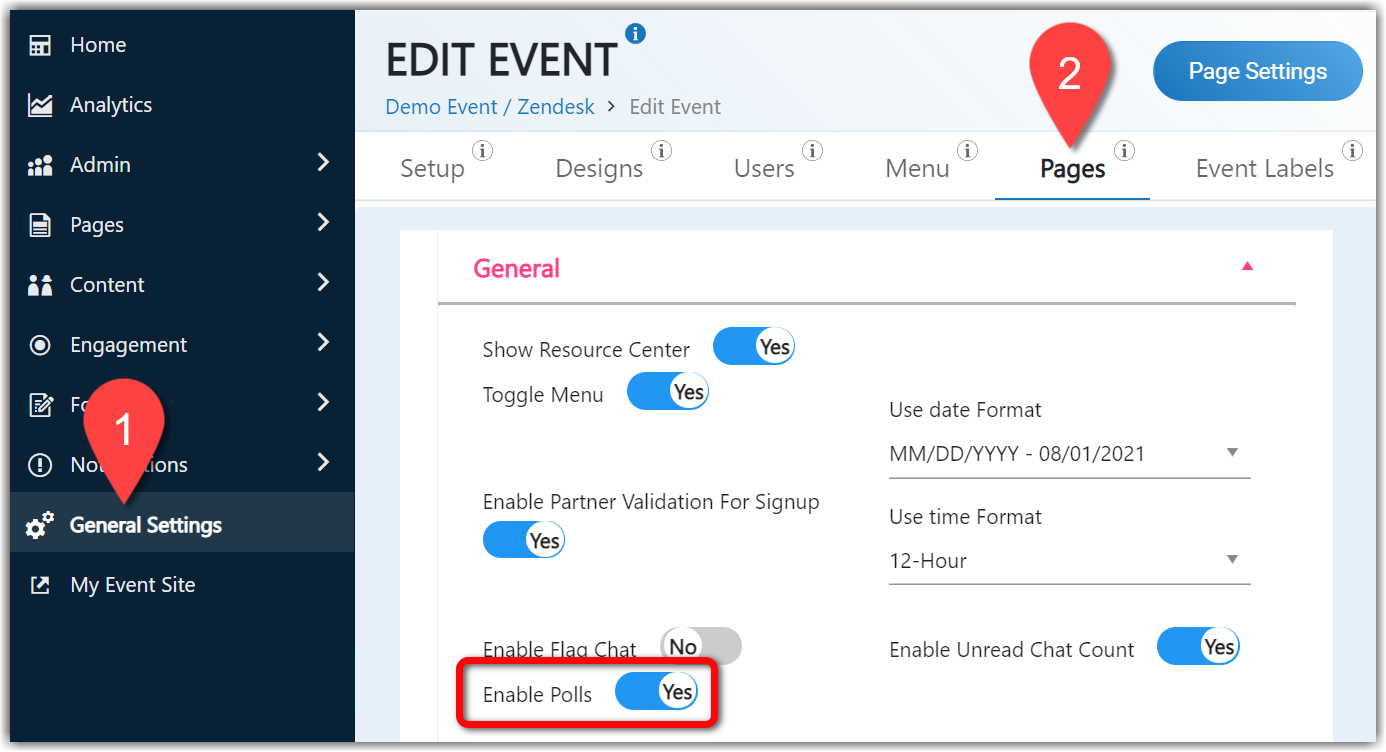
To create a poll, you need to first enable polls in General Settings. Log in to the Events Builder and click on your event. Click General Settings > Pages and turn on the Enable Polls toggle in the General section.
|
|
Now, you can create a poll by navigating to Forms > Polls and Quizzes in the left navigation menu, then Add Poll.
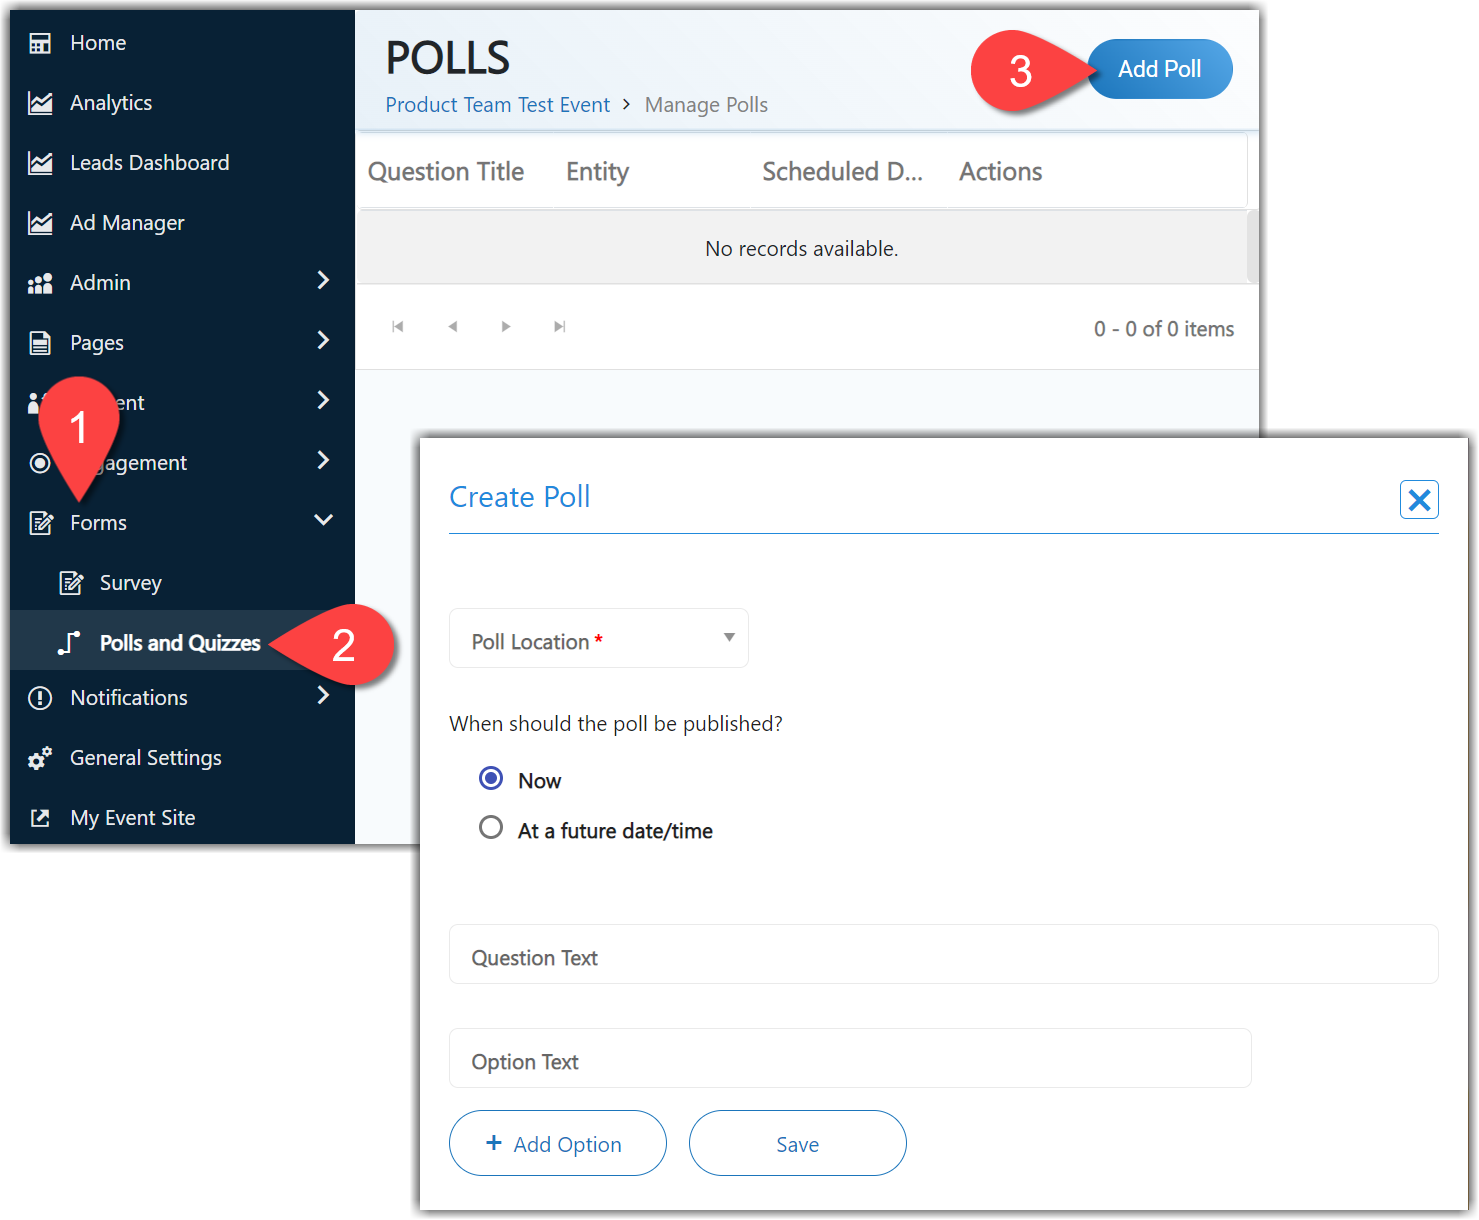
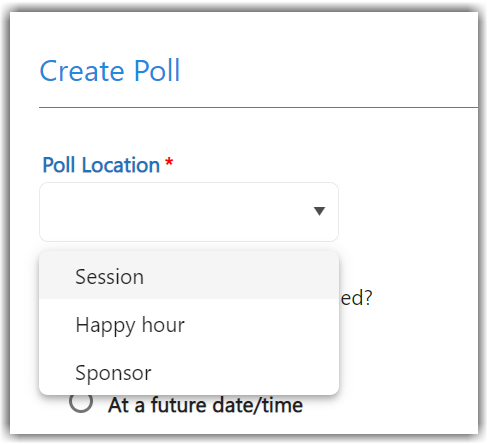
The Create Poll screen will appear and you can first select where you would like the poll to appear: in a session, Happy Hour, or sponsor booth. Then select which session / Happy Hour / sponsor booth you want the poll to appear in. (You can select multiple of each.)
Next, set when you would like the poll to be published and appear to session attendees: now or at a future date/time. If you select Now, the poll will be published as soon as you click Save at the bottom of the Create Poll screen.

|
|
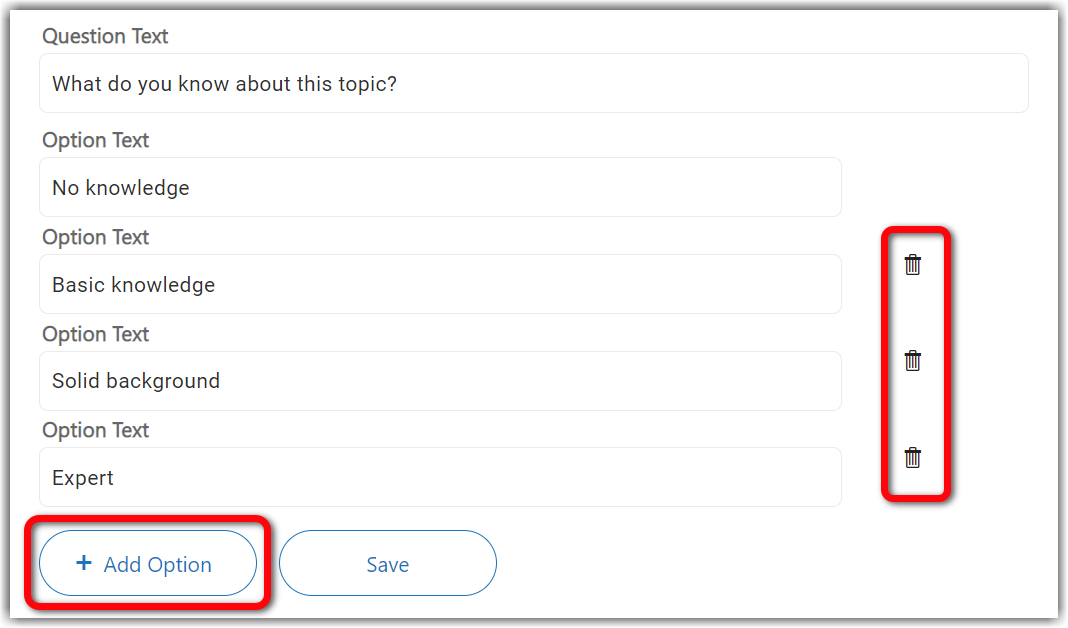
Once you've determined when you would like the poll to appear, enter your question in the Question Text field, and use the Add Option button and the trash can icons to add and remove answer options. You can add up to seven answer options.
|
|
Editing Polls
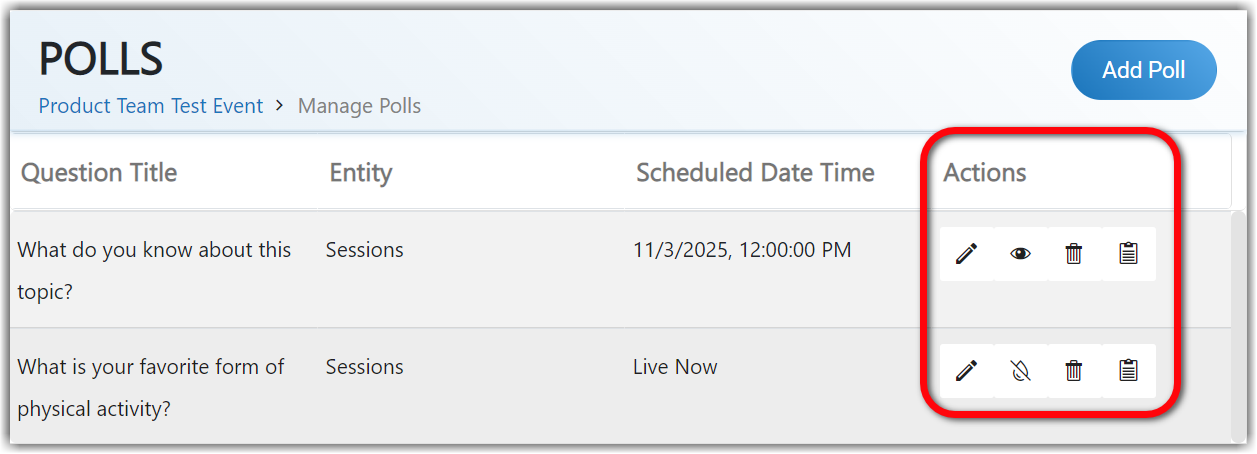
Once you click Save, you will be taken back to the Polls page where you can see all polls that have been created for your event. Use the icons on the right side of the screen to edit ( ) or delete (
 ) each poll.
If a poll is live, you will see an option ( ) to hide it from your event attendees. If the poll is scheduled, you can click the option (
 ) to publish and make it immediately visible to attendees.
|
|
Viewing Poll Results
Events Builder
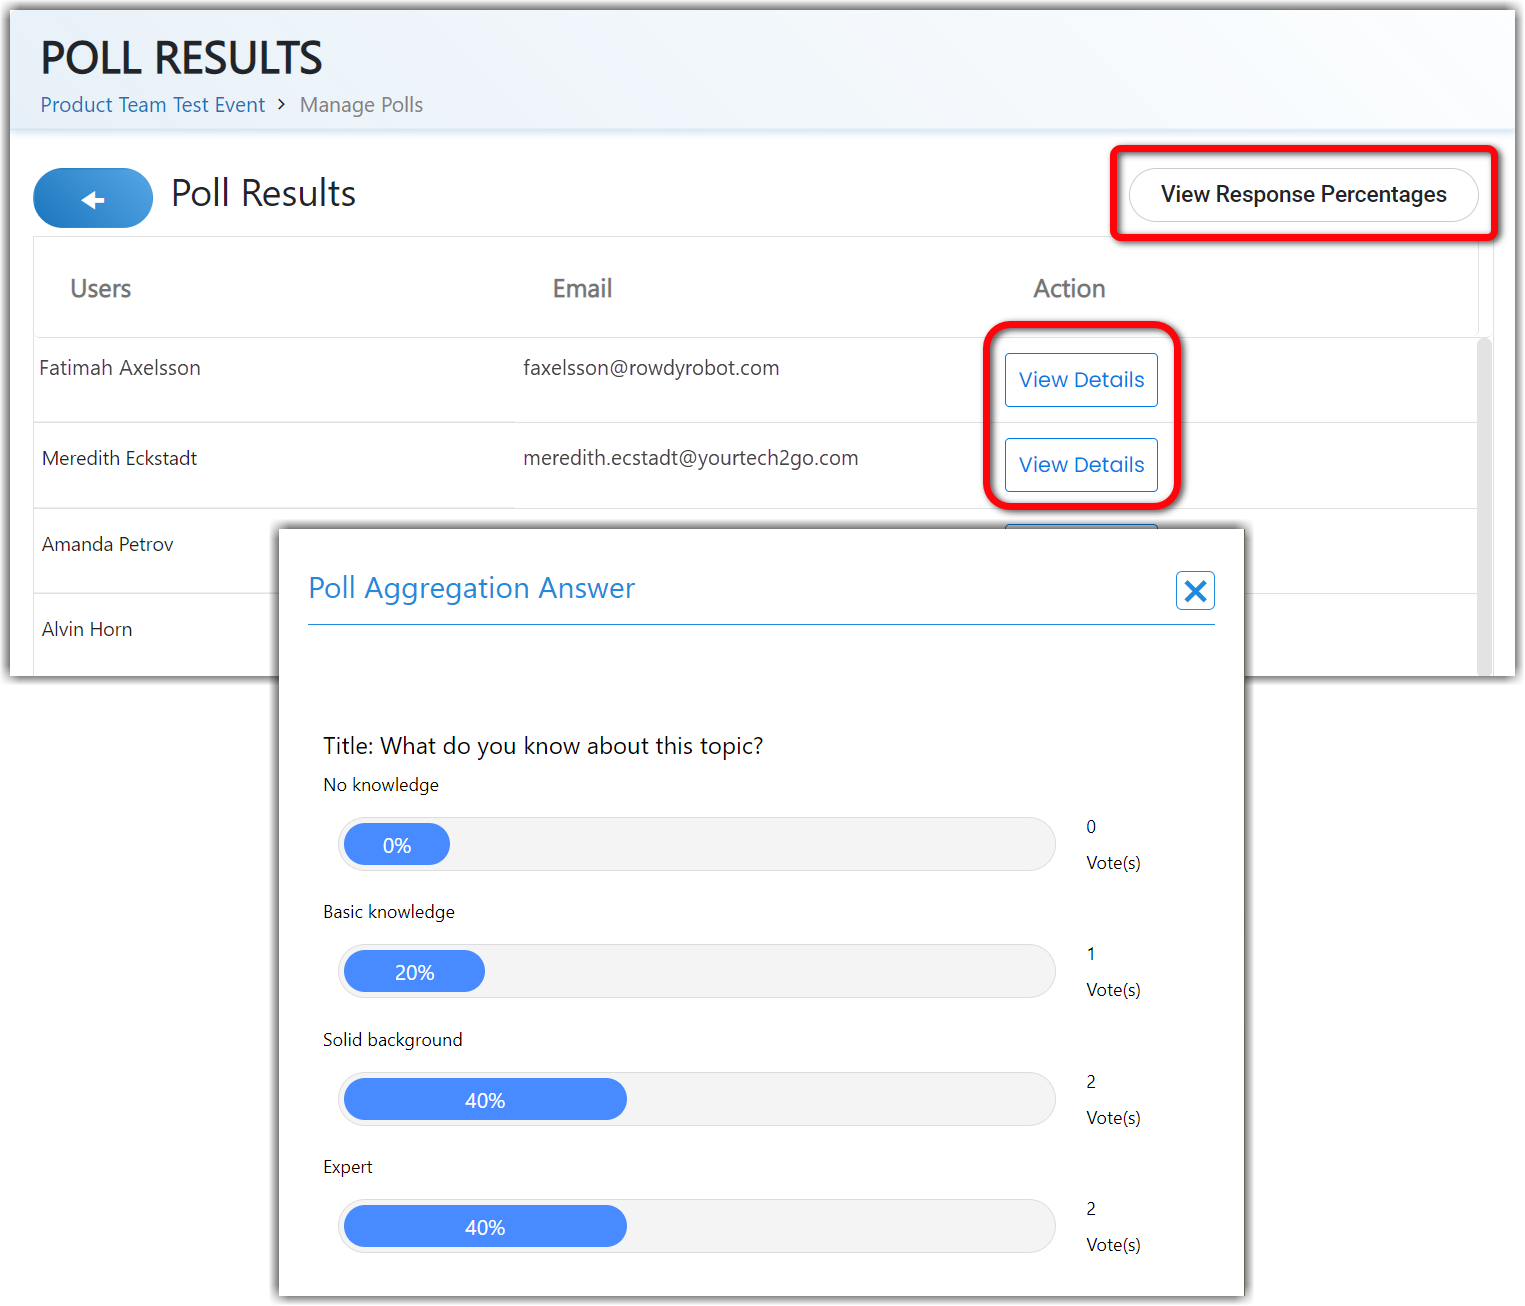
The final icon on the Polls page ( ) will allow you to view your poll results. You'll see a list of all users who have responded to the poll. Click View Response Percentages to see the percentage of responses for each option and View Details to see how each individual user answered the question.
Event Site
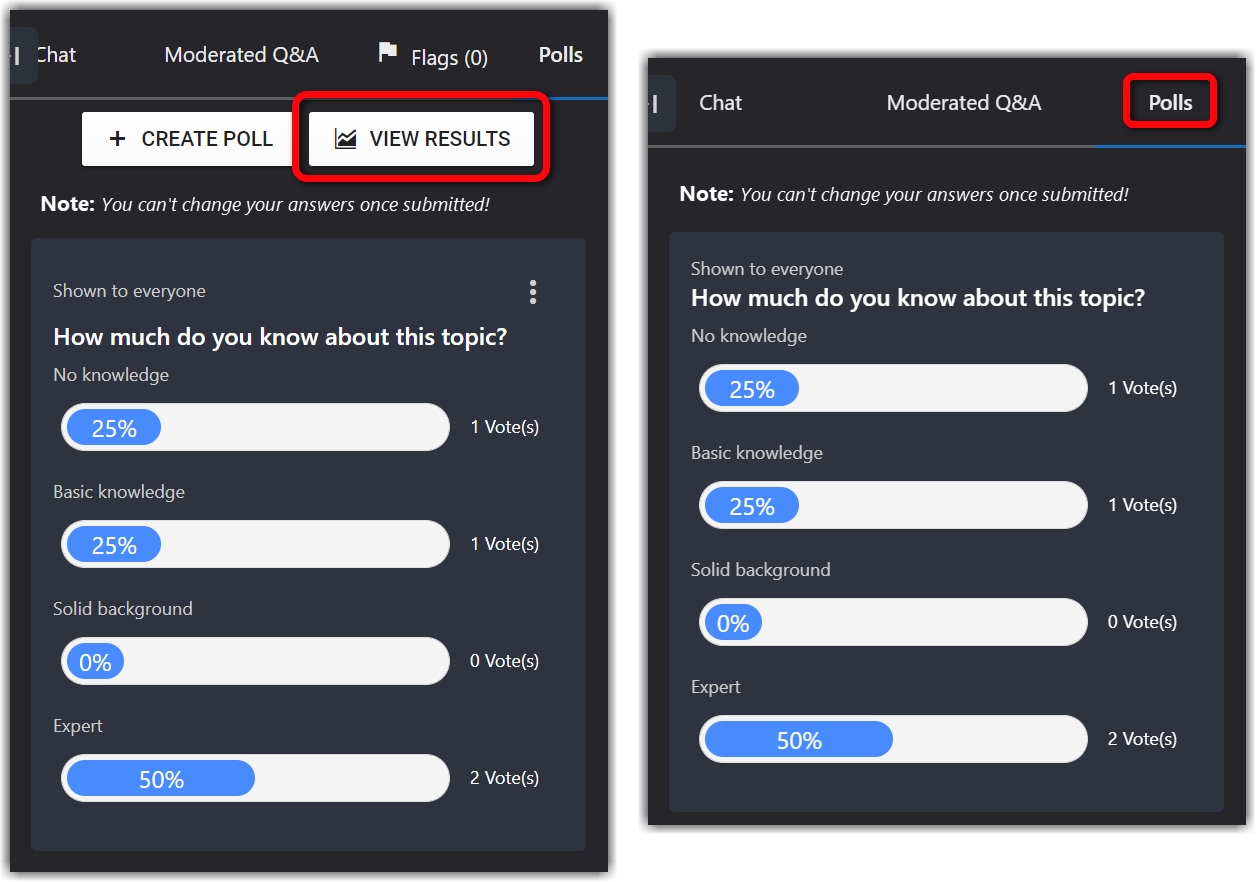
You and all attendees will also be able to see these results on the event site by opening the chat sidebar. When attendees respond to a poll, the page will reload to display their response. Anyone, attendees, included, can view the poll results. Moderators can click View Results, whereas attendees simply need to navigate to the Polls tab in the chat sidebar to see how all respondents have answered the poll. These results are updated in real time as attendees respond to the poll.
![]() Further Reading:
Further Reading:
Comments
1 comment
This article has been updated to reflect Social27's new Polls functionality.
Please sign in to leave a comment.