You can create posters for your event, which allow you to share presentations, resources and other relevant information with your attendees.
This article explains how to create posters in the Events Builder.
Topics include:
Menu Configuration
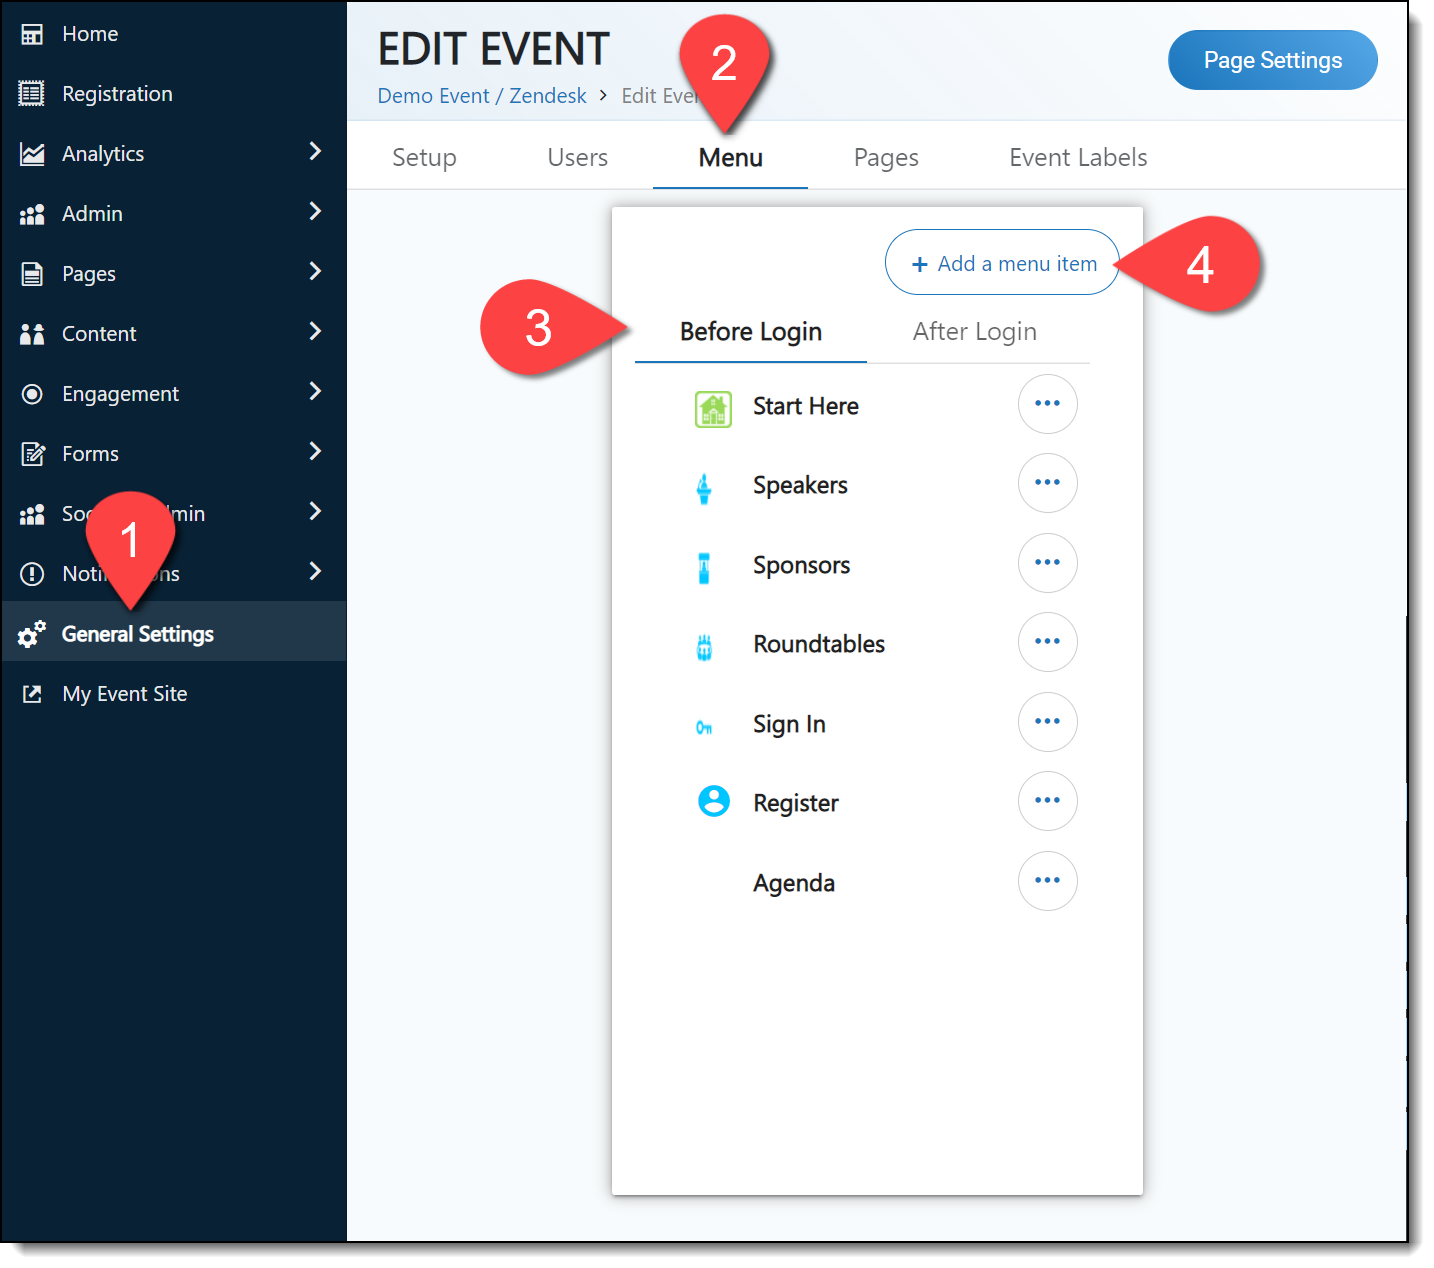
Before creating posters, you should first ensure that attendees can navigate to them using the left navigation pane on the event site. Log in the the Events Builder and select your event. Click General Settings in the left navigation panel, then click the Menu tab. Select whether you want the menu option to appear Before Login or After Login (typically posters appear after login), then click + Add a menu item.

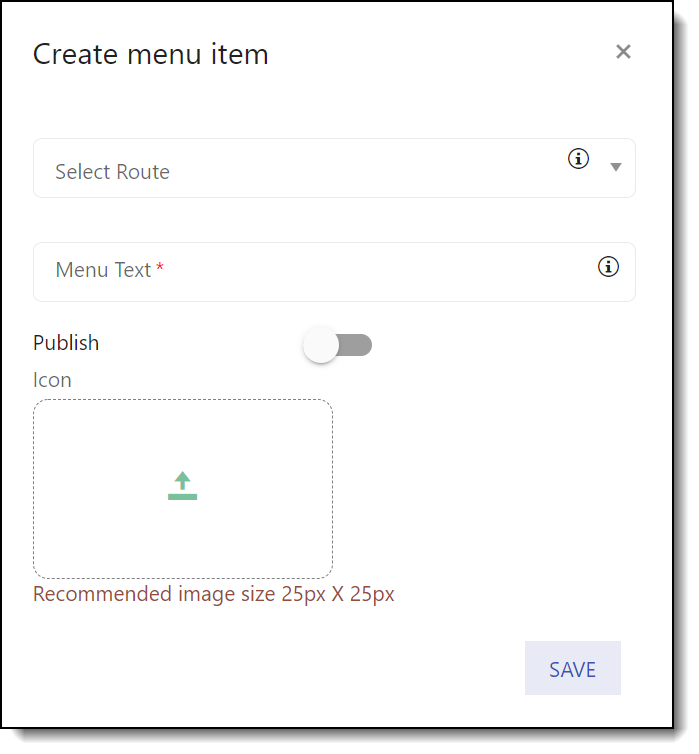
When the Create menu item screen loads, complete all information for the new menu item:
- Route: The page the user will be directed to when they click the menu button
- Menu Text: The name that appears below the menu button
- Publish toggle: Enables the menu button on the event site
- Icon: Recommended size: 25 x 25 pixels

Once you've created a menu item, you can reorder the menu list it by clicking and dragging items up and down.
Poster Creation
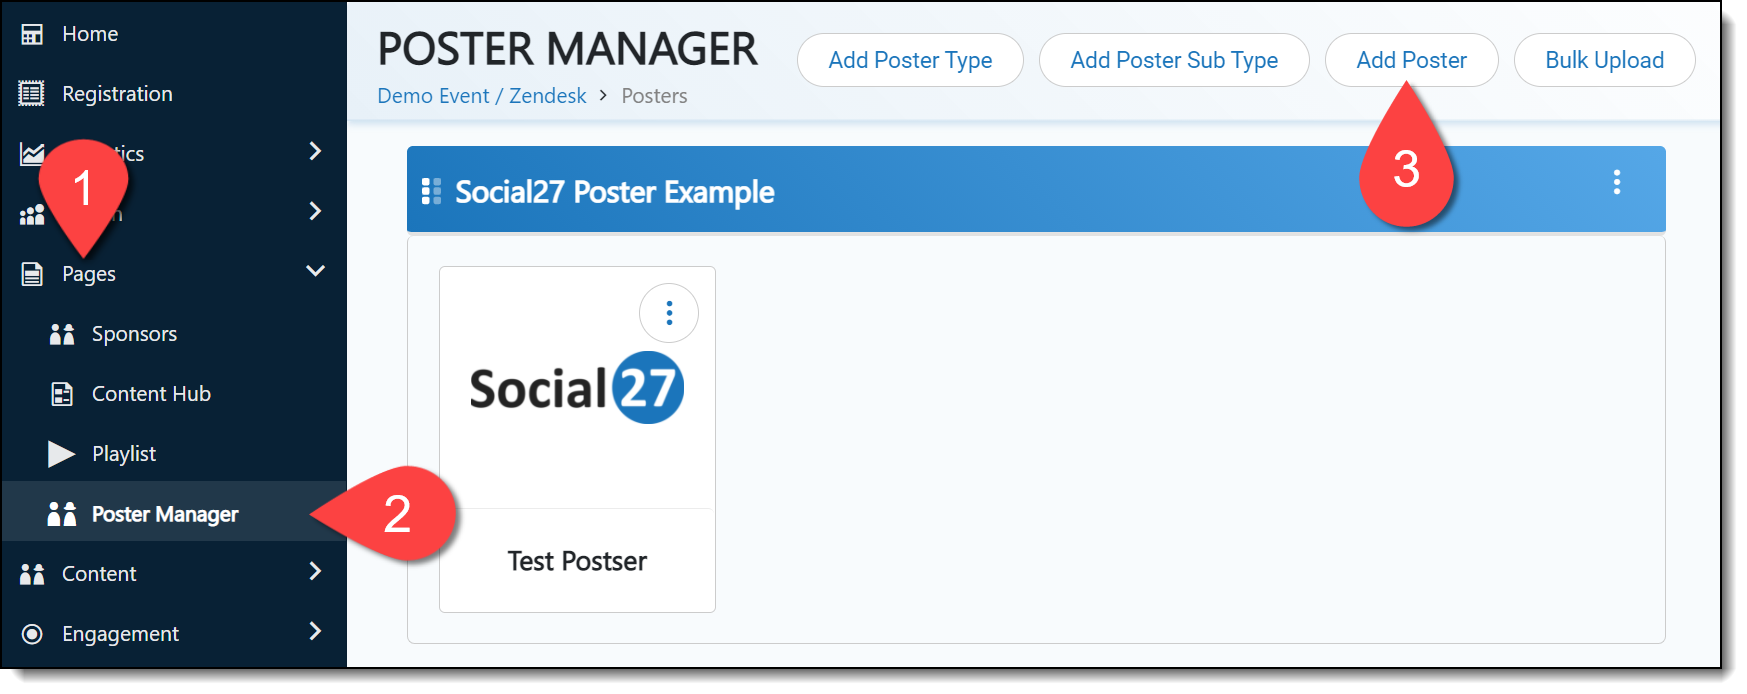
To create a poster, click Pages > Poster Manager in the left navigation panel, then click Add Poster.

The Create Poster screen will load, allowing you to add a logo, poster name, poster type, description, Playlist, and Tags (Areas of Interest).
Turn the Recommendations toggle on or off to allow posters to appear in recommendations to attendees.
In the Poster Settings section, you can set which features to make available on the poster, including Roundtables, representatives, Playlist resources, sponsors, sessions, resources, and visitors. Use the Chat section to turn the chat feature on or off.
Poster Media
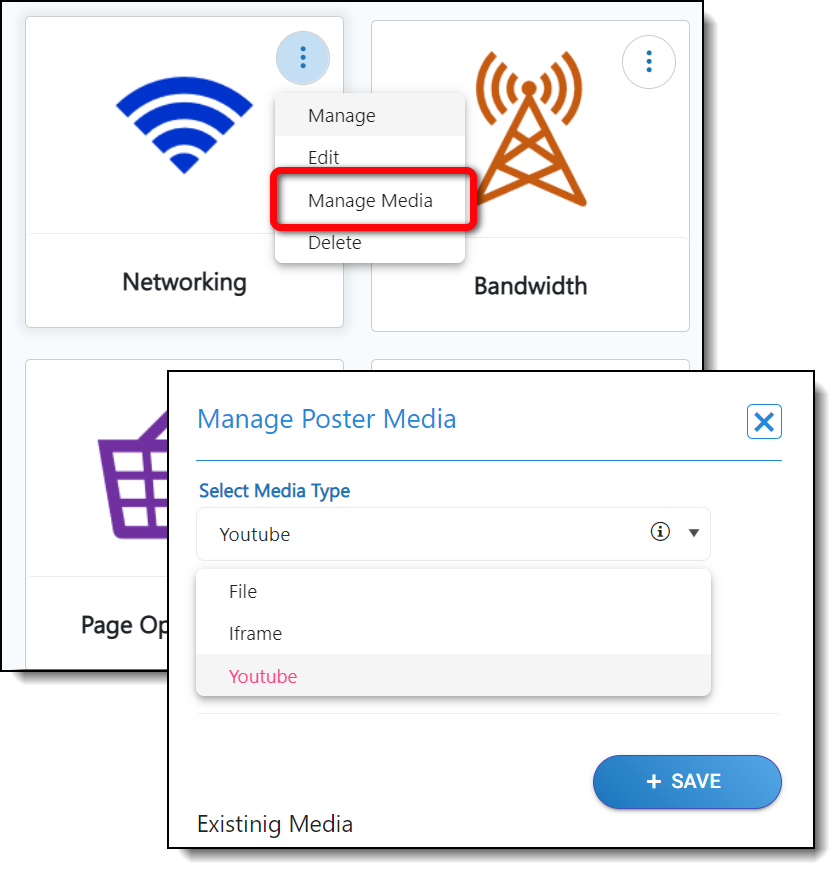
To add media to your poster, click the poster ellipses icon and Manage Media. Select the media type from the dropdown menu, upload the media, and click Save.

|
|
![]() Further Reading:
Further Reading:
Comments
0 comments
Please sign in to leave a comment.