Areas of Interest (AOIs) indicate certain topics an attendee may want to learn more about during an event. They personalize the attendee's experience and link them to recommended sessions, sponsors, speakers, attendees, and posters. AOIs ensure attendees see the content and connections most relevant to them.
This article explains how to create Areas of Interest in the Events Builder.
Topics include:
The Recommendation Engine
Social27's Recommendation Engine kicks off when an attendee logs in and selects Areas of Interest (AOI). The AOIs they select:
- Dictate which section their Hello World! video is uploaded to
- Populate their Recommended Agenda with relevant sessions
- Show them Soapbox videos that might interest them
Then, as the attendee interacts with the platform, the engine incorporates Artificial Intelligence and Machine Learning algorithms to track the attendee's engagement behaviors.
This engagement behavior includes the attendee's selected AOIs, but is not limited to them. The Recommendation Engine also tracks the sessions the attendee watches, the other users they connect with, and the sponsors they visit. The engine analyzes these behaviors and further adapts to the attendee’s interests. To "feed" this recommendation engine, it's helpful to associate AOIs to sessions, sponsors, and roundtables.
Video Walkthrough
Check out the video walkthrough or Please check out the video below for a walkthrough on how to create Areas of Interest in the Events Builder.
AOI Creation Steps
After logging in to the Events Builder and selecting your event, navigate to Engagement > Area of Interest. Click Add Area Of Interest to add a new AOI.

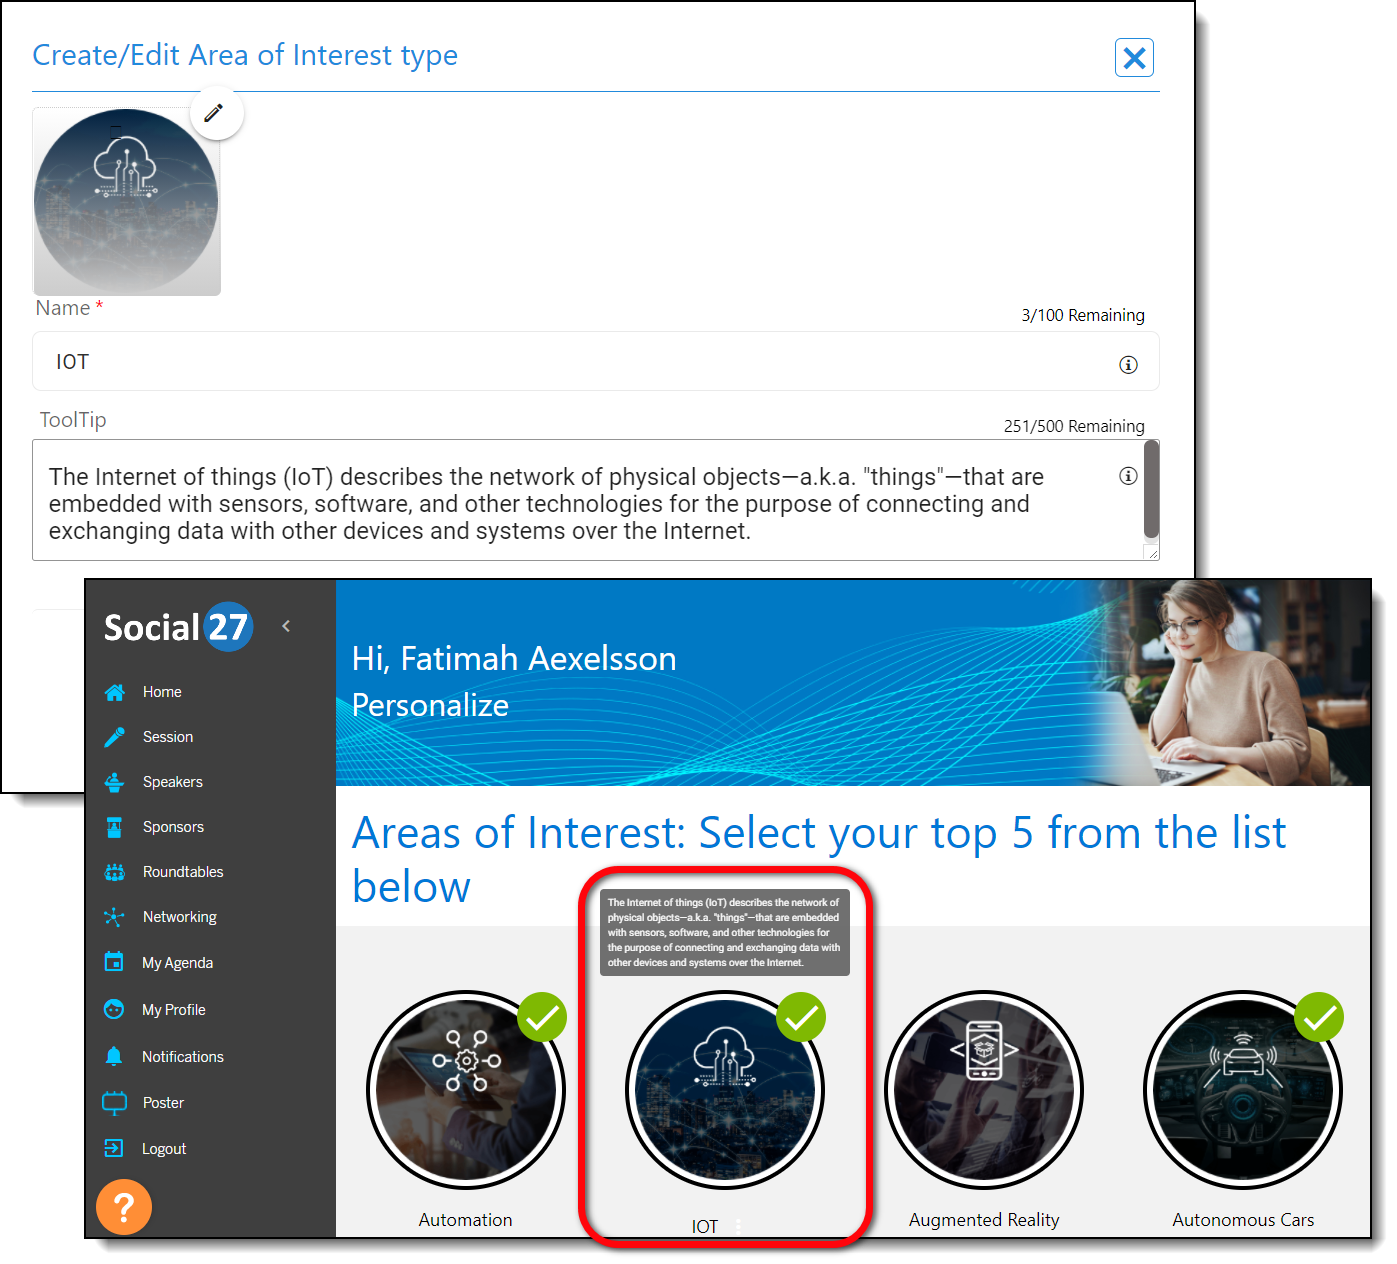
Give the AOI a name and image.
Enter a description of the AOI in the ToolTip field. This tool tip will appear on the Personalize page (the page that asks users to select their AOIs after they log in for the first time) in the event site when users hover over the AOI image.

|
|
Sub AOI Creation Steps
You can also add sub AOIs that break a "parent" AOI into its sub-categories. Sub AOIs appear in the event site if a user clicks the ellipses icon beside a parent AOI on the initial Personalization page and when a user updates their selected AOIs on their profile. If a user selects a sub AOI, the system automatically marks the parent AOI as well.
| Personalize Page | My Profile Page |
 |
 |
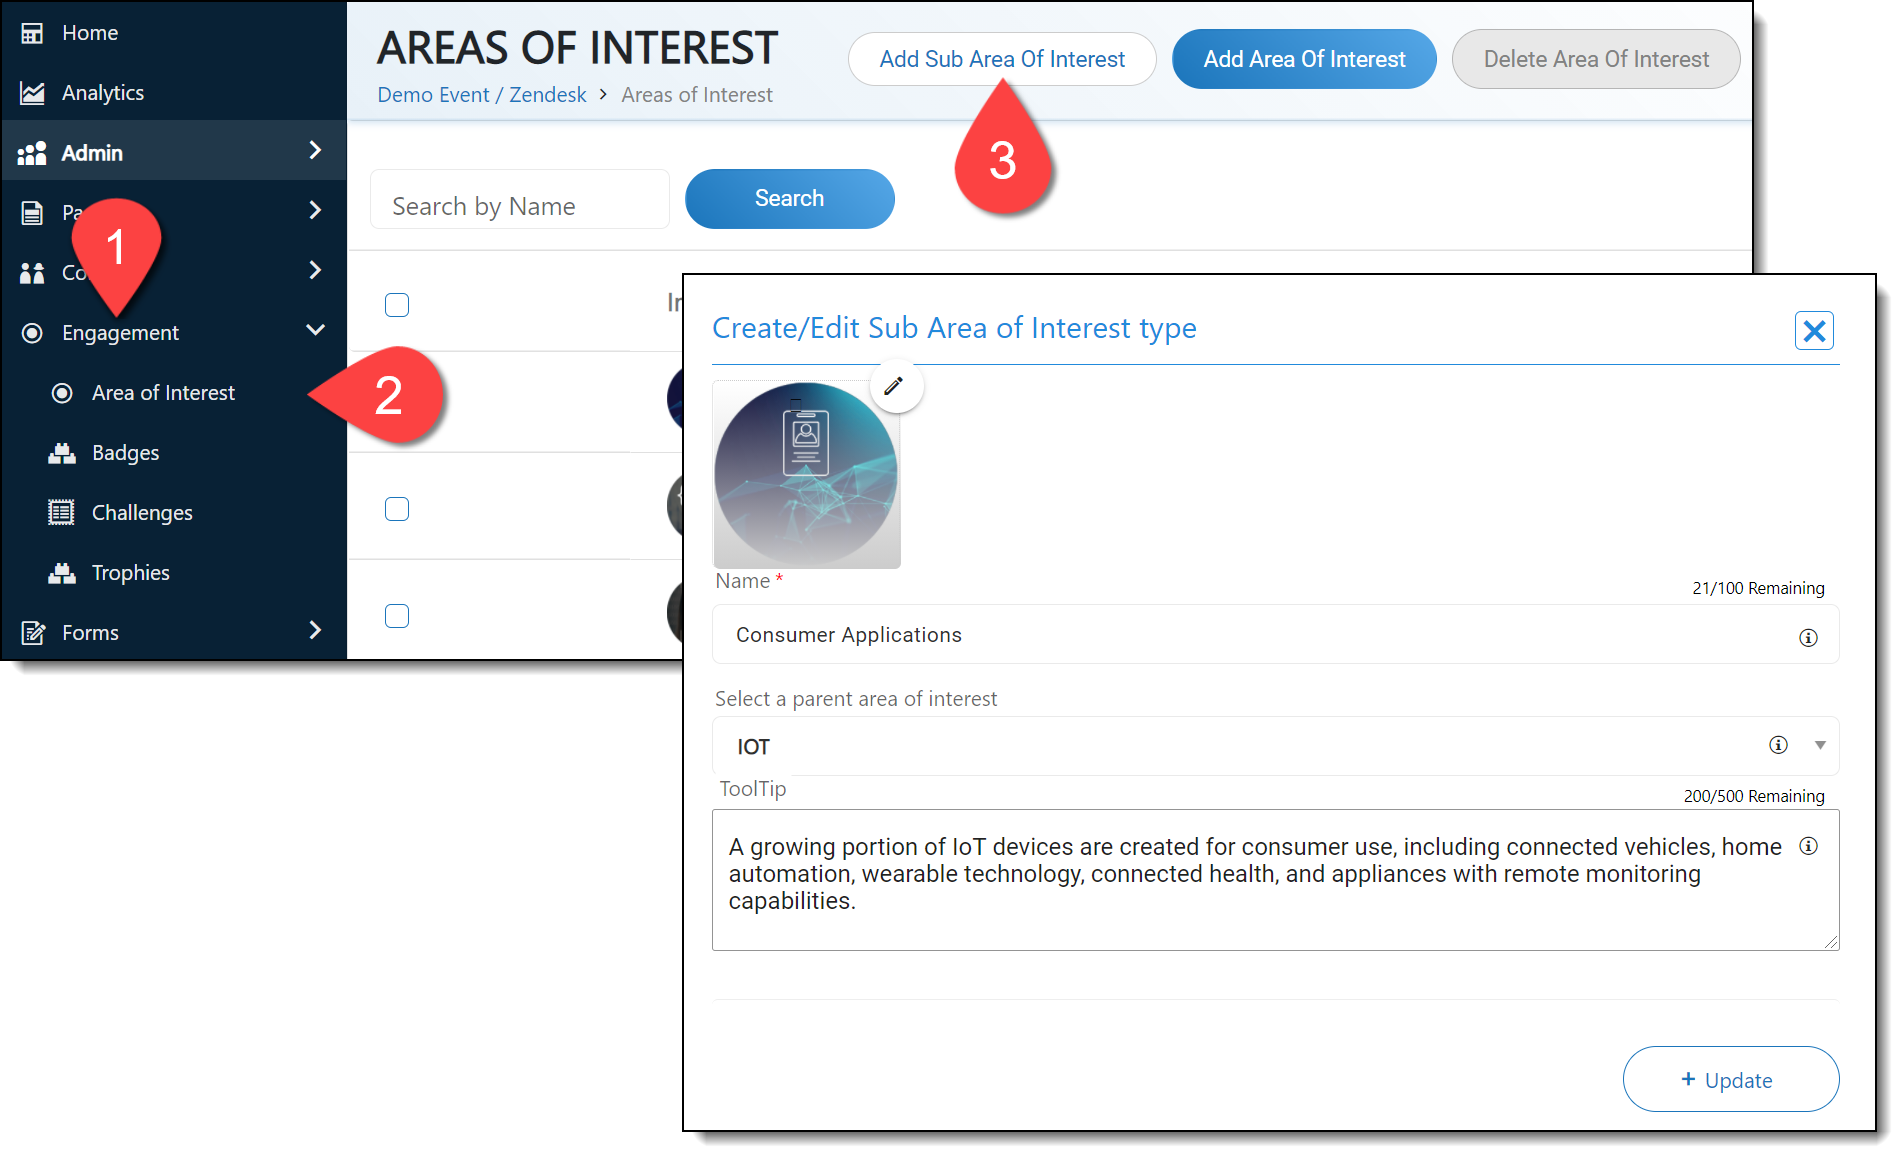
To create sub AOIs, click go to Engagement > Areas of Interest in the Events Builder and click Add Sub Area of Interest. Name the sub AOI, add an image and tool tip, specify which parent the sub AOI belongs to, and click Update.

![]() Further Reading:
Further Reading:
Comments
0 comments
Please sign in to leave a comment.