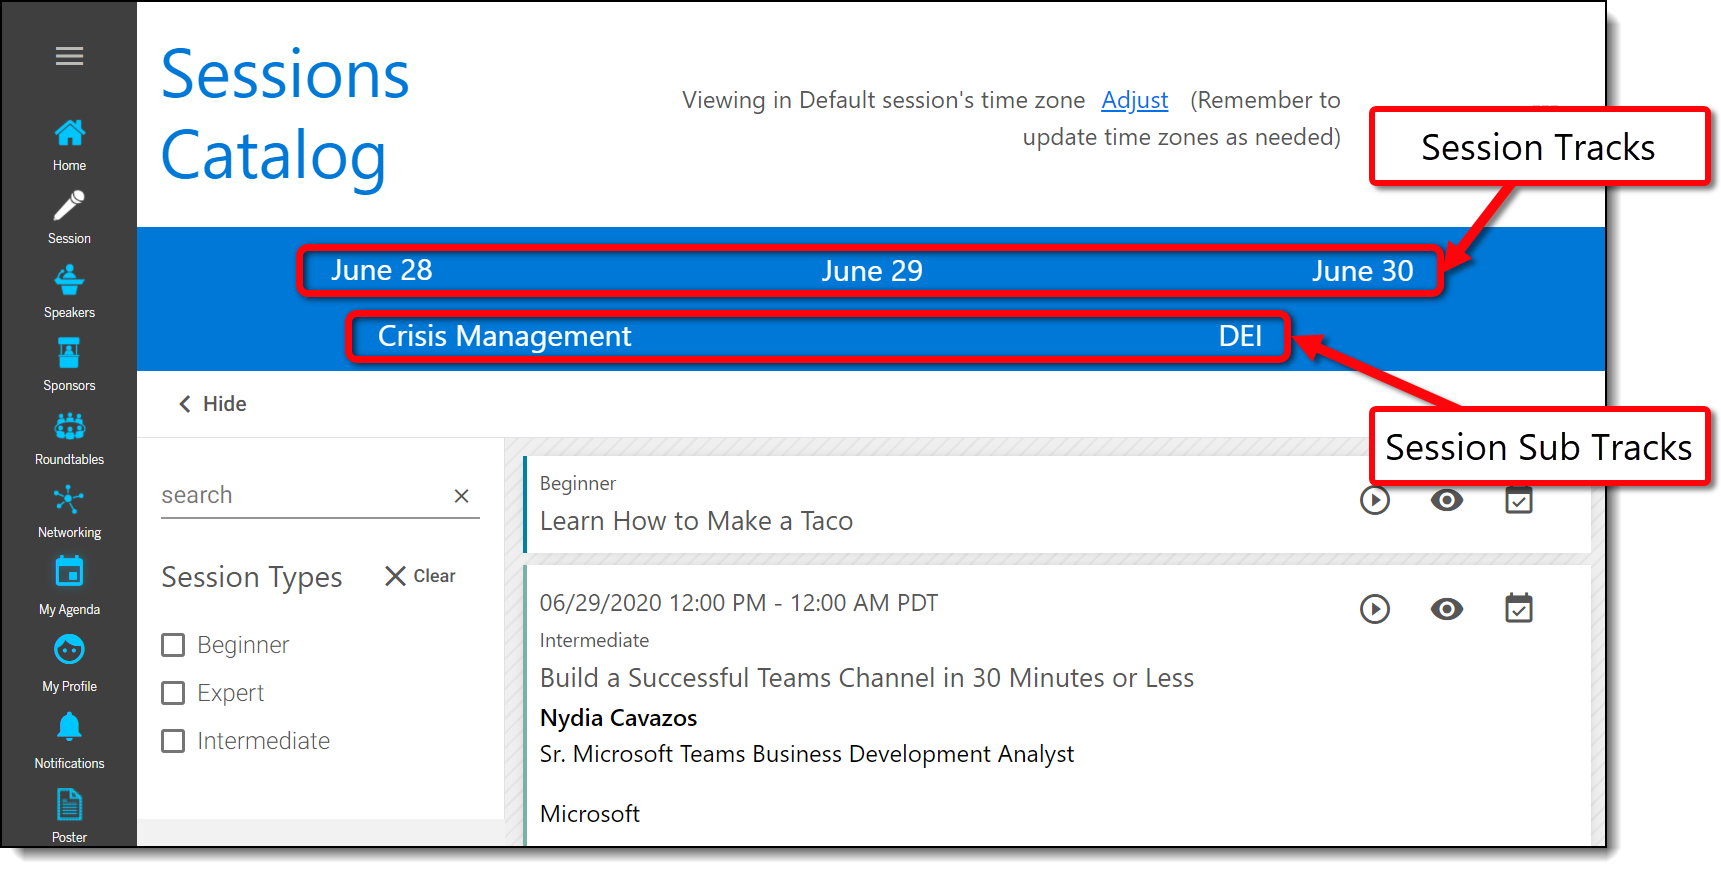
To make your event sessions more accessible for your attendees, you can add sessions to tracks and sub tracks, which will appear as tabs on the Sessions page. This article explains how to edit and delete sessions tracks and sub tracks.
Topics in this article include:
Editing and Deleting Tracks
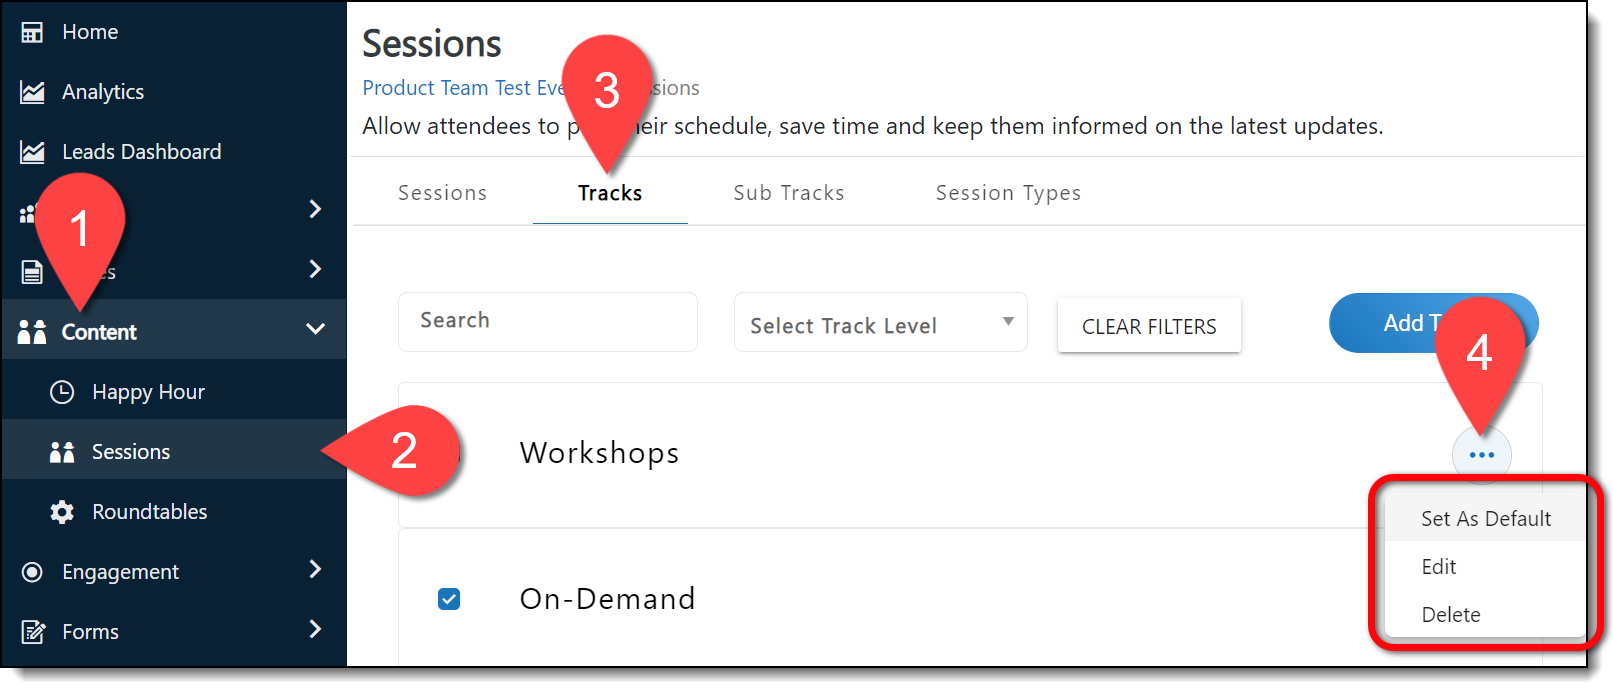
To edit session tracks, log in to the Events Builder, select Content > Sessions from the left navigation menu. Navigate to the Tracks tab and and select the ellipses icon beside the session track you wish to update to reveal the edit options.
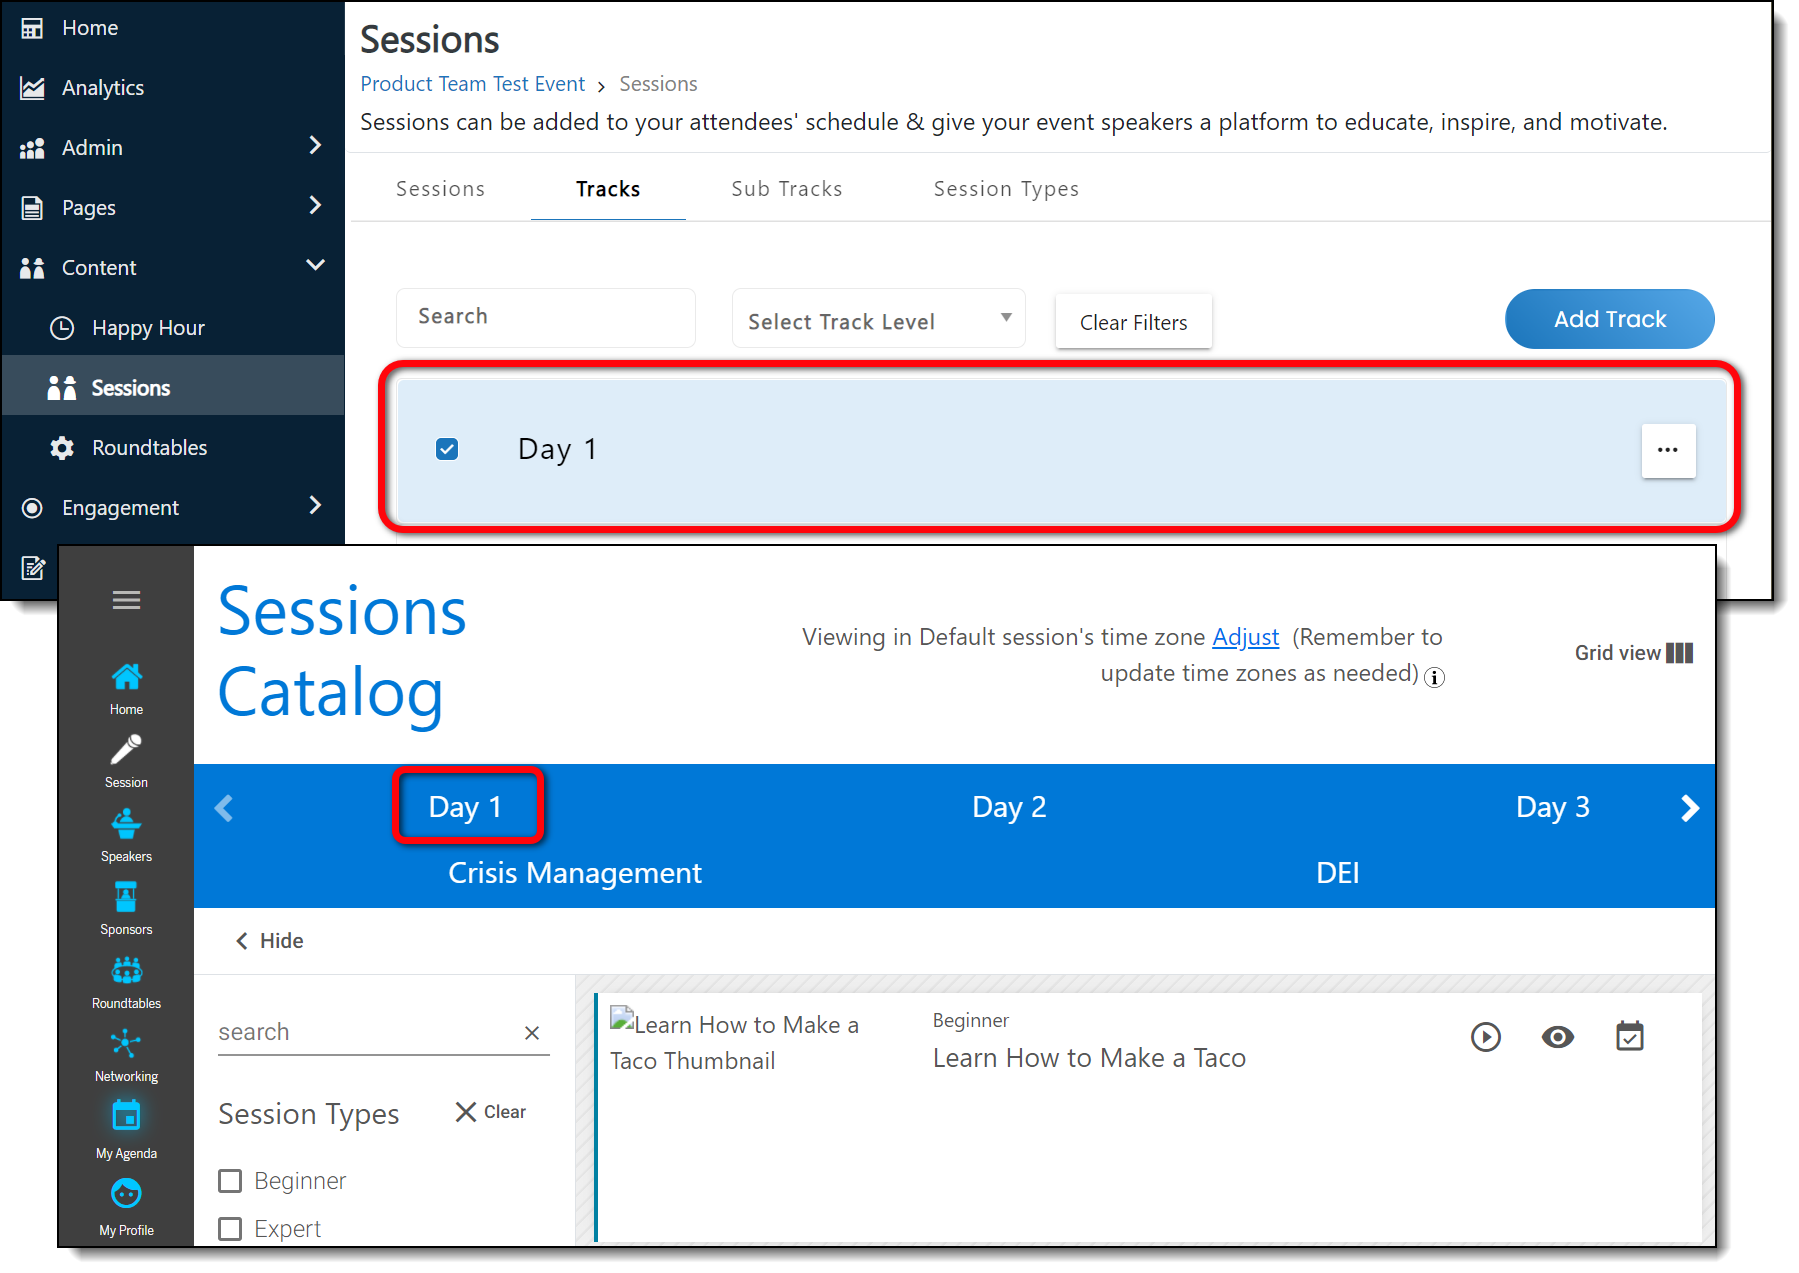
Clicking Set as Default will set that track as the default track that appears on the event site when attendees navigate to the Sessions page. You can easily see which track is the event's default track because the track row is highlighted in blue in the Events Builder.
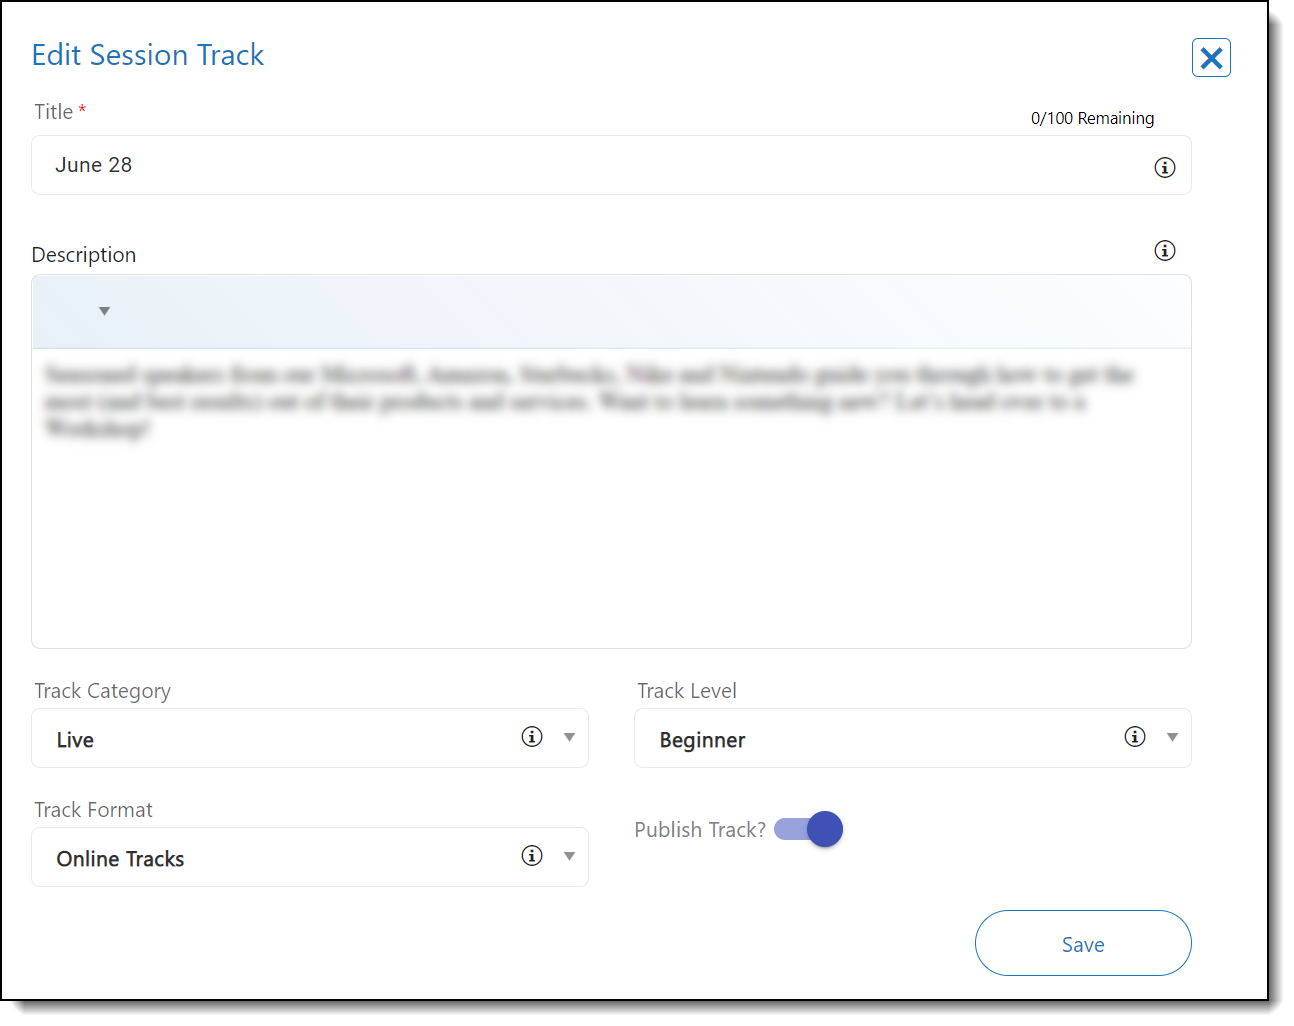
Clicking Edit will open the Edit Session Track page and allow you to update the session title, description, category, level, format, and publication status. Don't forget to click Save at the bottom of the page after you have completed your updates.
Clicking Delete will delete the track.
Editing and Deleting Sub Tracks
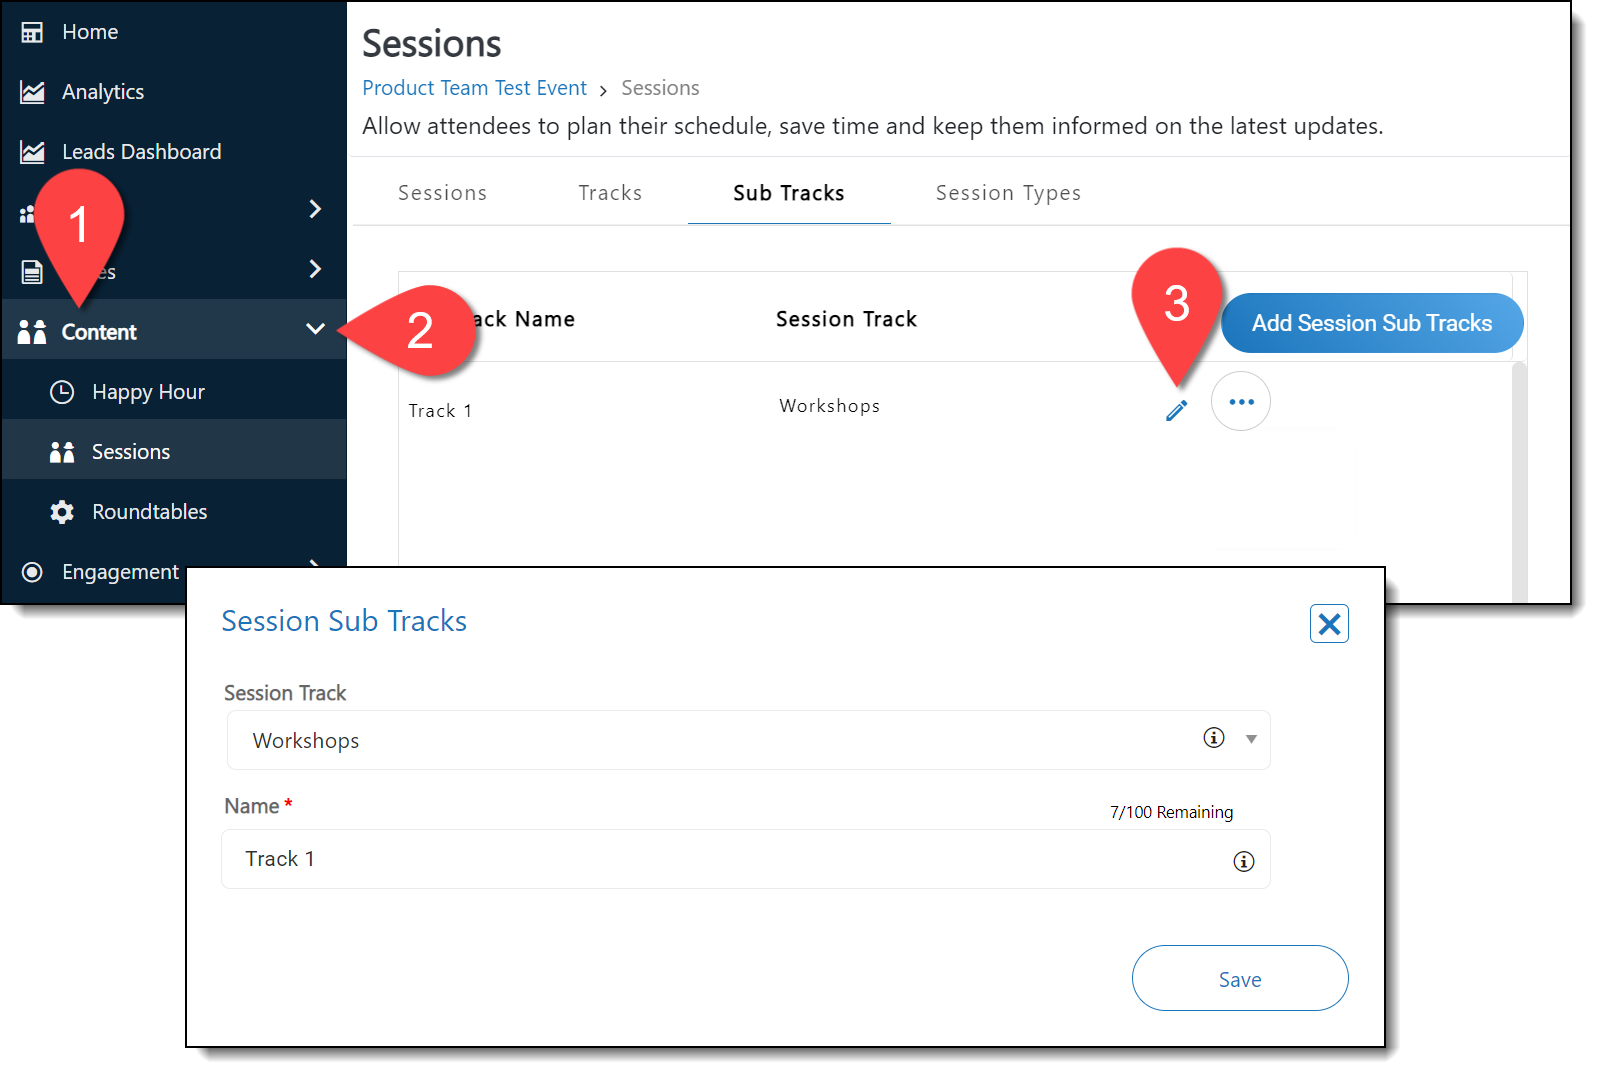
To edit sub tracks, select Content > Sessions from the left navigation panel, select the Sub Tracks tab, and click the pencil icon. The Session Sub Tracks page will load, allowing you to update the sub track name and associate it with a session track. Click Save at the bottom of the screen after you've made your changes.
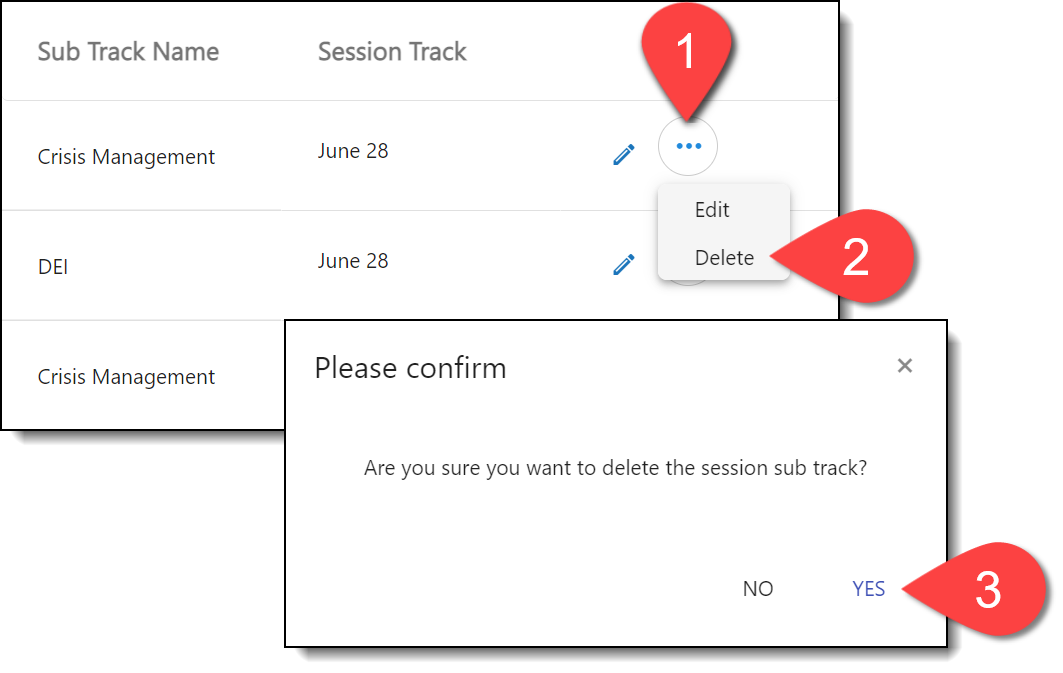
If you would like to remove a sub track, click the ellipses icon, then Delete. Click Yes on the confirmation page that appears.
![]() Further Reading:
Further Reading:
Comments
0 comments
Please sign in to leave a comment.