The Theme Designer in the Events Builder allows you to quickly update and customize the look and feel of your event pages.
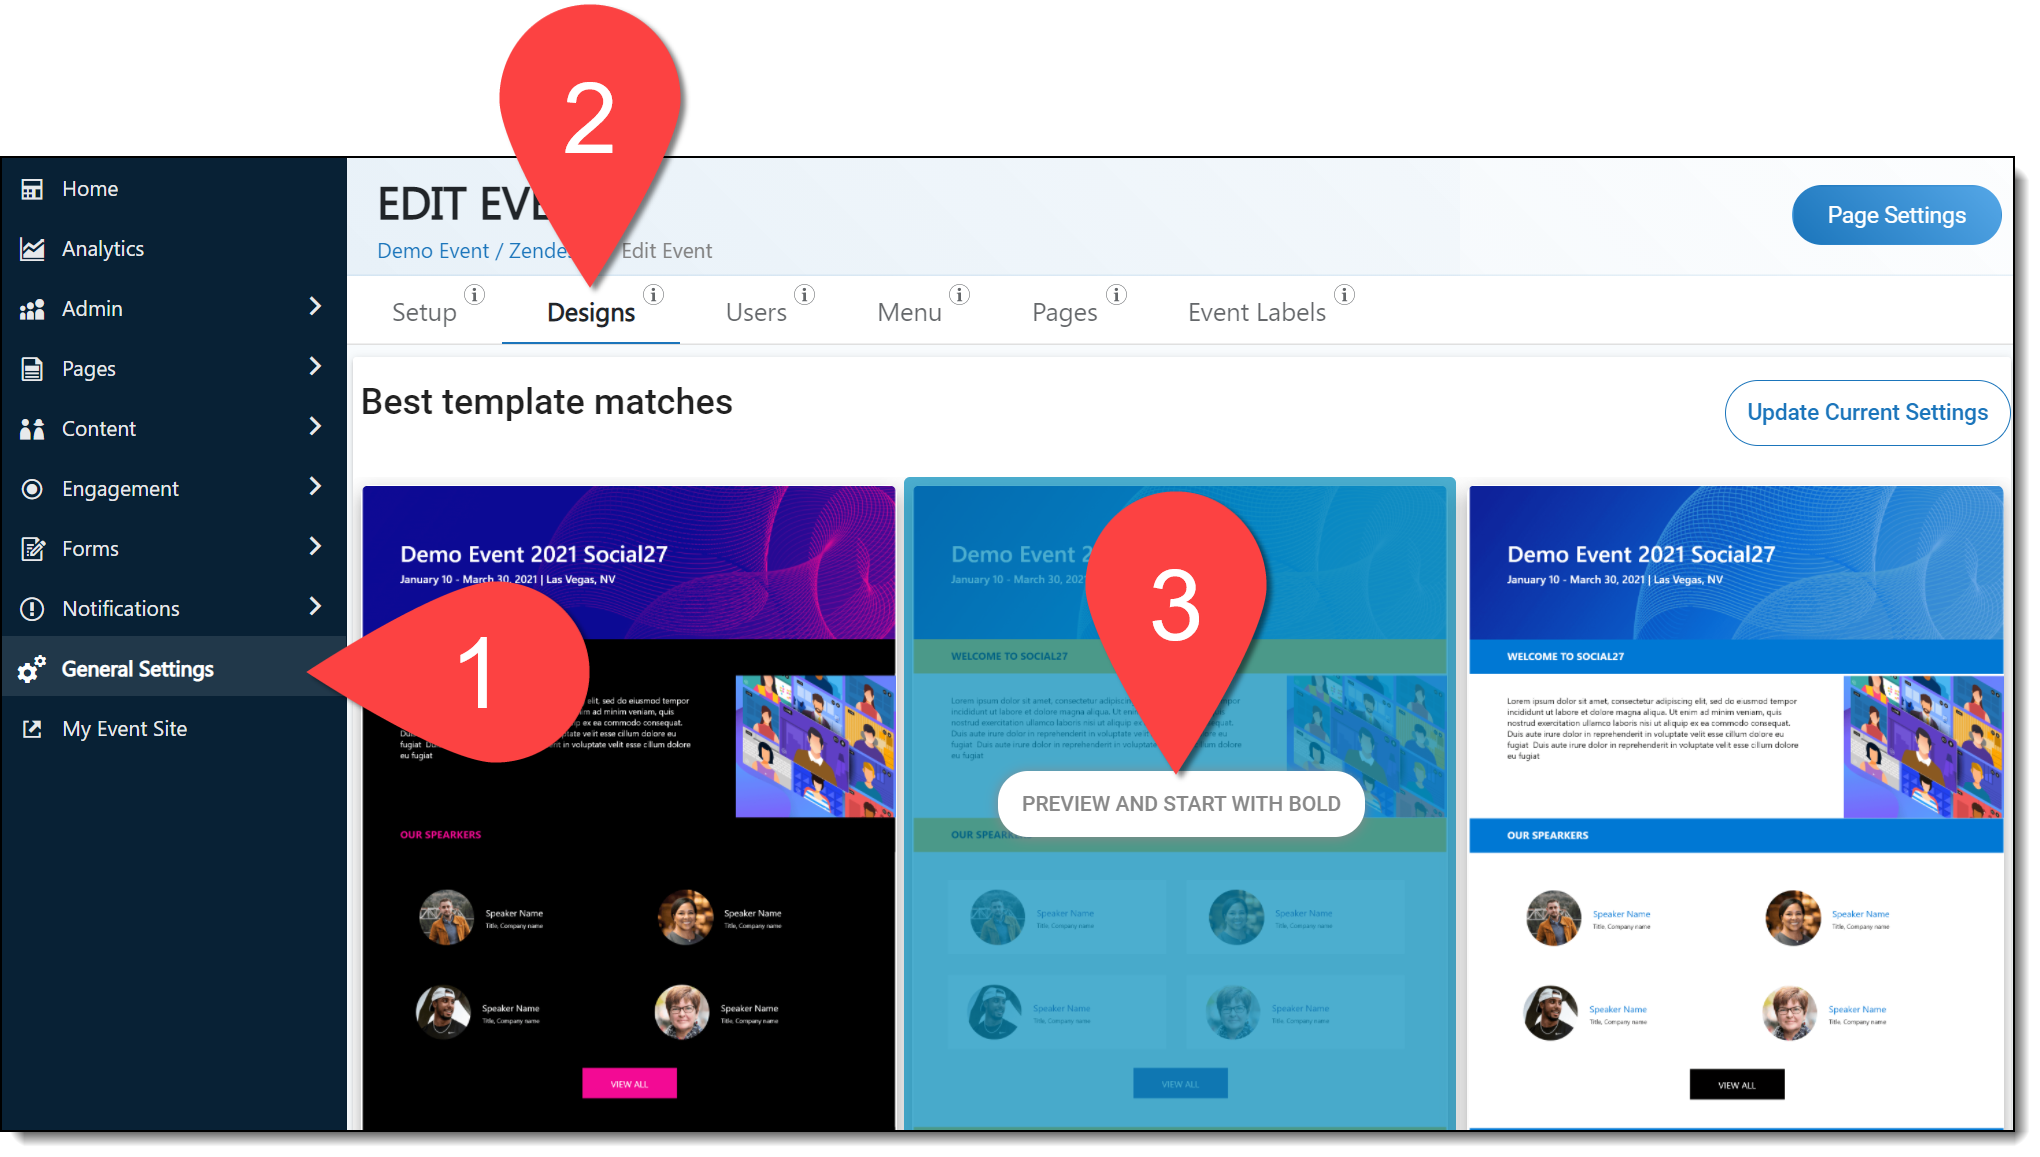
To use the designer, log in to the Events Builder and select your event. Go to General Settings > Design. On this page, you will see a number of different theme options. Hover over the one you want to apply to your event and click Preview and Start.
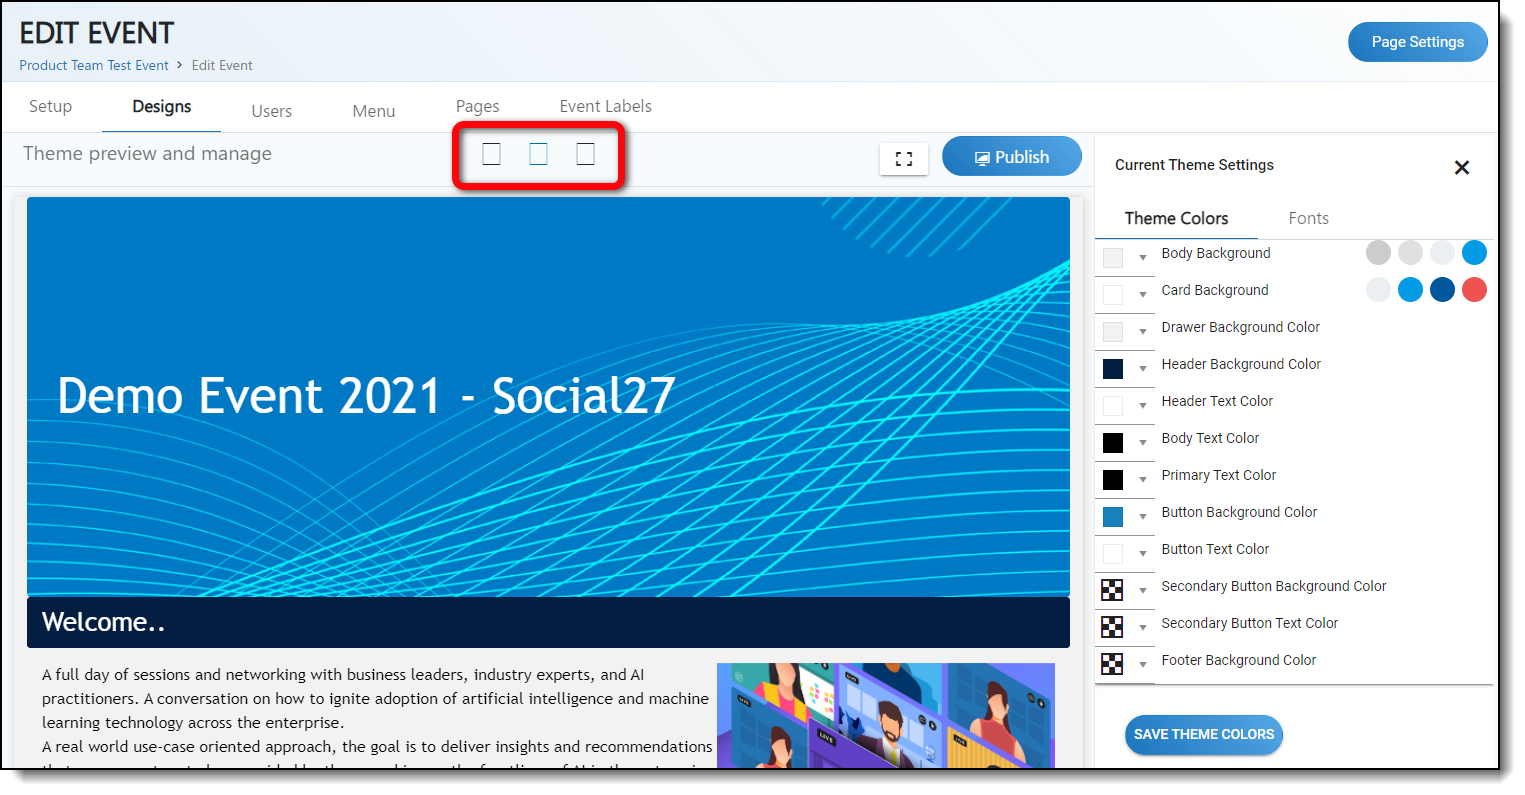
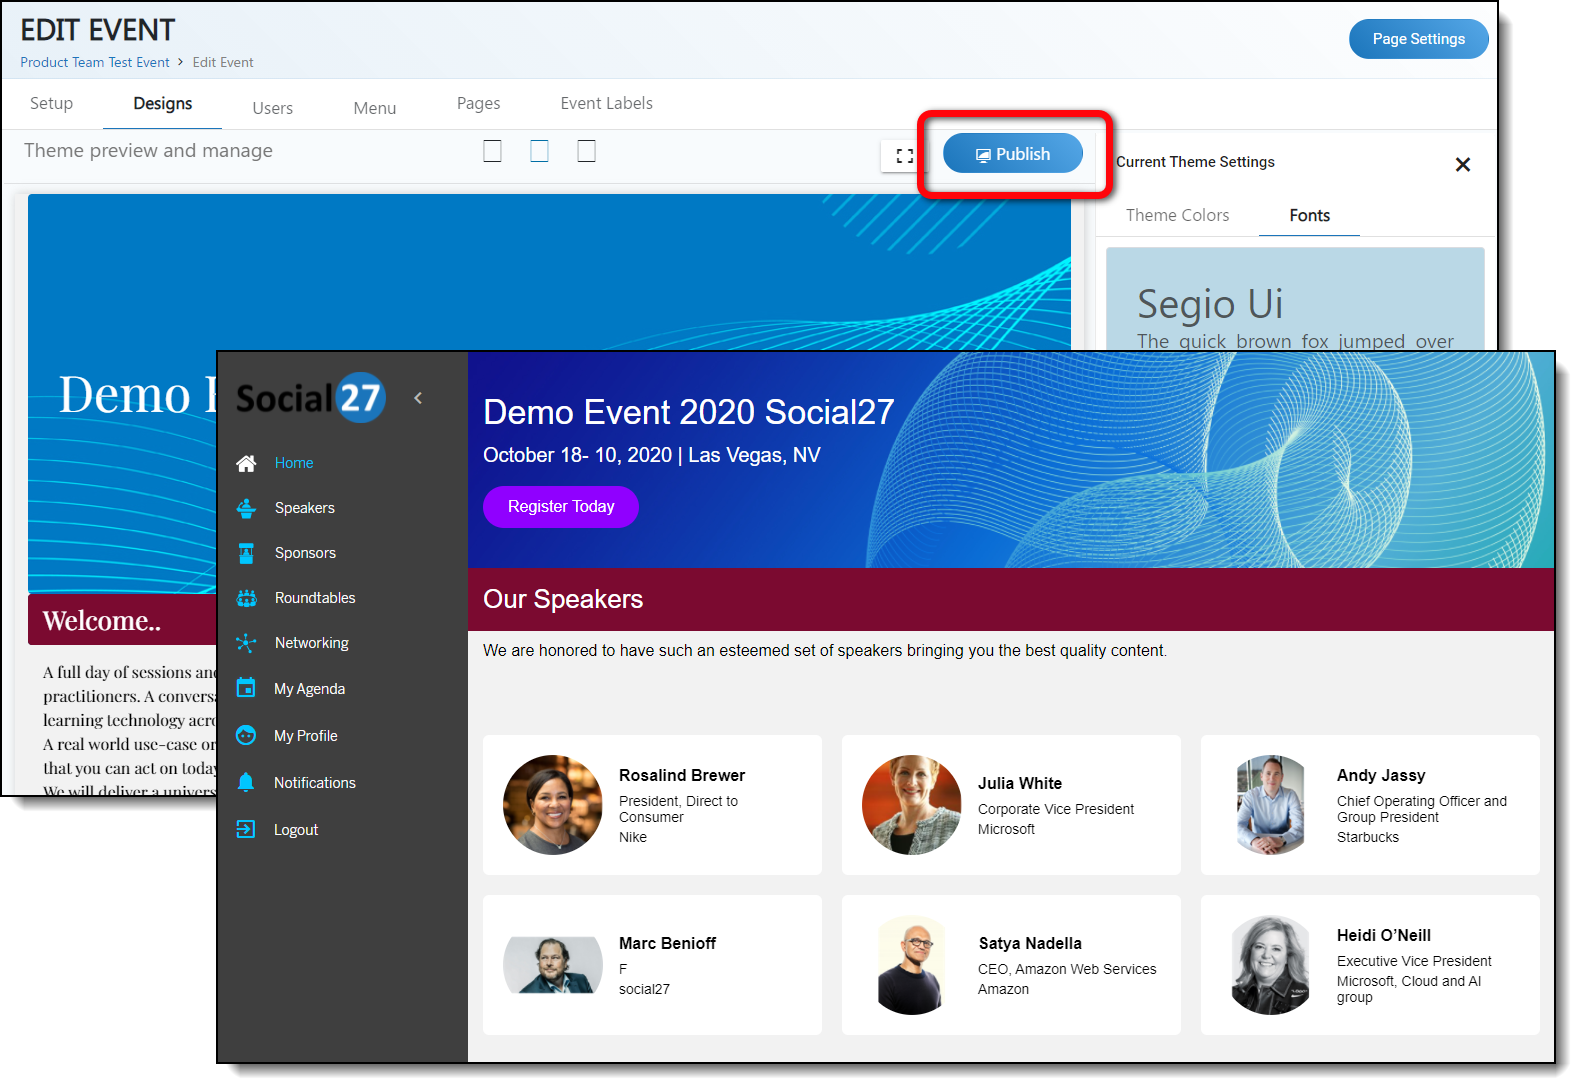
The Theme preview and manage page will load where you can customize and publish the theme to your event. Use the preview buttons above the preview pane to change the preview from mobile to tablet to desktop.
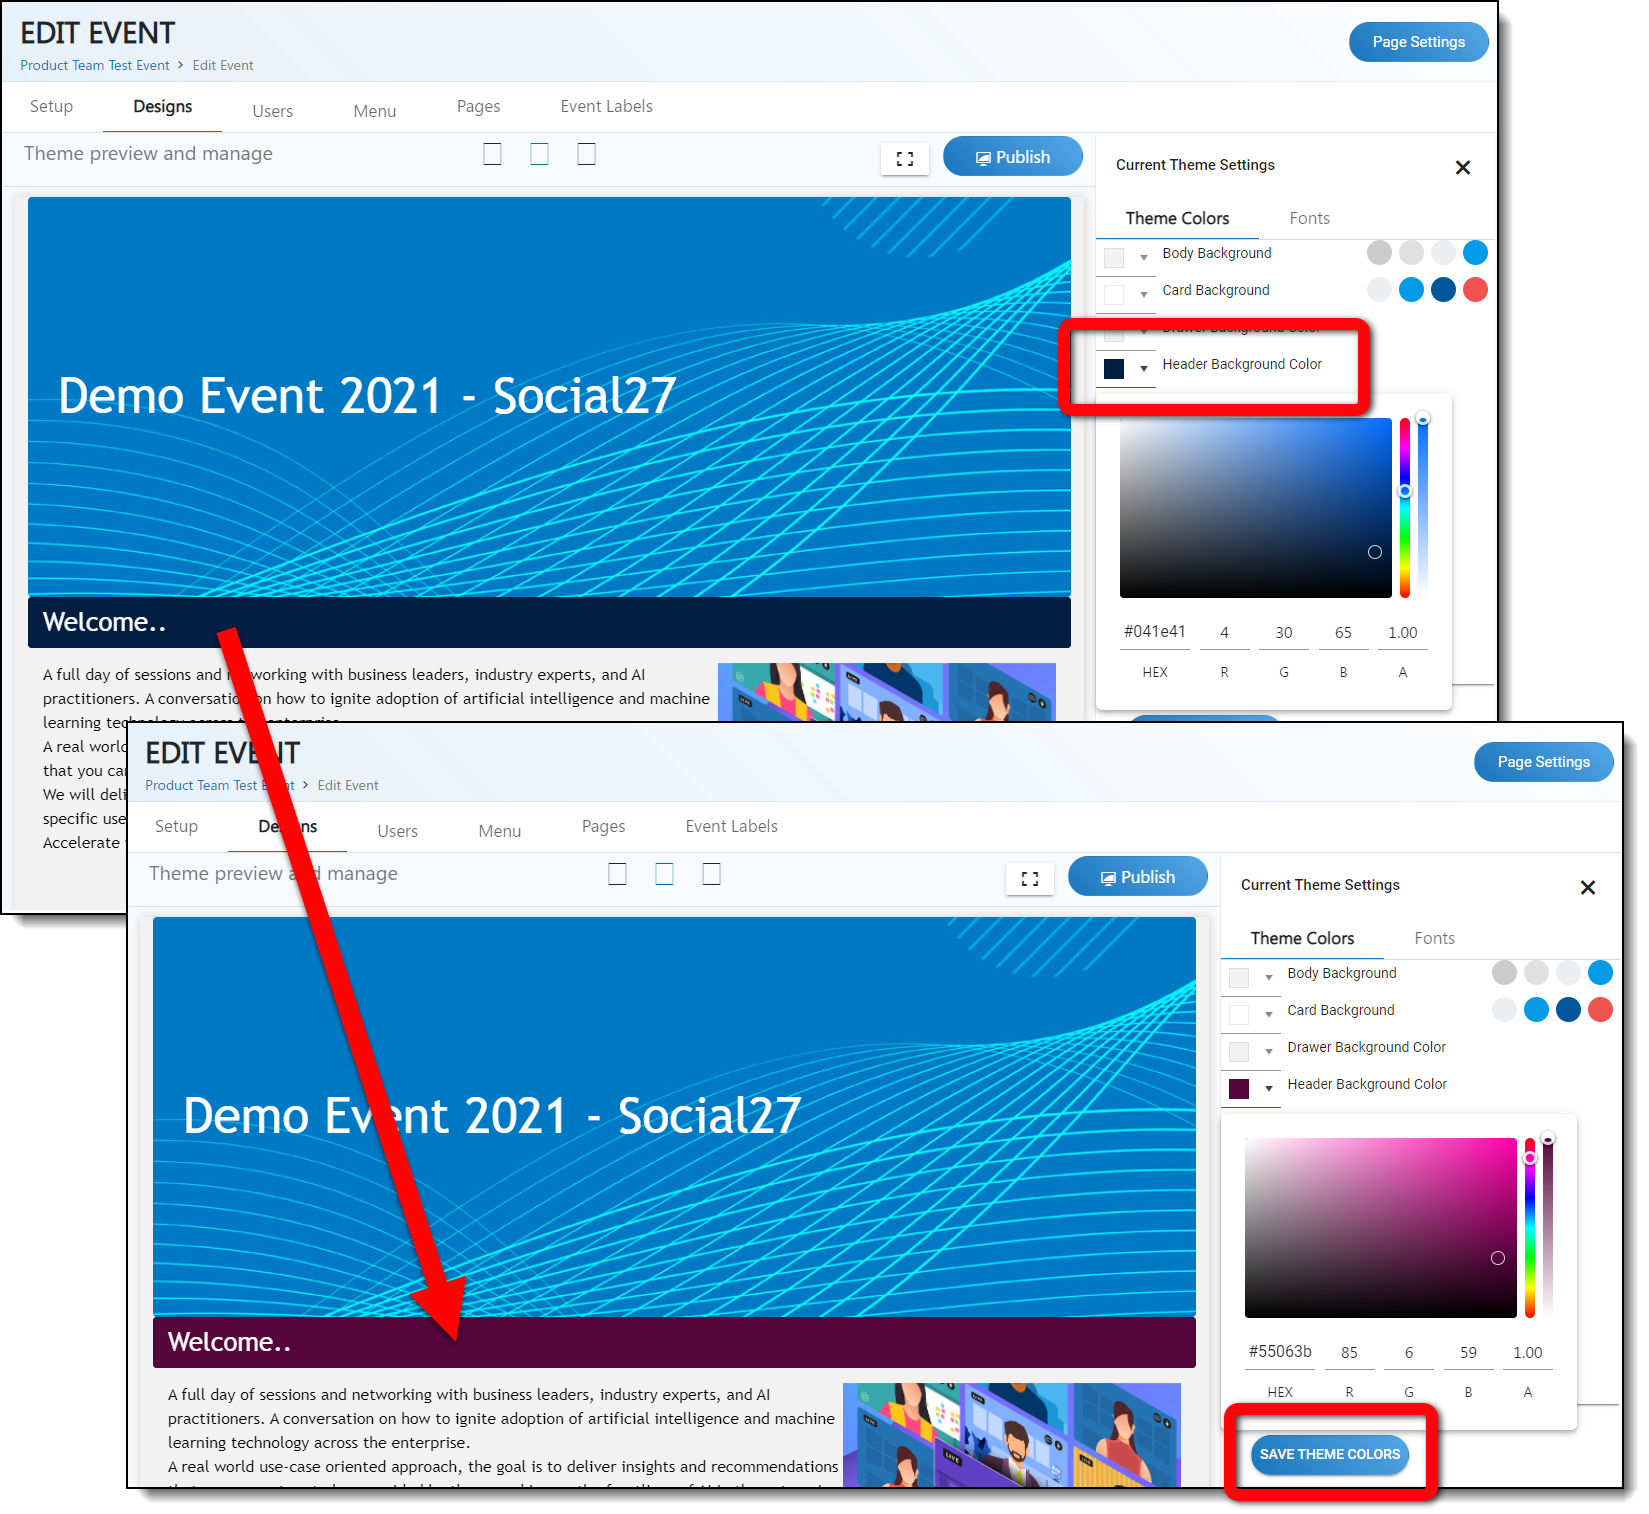
Use the Current Theme Settings > Theme Colors tab on the right side of the screen to adjust the color of various elements in your event, from heading colors to body text to button colors. Whenever you change a color, the preview will automatically update to reflect your change.
After making your adjustments, don’t forget to click Save.
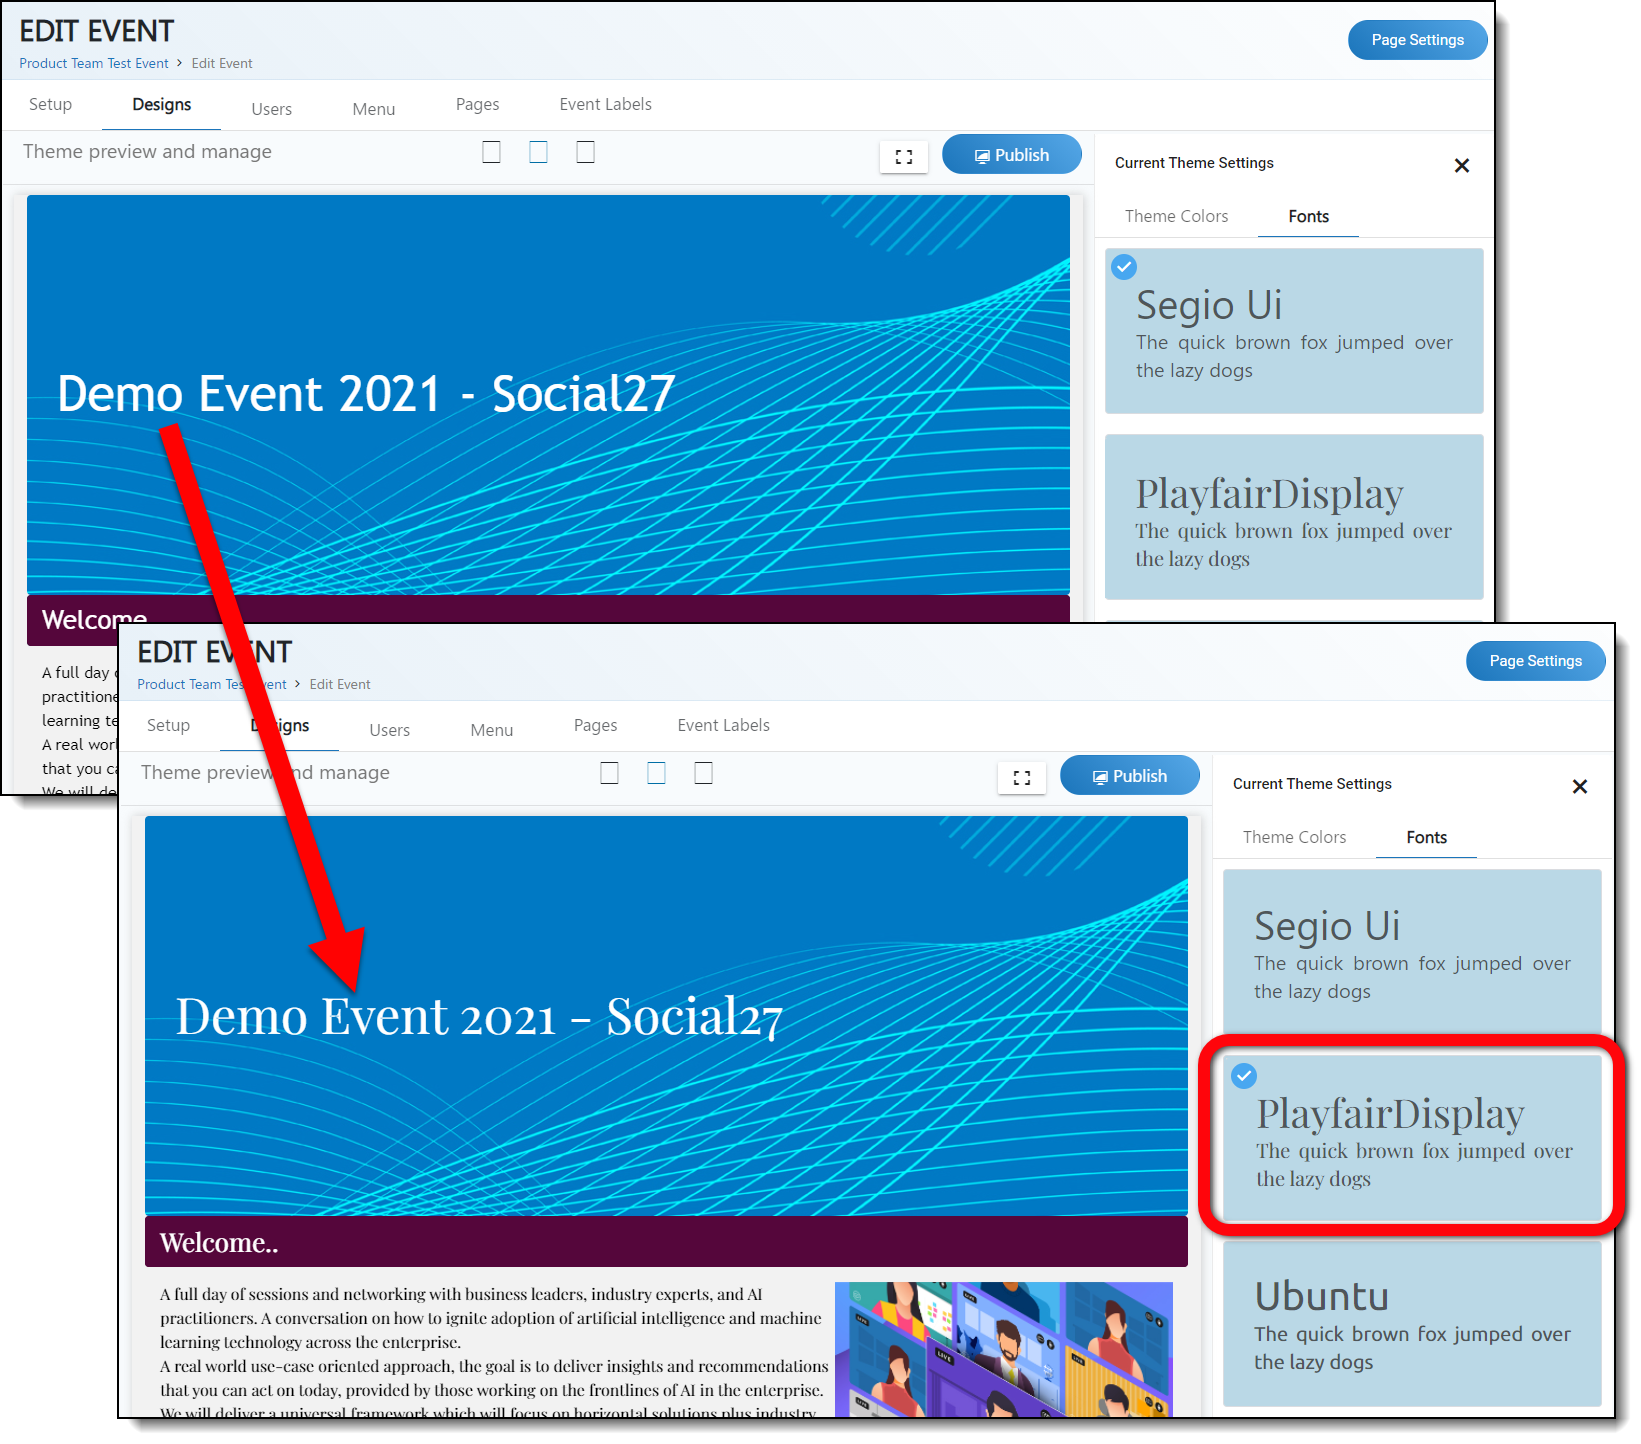
Switch to the Fonts tab to select which font you would like to use throughout your event site. Again, click the Save button that appears at the bottom of the font list to save your changes.
Once you’ve finished customizing your theme, click Publish to make your changes appear live on your event site. You can come back to the theme designer at any time to update your event’s theme settings.
![]() Further Reading:
Further Reading:
Comments
0 comments
Please sign in to leave a comment.