 |
This article explains how to use the Events Builder tool. To learn about this functionality in the Sponsor Workspace, click here. |
Sponsor booths (also called microsites) are located on the Expo Hall page. Booths contain information about the various organizations that are sponsoring the event, including Playlists, provided resources from the sponsor, and sponsor contact methods.
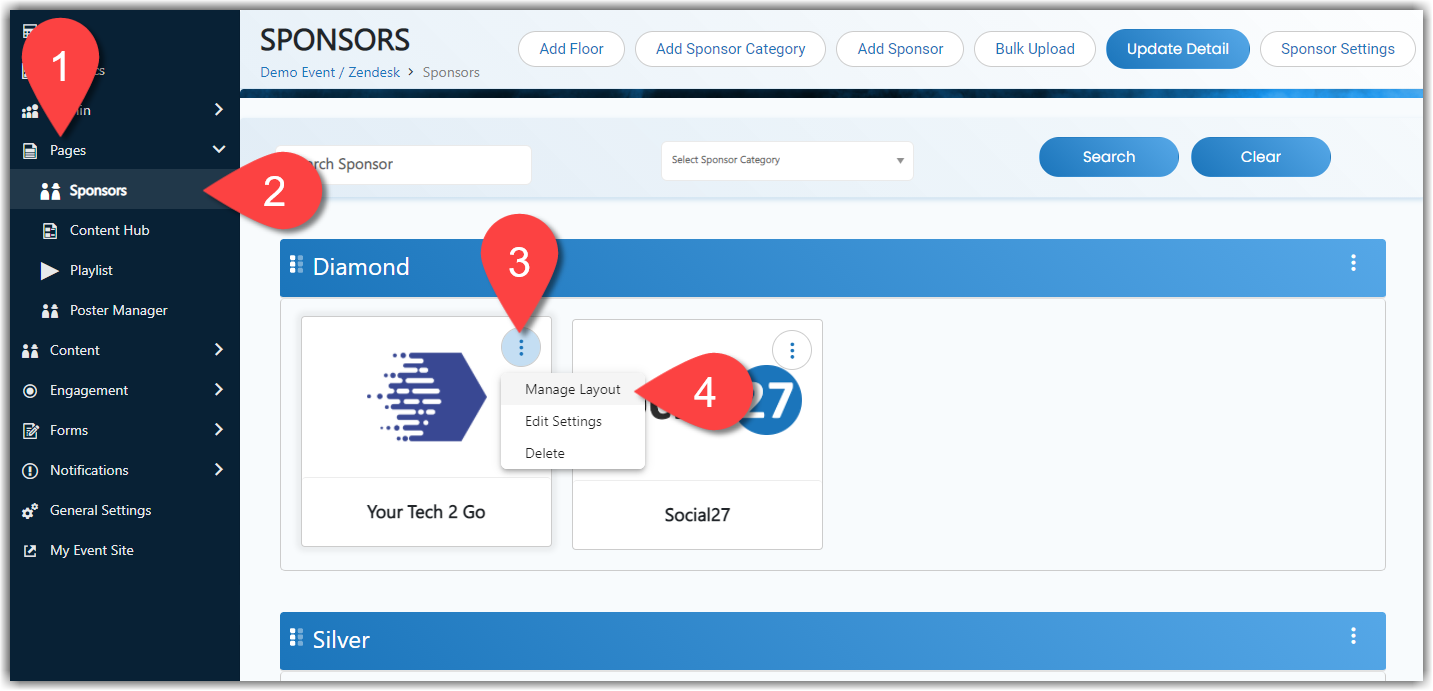
This article explains how to add a logo and banner to the top of a sponsor booth page. To do this, log in to the Events Builder and select your event. Navigate to Pages > Sponsors. Click the ellipses icon on the sponsor you wish to edit and select Manage Layout.

The layout of the booth page mimics the page as it is displayed to event attendees.
Please note: Don't forget to click Update Sponsor Details after editing the sponsor page. Your changes won't be saved or published to your event site until you click this.

The banner section is the first component on this page. Use the buttons (a) to add, crop, and delete the banner image (recommended size: 120 x 500 pixels). You can also use the toggle (b) if your sponsor would like their banner to be a video instead of a still image.

Use the Heading Logo toggle to set whether a logo (recommended size: 400 x 200 pixels) is displayed on top of the banner or if a heading and sub heading are shown instead.

|
|
![]() Further Reading:
Further Reading:
Comments
1 comment
This article has been updated to reflect the latest functionality for managing sponsor booth banners and logos in the Events Builder.
Please sign in to leave a comment.