 |
This article explains how to use the Events Builder tool. To learn about this functionality in the Sponsor Workspace, click here. |
Sponsor booths (also called microsites) are located on the Expo Hall page. Booths contain information about the various organizations that are sponsoring the event, including Playlists, provided resources from the sponsor, and sponsor contact methods.
This article explains how to use Events Builder to customize the layout of your microsites. (If you want to update your sponsor's settings, check out these articles.)
Topics in this article include:
- Accessing the Booth Layout Page
- Changing Sponsor Settings
- Editing the Banner and Logo
- Updating Section Headings
- Rearranging Content
- Adding Content and Meetings
- Assigning Booth Reps
- Adding Custom Sections
Accessing the Booth Layout Page
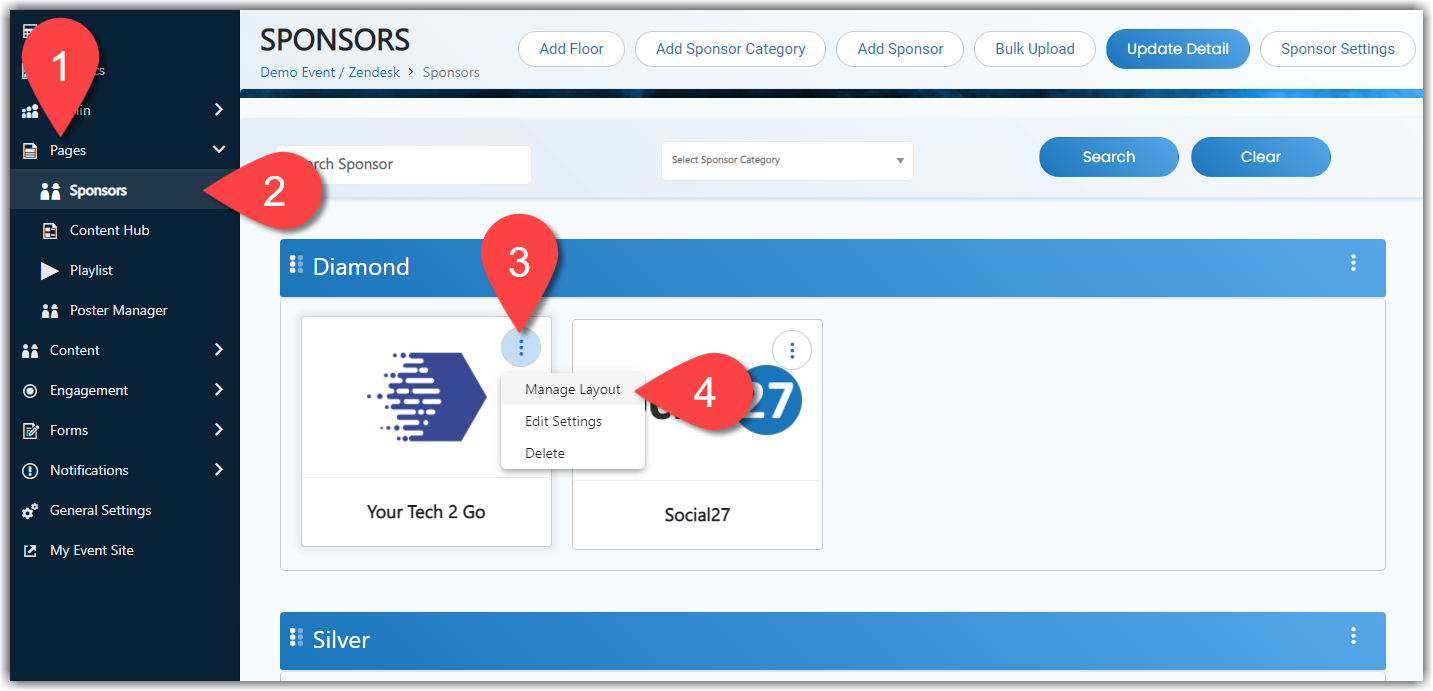
To access a sponsor booth page, log in to the Events Builder and select your event. Navigate to Pages > Sponsors. Click the ellipses icon on the sponsor you wish to edit and select Manage Layout.
Changing Sponsor Settings
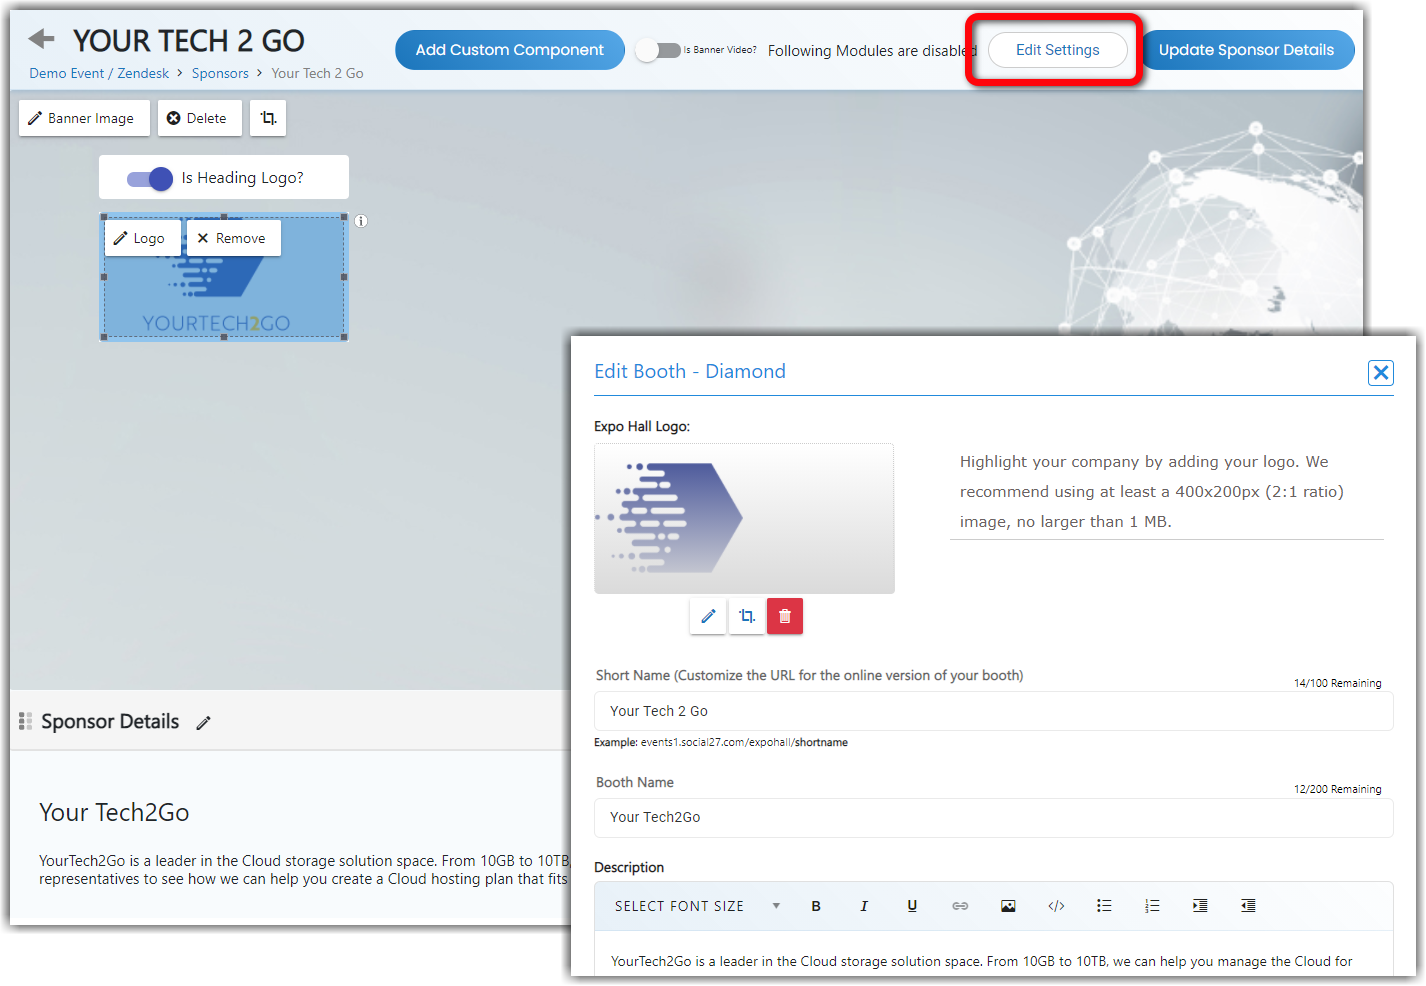
At the top of the booth page, you'll see an Edit Settings button. clicking this will open the sponsor settings sidebar, where you can update the sponsor name, description, logo, and other settings. (Check out these articles for more information about updating sponsor settings.)
Editing the Banner and Logo
The layout of the booth page mimics the page as it is displayed to event attendees. Please note: Don't forget to click Update Sponsor Details after editing the sponsor page. Your changes won't be saved or published to your event site until you click this.

The banner section is the first component on this page. Use the buttons (a) to add, crop, and delete the banner image (recommended size: 120 x 500 pixels). You can also use the toggle (b) if your sponsor would like their banner to be a video instead of a still image.

Use the Heading Logo toggle to set whether a logo (recommended size: 400 x 200 pixels) is displayed on top of the banner or if a heading and sub heading are shown instead.

|
|
Updating Section Headings
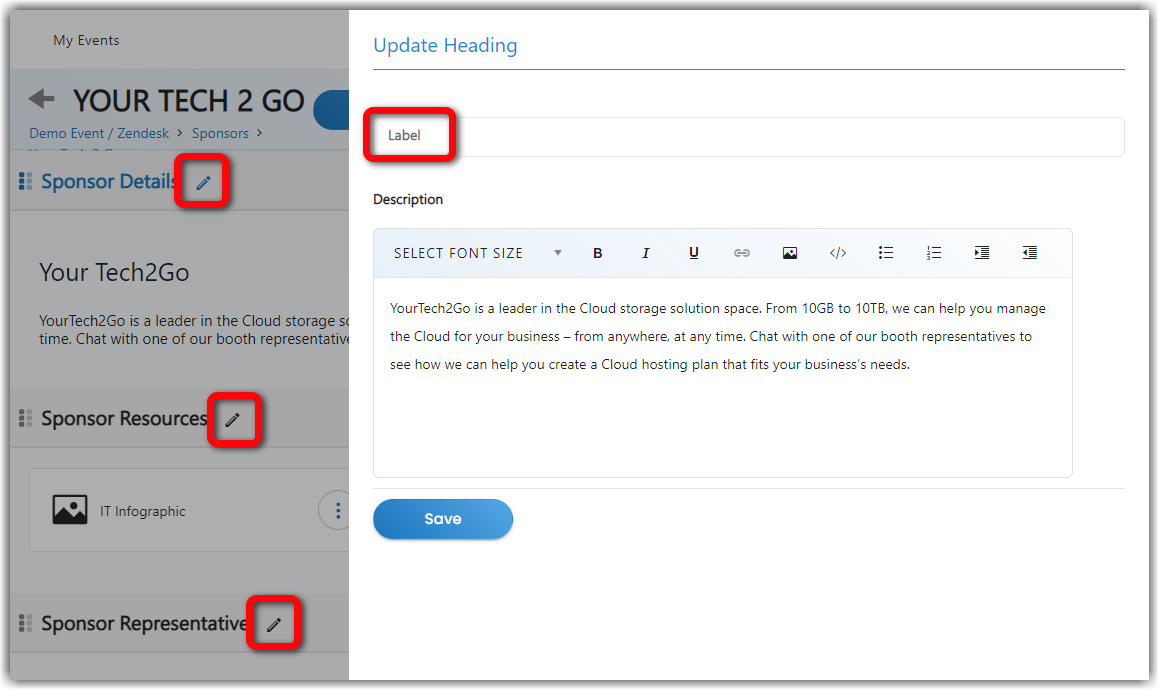
Click the pencil icons to edit the section heading labels. When the Update Heading sidebar opens, enter your new heading in the field containing the "label" placeholder text.
|
|
Rearranging Content
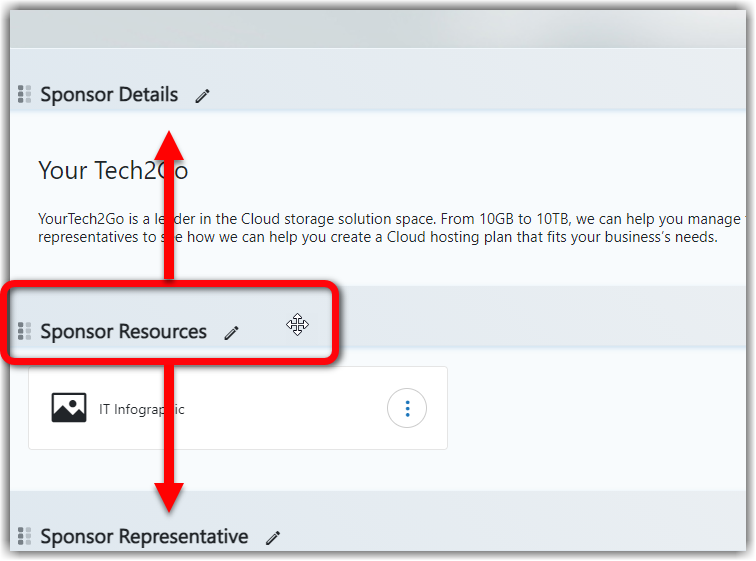
Click and drag section headings, resources, and booth representatives to rearrange the page content.
Adding Content and Meetings
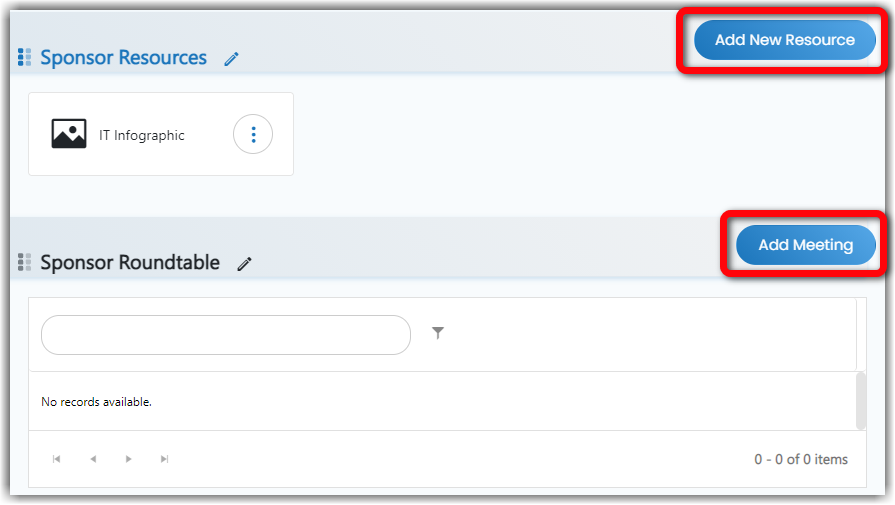
Click the blue buttons to add downloadable resources and sponsored meetings to the page. For more information about creating sponsored meetings, check out this article.
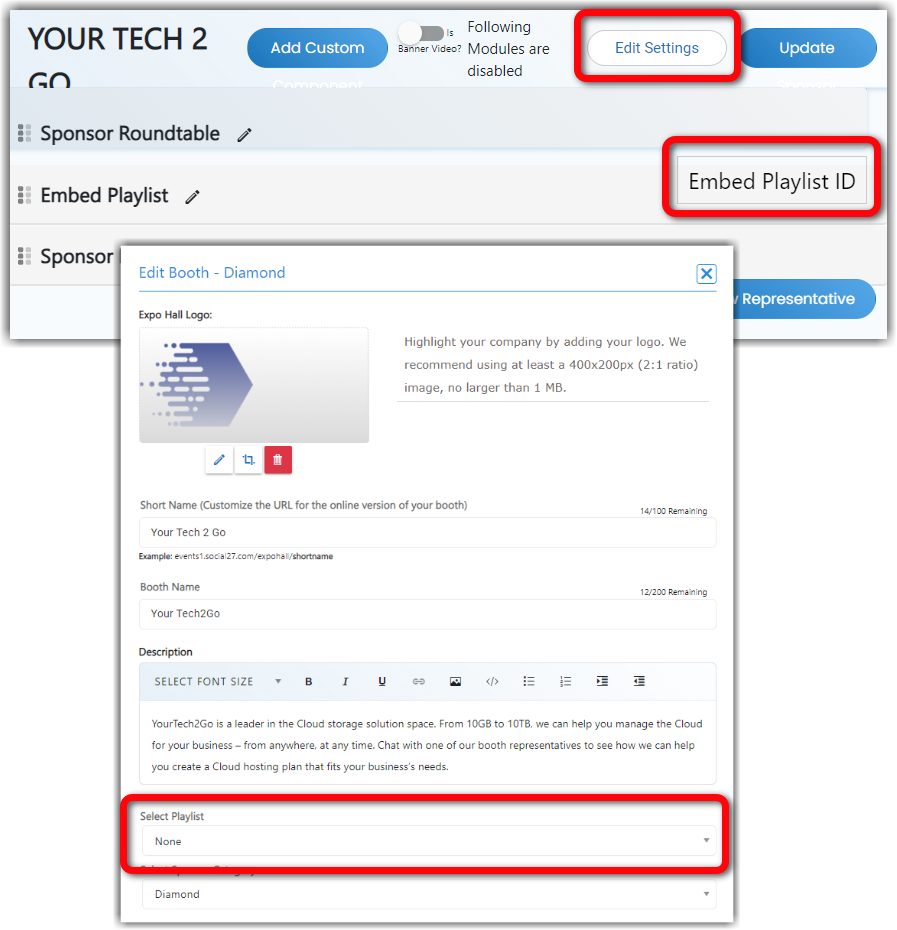
To add a Playlist to the booth page, you can enter its ID in the Embed Playlist ID field. However, it's often easier to click Edit Settings and use the Select Playlist dropdown. For more information about creating and managing Playlists, check out this article.
Assigning Booth Representatives
To assign a user to the booth as a booth representative, click Add New Representative. You will only be able to add users to the booth who have been given the Booth Representative role. For more information about creating users and managing user roles and permissions, check out these articles:
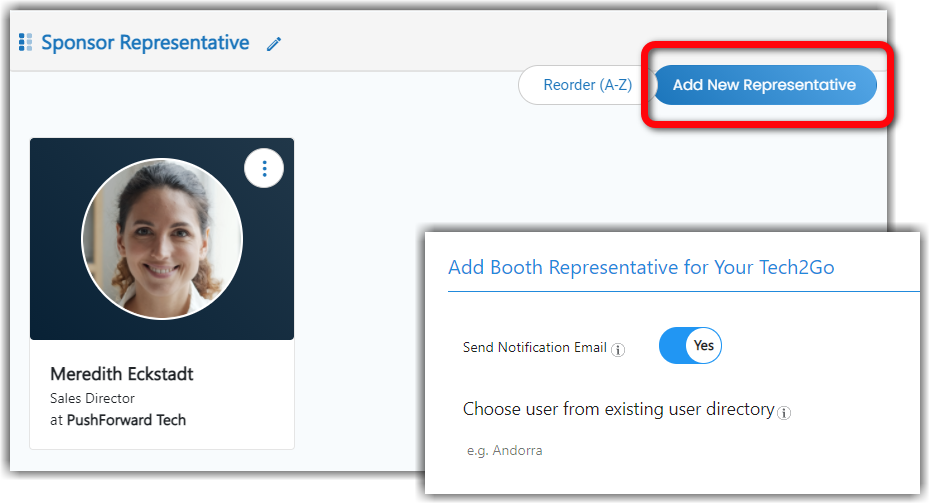
Turn on the Notification Email toggle to send an email to the user notifying them that they have been added to the booth. (As soon as you select the user from the user directory, the email will be sent.)
You can rearrange the order in which your booth representatives are displayed on your booth page by clicking and dragging their tiles or by clicking Reorder (A-Z).
Adding Custom Sections
Click the Add Custom button at the top of the page to add custom sections to the booth. Once you've added a custom section, it will appear at the bottom of the page and you can click and drag to rearrange it on the page just like any of the default sections. For more information about custom sections, check out this article.

![]() Further Reading:
Further Reading:
Comments
1 comment
This article has been updated to reflect the latest functionality for managing sponsor booth layout in the Events Builder.
Please sign in to leave a comment.